

REASSEMBLY
Reassembly is reverse order of removal with special attention to the following steps.
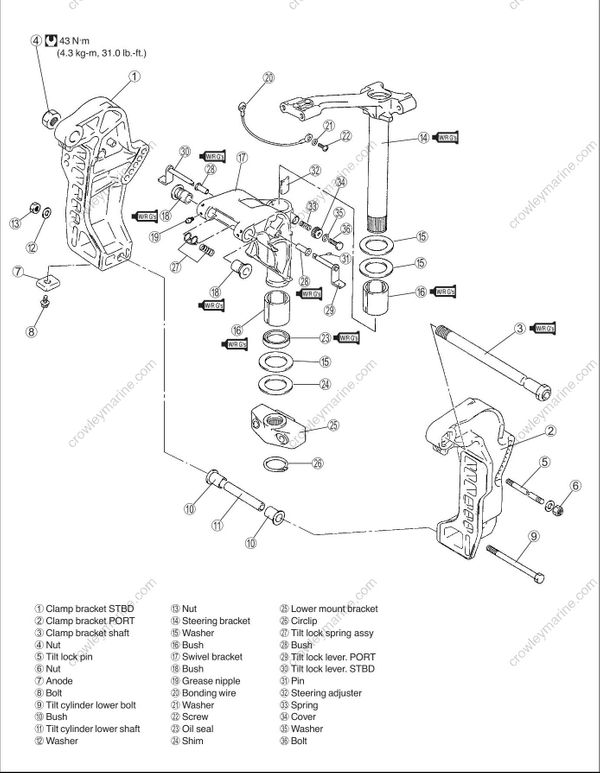
CLAMP BRACKET
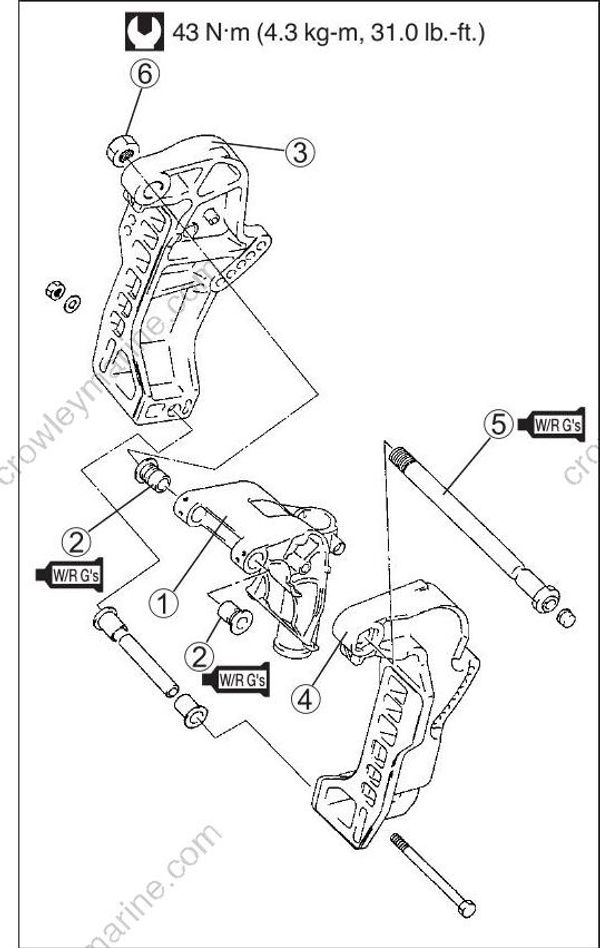
Insert PORT and STBD bushings (2) into the swivel bracket (1). Install clamp bracket (3), (4) and clamp bracket shaft 5 to swivel bracket (1).
Install clamp bracket shaft nut (6). Leave nut loose for easier installation of PTT unit.

Before installing clamp bracket to swivel bracket, apply grease to clamp bracket shaft and bushings.
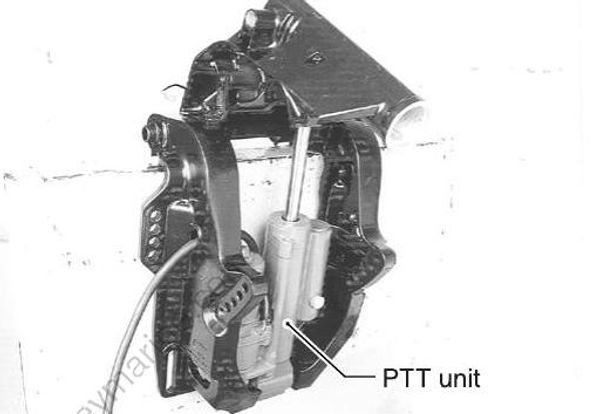
Install PTT unit assembly, lower shaft and bushings in position between clamp brackets.
(See “INSTALLATION” in POWER TRIM & TILT section for PTT unit installation.)
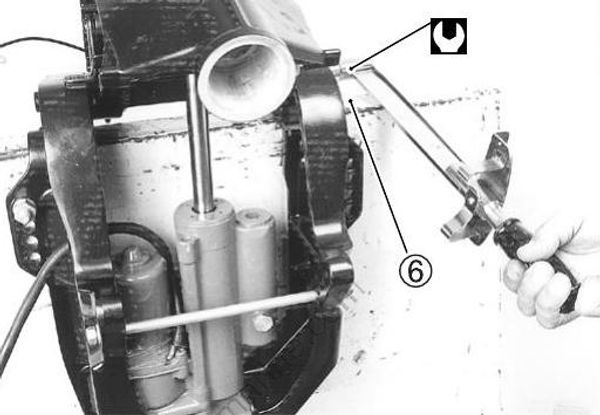
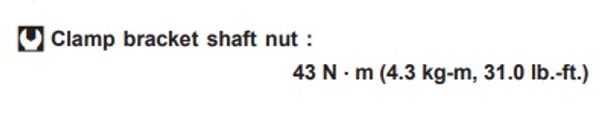
Tighten clamp bracket shaft nut (6) to specified torque.
STEERING BRACKET
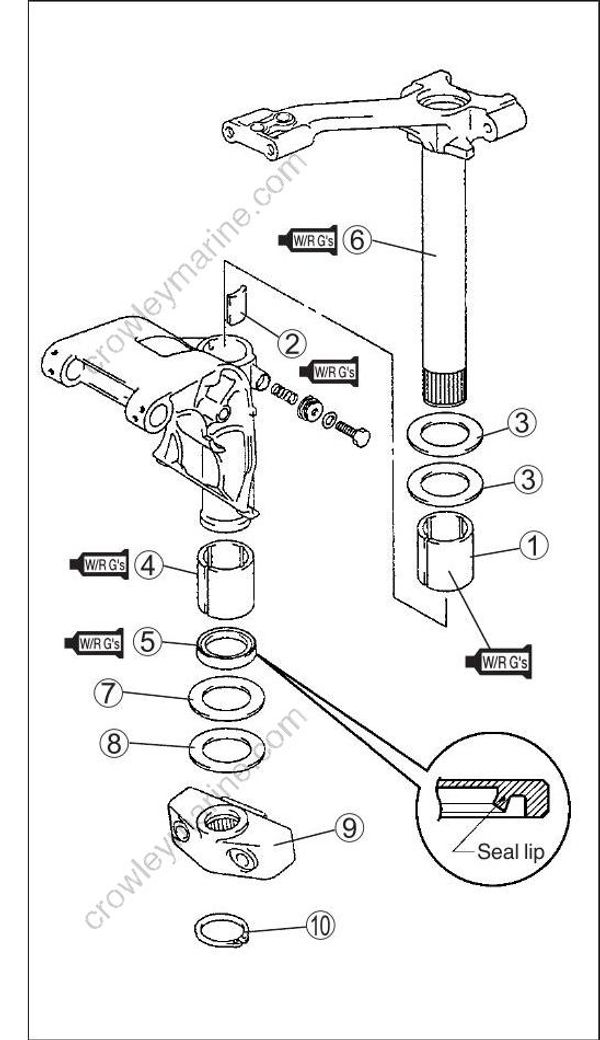
Apply Water Resistant Grease to steering bracket shaft.

Apply grease to bushings, oil seal lip and pilot shaft portion of steering bracket.
Install upper bushing (1), steering adjuster (2) and washer (3) to swivel bracket.
Be certain that steering adjuster (2) is placed between upper bushing (1) and swivel bracket casing.
Install lower bushing (4) and swivel bracket seal (5) to swivel bracket.
Install seal (5) with lip (spring side) facing downward.
Install steering bracket (6) to swivel bracket.
LOWER MOUNT BRACKET
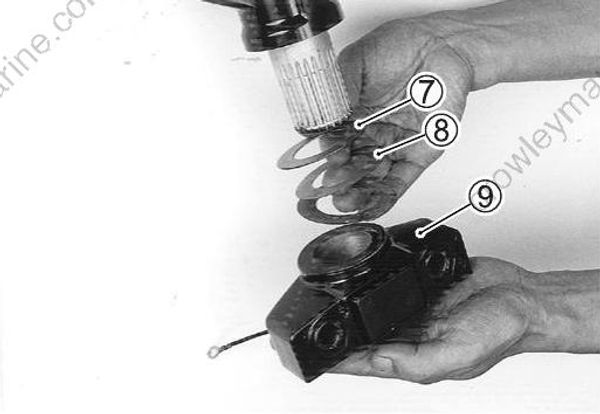
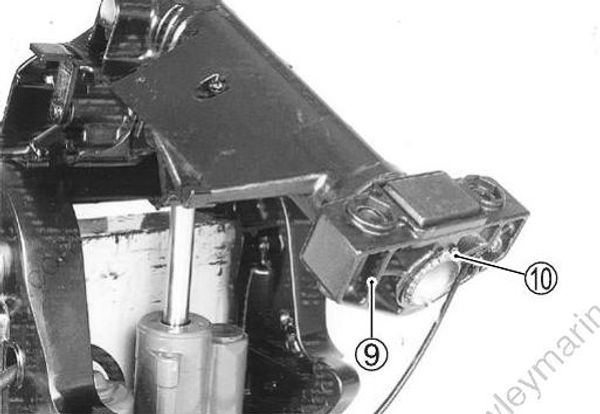
Install washer (7) and shim (8), and then slide the lower mount bracket (9) upward on the splines until it contacts the shim. Install circlip (10) to retain bracket.
BONDING WIRE
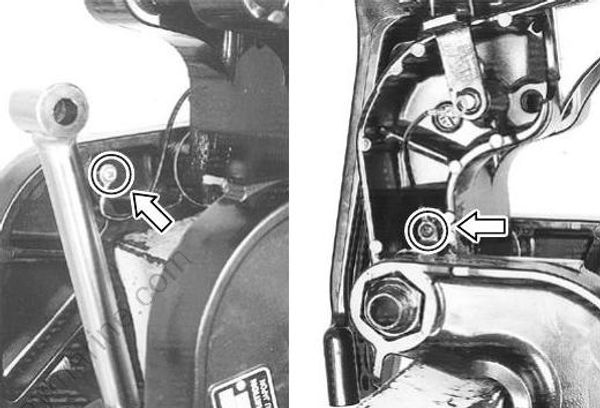
Reattach bonding wire to clamp bracket and swivel bracket, then ntighten screw securely.
The insulation washer must be installed between the bonding wire terminal and bracket.
LUBRICATION
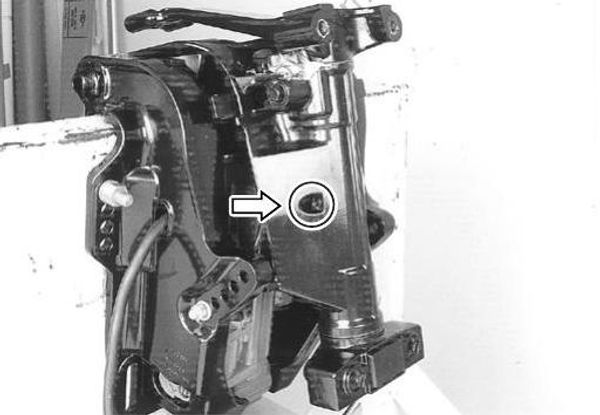
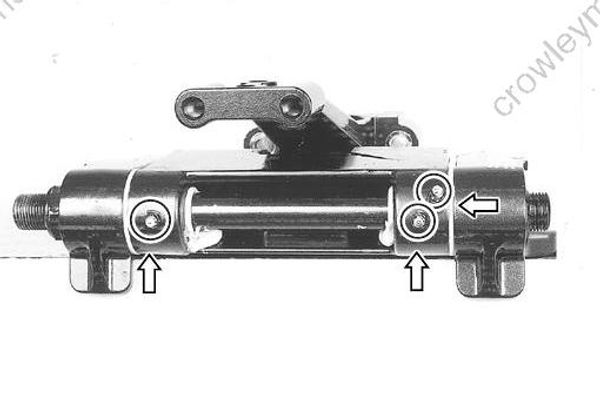
The insulation washer must be installed between the bonding wire terminal and bracket.

