

STORAGE
IMPORTANT: DO NOT start outboard without a water supply to the outboard’s cooling system. Cooling system and/or powerhead damage could occur.
Fuel System Treatment
Internal Engine Treatment
Remove the propeller, attach garden hose to flushing port and turn on water.
Evinrude E-TEC models are designed to be selfwinterizing using either of the following methods:
IMPORTANT: Engine MUST be in NEUTRAL throughout these procedures.
Throttle Control Method
• Mechanical Remote Controls: Fully advance throttle control and then start the outboard. All four SystemCheck lights will turn on and the outboard will run at idle speed.
• After approximately 15 seconds, the SystemCheck lights will go off. Move throttle to IDLE position. SystemCheck lights will light again.
• Wait another 15 seconds. SystemCheck lights will go off. At this point, advance throttle to FULL (in neutral). SystemCheck lights will flash, indicating that outboard is in winterize mode.
• Outboard will automatically go to fast idle and fog itself. Allow outboard to run until it shuts itself off (about one to two minutes).
• ICON Remote Controls: Turn Master Power/Key Switch ON. Press the N switch. Fully advance the control lever and then start the outboard.
• After approximately 15 seconds, move throttle control lever to IDLE position.
• Wait another 15 seconds. At this point, advance throttle to FULL (in neutral). Digital gauge will indicate that outboard is in winterize mode.
• Outboard will automatically go to fast idle and fog itself. Allow outboard to run until digital gauge indicates winterization complete and outboard shuts off (about one to two minutes).
IMPORTANT: If the digital gauge does not indicate winterization mode active, or outboard runs above fast idle, immediately turn off outboard and start the procedure again.
Software Control Method
Winterization can also be run using Evinrude Diagnostics software. With the outboard running, start the process at the Settings/Adjustments screen and follow the instructions.
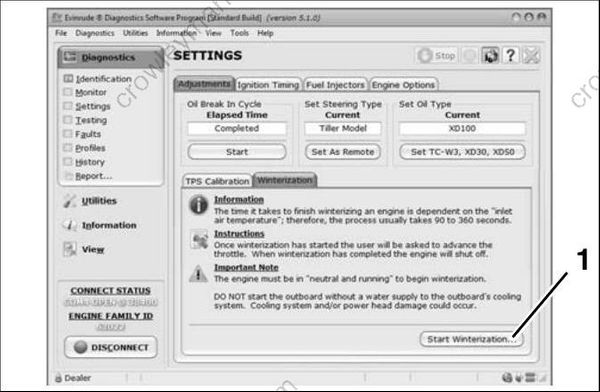
- Winterization start button
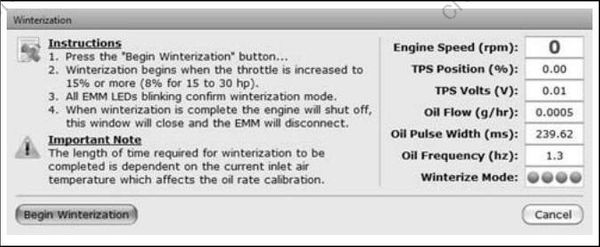
After the outboard shuts itself off, turn key switch OFF, then detach garden hose.
IMPORTANT: When finished, leave the out board in vertical position long enough to completely drain the powerhead.
Digital Gauge Method
The ICON Pro 5 inch and I-Command 3.5 inch digital gauges provide a winterize feature for 2008 and newer V4 and V6 models.
Use the “Mode” button (ICON Pro 5 inch), or “Menu” button (I-Command 3.5 inch) to access the winterize feature.
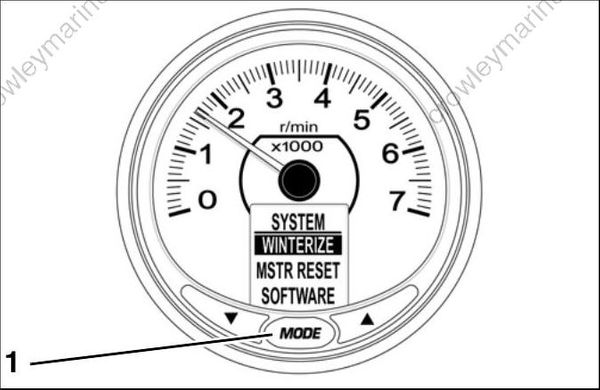
ICON Pro 5 inch Digital Gauge
- Mode button
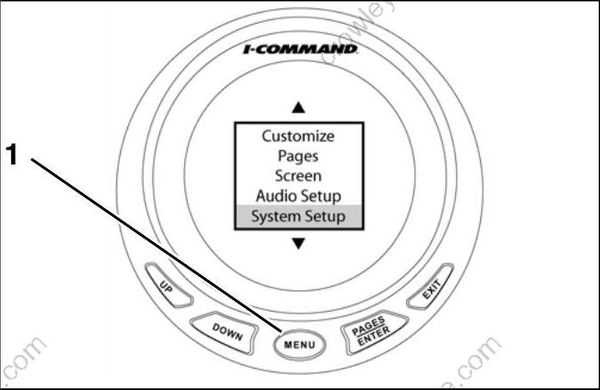
I-Command 3.5 inch Digital Gauge
- Menu button
• Refer to the digital gauge user’s guide for complete instructions.
Additional Recommendations
- Top off oil reservoir.
- inspect the fuel filter. If there is debris in the fuel filter, it must be replaced.
- Replace gearcase lubricant.
- Remove and inspect propeller.
- Clean and grease propeller shaft.
- Blow water from gearcase speedometer pickup system (gearcase speedometer models only).
- Lubricate all grease fittings and linkages.
- Inspect outboard, steering system, and controls. Replace all damaged and worn components. Refer to manufacturer’s and lubrication recommendations.
- Touch up painted surfaces as needed. Coat outer painted surfaces with automotive wax.
- Remove battery(s) from boat. Store in a cool, dry location. Periodically charge battery(s) while stored. Refer to manufacturer’s maintenance recommendations when servicing batteries.
- Store outboard in upright (vertical) position.
- Check for fuel leakage.
Failure to check for fuel leakage could allow a leak to go undetected, resulting in fire or explosion.
