

GEARCASE
housing and measuring the clearance between the gauge bar and the bearing housing with feeler gauges. Measure between each pair of screw holes. Replace the bearing housing and repeat check if variance exceeds 0.004 in. (0.010 mm).
Check the squareness of the pinion to the driveshaft by holding the shim gauge bar against the bearing housing (between the screw holes) while rotating just the driveshaft and pinion assembly and measuring the clearance between the shim gauge bar and the pinion. Replace the pinion or the driveshaft, as necessary, and repeat the check if variance exceeds 0.002 in. (0.050 mm).
Subtract the average clearance measurement obtained from 0.020 in. (0.508 mm) to determine the correct shim thickness required. Select the fewest number of shims to achieve the correct thickness.
Remove the driveshaft from the tool base.
Remove the collar and bearing housing from the driveshaft, and add the required amount of shims.
Use extreme care when removing bearing housing to avoid damaging the seals. Use Driveshaft Seal Protector, P/N 318674.
Check shimming by reassembling the driveshaft with shims and placing it back into the tool base. The measurement between the gauge bar and the pinion should be 0.020 in. (0.508 mm).
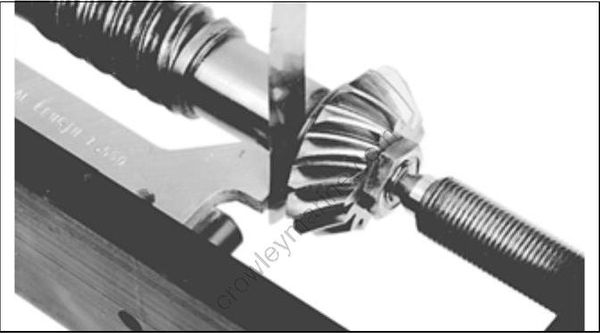
Remove the nut and pinion from the driveshaft.
Discard the nut.
ASSEMBLY
Water Intake Screens
Install water intake screens. Torque screws to 60 to 84 in. lbs. (7 to 9.5 N-m).
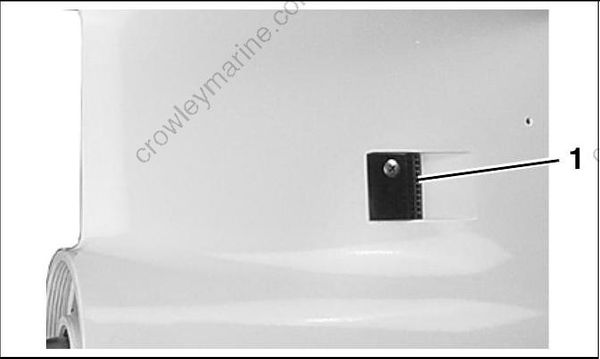
- Water intake screen
Shift Housing, Gear, and Propeller Shaft Installation
Push shifter detent into farthest downward position. Tip the rear of the gearcase slightly down ward to assist in the installation of the shaft assembly.
Be sure the thrust bearing and the thrust washer are properly positioned. Insert the shaft assembly fully into the gearcase while aligning shift housing pin with hole in forward end of gearcase housing.
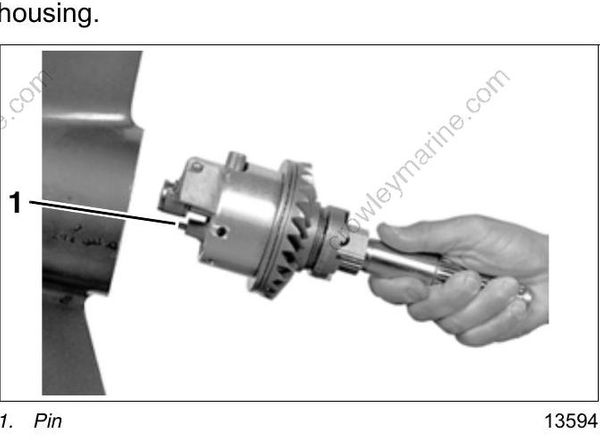
- Pin
Shift Rod Housing Installation
Lubricate a new shift rod cover O-ring with Triple-Guard grease. Install the O-ring into the shift rod cover.
Make sure O-ring is fully seated in groove around shift rod cover’s full circumference.
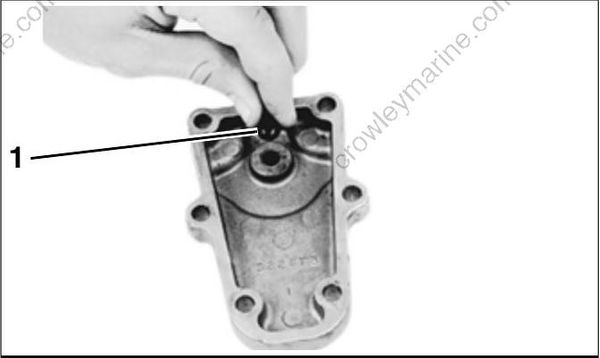
- O-ring
Install the shift rod spacer on the shift rod. On 30 in. models, first install the extension (not shown). Place the shift rod grommet on the shift rod.
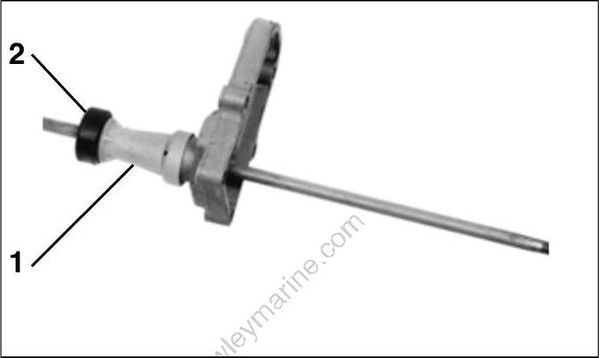
- Grommet
- Shift rod spacer
Apply Triple-Guard grease to the threaded end of the shift rod and insert it through the cover. Turn the shift rod while pushing it through the cover to avoid damaging the O-ring.
Apply Gasket Sealing Compound to both sides of a new shift rod cover gasket.
Position the gasket on the gearcase. Thread the shift rod into the shifter detent about four turns.
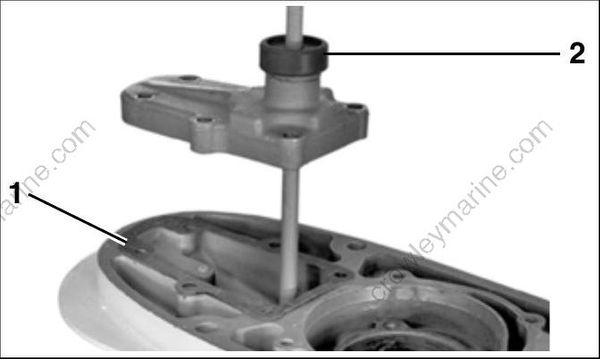
- Cover gasket
- Grommet
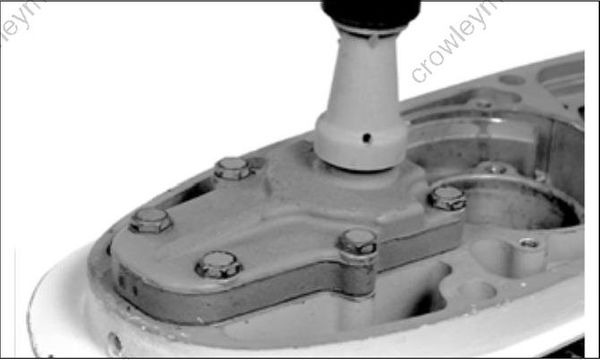
Move shift rod from side to side while pushing on the propeller shaft to ensure proper alignment of the bearing housing locator pin into the locator pin hole in the gearcase.
Apply Ultra Lock to the threads of the shift rod cover screws. Install the screws. Torque the screws to 60 to 84 in. lbs. (7 to 9.5 N-m).
Pinion Gear and Driveshaft Installation
Refer to DRIVESHAFT SHIMMING on p. 304 before proceeding. Position the driveshaft thrust bearing, thrust washer, and shim(s) (selected earlier) on the driveshaft, exactly in order shown.
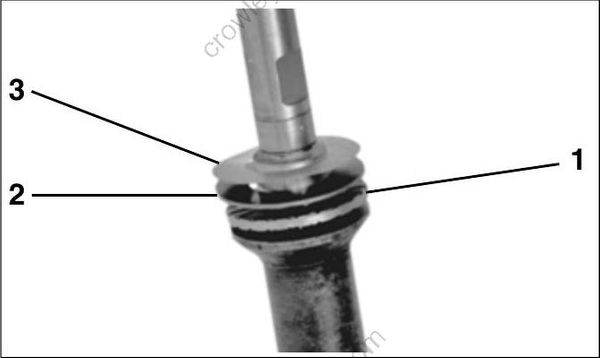
- Thrust bearing
- Thrust washer
- Shim(s)
Using Driveshaft Seal Protector, P/N 318674, slide the driveshaft bearing housing onto the driveshaft.
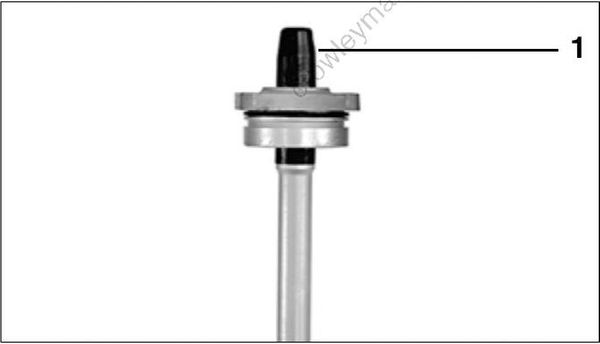
- Seal protector
Move shift rod to position clutch dog as far forward as possible. Be sure excess grease is removed from the pinion bearing.
Washer must be snapped into recess of pinion gear.
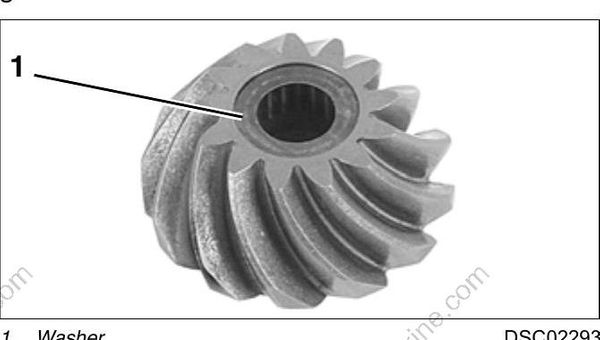
- Washer
The inside taper of the pinion gear and the driveshaft taper MUST be completely free of grease. Clean the tapers with Cleaning Solvent. Use a shop towel free of grease and lint.
Lightly coat the threads of a new pinion nut with outboard lubricant and install on the driveshaft using Pinion Nut Starting Tool, P/N 342216. Turn the driveshaft by hand to engage the nut. Hand tighten pinion nut and remove the pinion nut starting tool. Proceed to next step and then torque procedure.
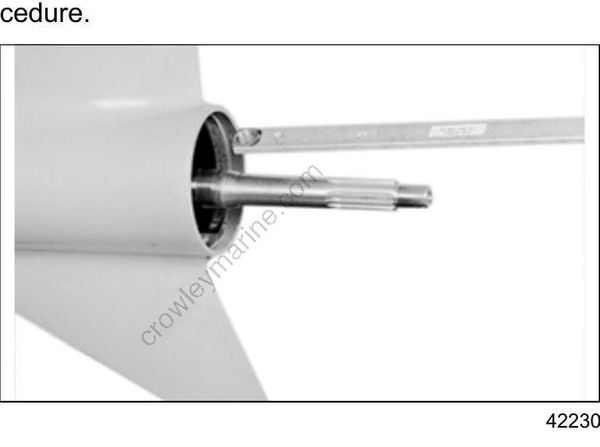
Install washers on the driveshaft bearing housing screws. Apply Gasket Sealing Compound to the threads of the screws. Install screws and torque to 120 to 144 in. lbs. (13.6 to 16.3 N-m).
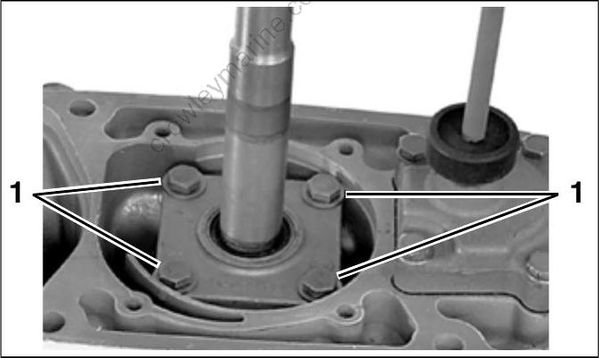
- Driveshaft bearing housing screws
Use Driveshaft Holding Socket, P/N 311875, Pin ion Nut Holder, P/N 334455, and Wrench Retainer, P/N 341438, to torque the pinion nut to 100 to 110 ft. lbs. (136 to 149 N-m).
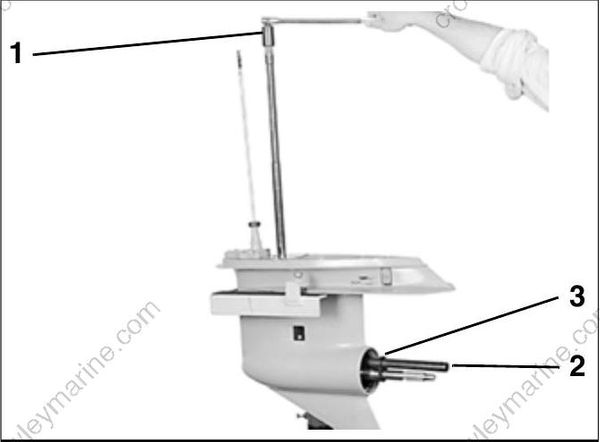
- Holding socket
- Pinion holder
- Retainer
Propeller Shaft Bearing Housing and Gear Installation
Oil and install thrust bearing and thrust washer on hub of reverse gear. Slide the gear assembly onto the propeller shaft until it engages the pinion gear.
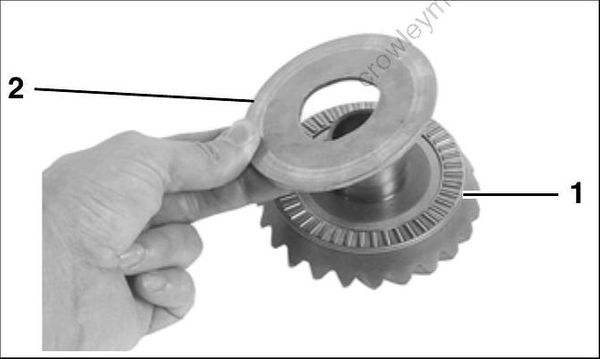
- Thrust bearing
- Thrust washer
Lightly apply Gasket Sealing Compound to a new bearing housing O-ring. Install O-ring in groove in the housing.
Install housing into gearcase, aligning screw holes with retainer slots in gearcase.
Housing must be completely seated to install retainer tabs.
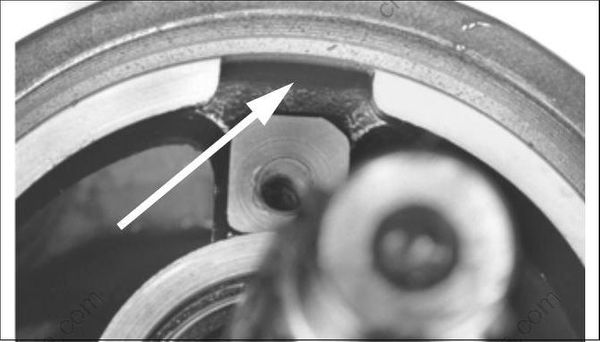
Retainer Tab Notch
Install two retainers, washers and screws.
Apply Ultra Lock to threads and torque screws 18 to 20 ft. lbs. (24 to 27 N-m).
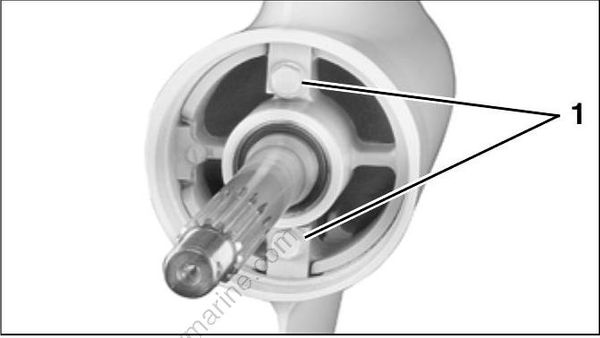
- Retainer tab screws
Loosen retainer screws 1/4 turn.
Install wedge, screw, and washer. Apply Ultra Lock to threads and torque screw 15 to 20 in. lbs. (1.7 to 2.3 N-m).
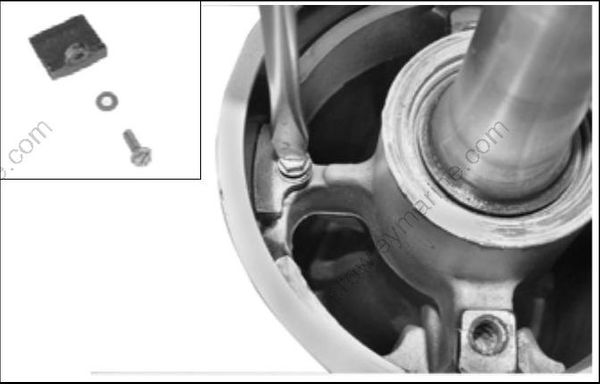
Re-torque two retainer screws to 18 to 20 ft. lbs. (24 to 27 N-m).
Confirm that torque on the wedge screw is 15 to 20 in. lbs. (1.7 to 2.3 N-m).
To complete gearcase assembly, refer to:
- LEAK TEST on p. 285
- WATER PUMP on p. 288
- SHIFT ROD ADJUSTMENT on p. 290
- REMOVAL AND INSTALLATION on p. 285
- LUBRICANT on p. 284
- Propeller Hardware Installation on p. 73
- Trim Tab Adjustment on p. 76
During break-in period of a reassembled gearcase, change the gearcase lubricant between 10 to 20 hours of operation.
