

Bearings
Inspect center main bearing and split sleeves for excess wear, nicks, or scratches. Replace if necessary.
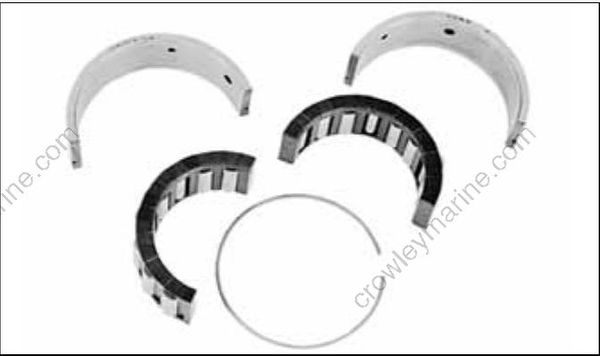
Inspect crankshaft rod bearings for excess wear, nicks, or scratches. Replace if necessary.
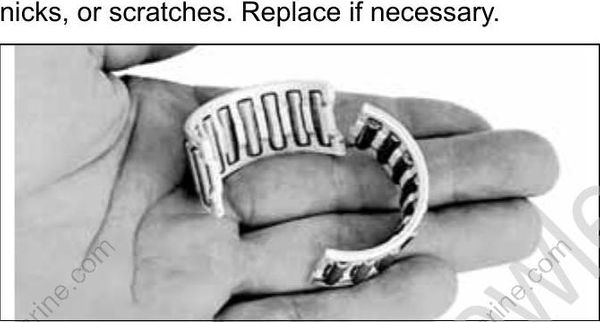
POWERHEAD ASSEMBLY
IMPORTANT: Proceed slowly. Make no forced assemblies unless a pressing operation is called for. All internal components must be perfectly clean and lightly coated with outboard lubricant.
IMPORTANT: Use new wrist pin retaining rings, gaskets, seals, and O-rings during assembly.
Crankshaft
Place bearing retainer plate, flat side down, on lower end of crankshaft.
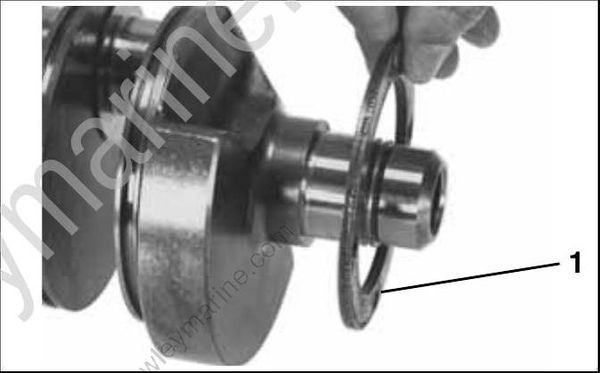
- Bearing retainer plate
Oil the end of the crankshaft. Use Crankshaft Bearing/Sleeve Installer, P/N 338649, and place a new lower main bearing onto crankshaft with lettered side facing the tool. Install bearing until it seats on the crankshaft.
Oil the end of the crankshaft. Use Crankshaft Bearing/Sleeve Installer, P/N 338649, to drive a new sleeve onto the crankshaft until the installer contacts the lower main bearing.
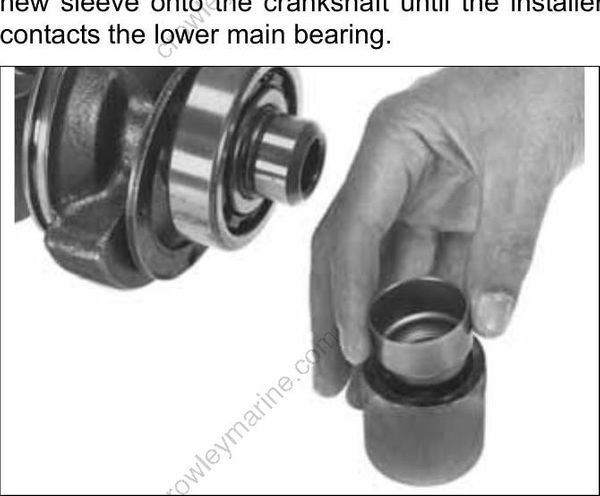
If the installer sticks on the sleeve after installation, thread Slide Hammer, P/N 391008, into installer and pull it off.
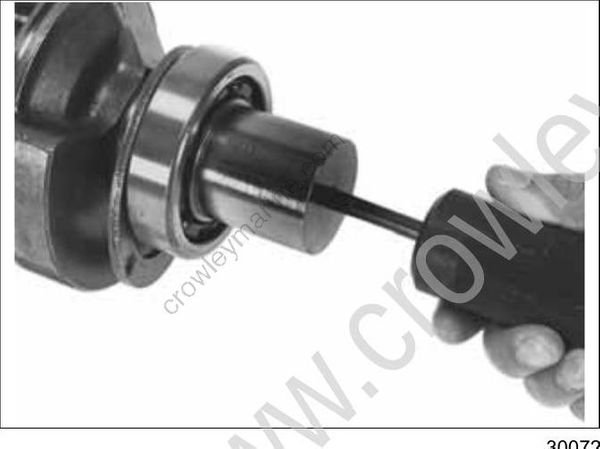
IMPORTANT: Inspect sleeve after installation. Sleeve must not be used if surface is damaged.
Use retaining ring pliers to install bearing retaining ring with sharp edge facing away from bearing.
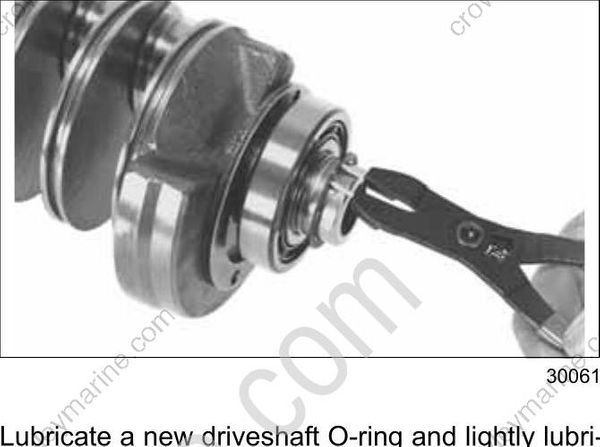
Lubricate a new driveshaft O-ring and lightly lubricate crankshaft splines with Moly Lube. Install O-ring in sleeve.
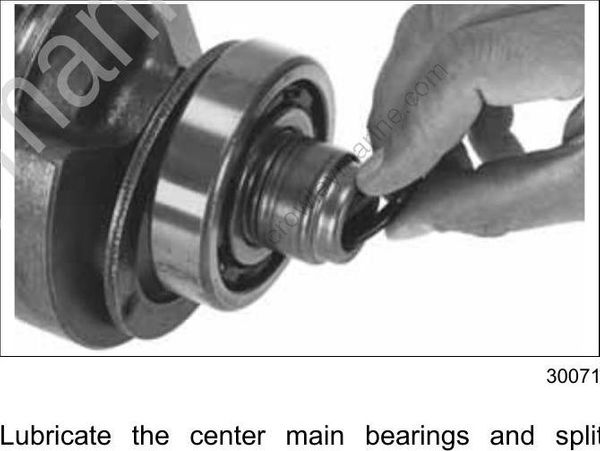
Lubricate the center main bearings and split sleeves with outboard lubricant and install them in their original positions. The split sleeve ring grooves must face toward driveshaft (lower) end of crankshaft when installed.
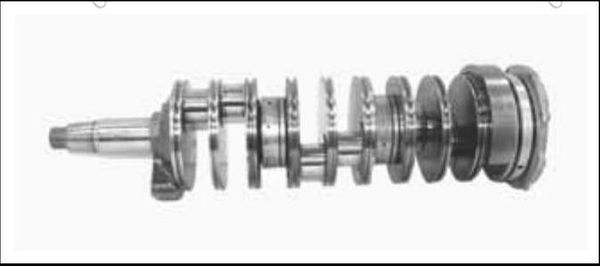
Lightly coat the outside diameter of a new crank shaft seal with Gasket Sealing Compound. Use Seal Installation Tool, P/N 325453, to install seal in lower crankcase head with extended lip of seal facing down. Coat seal lips with Triple-Guard grease.
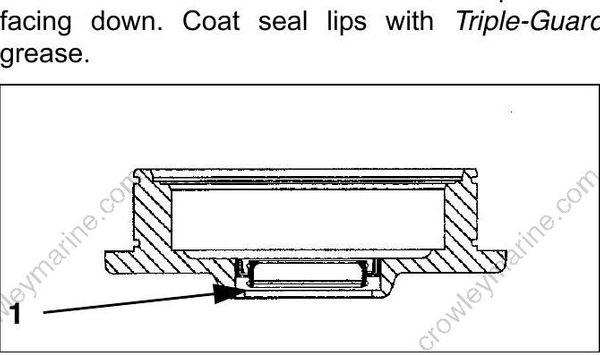
- Seal, extended lip
Lightly coat two new O-rings with Gasket Sealing Compound and install on lower crankcase head. Keep sealer away from oil passage.
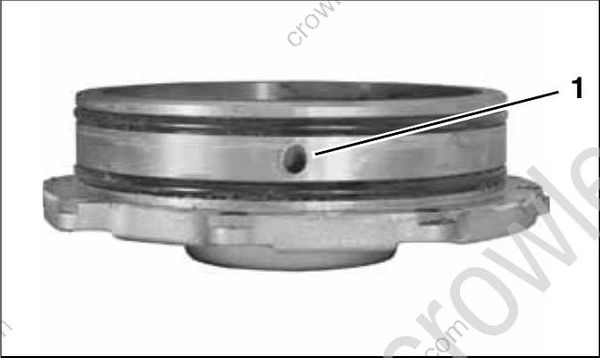
- Oil passage
Use threaded rods or Guide Rods, P/N 383175, to align retainer plate with crankcase head. Slide crankcase head onto crankshaft until seated around lower main bearing.
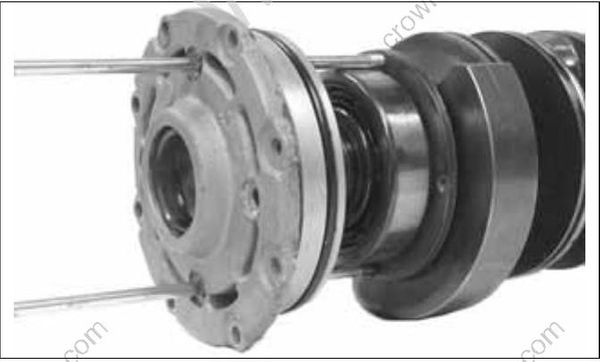
Install new seals on the four bearing retainer screws. Apply Nut Lock to the threads of the screws and tighten to a torque of 96 to 120 in. lbs. (11 to 13.5 N•m).
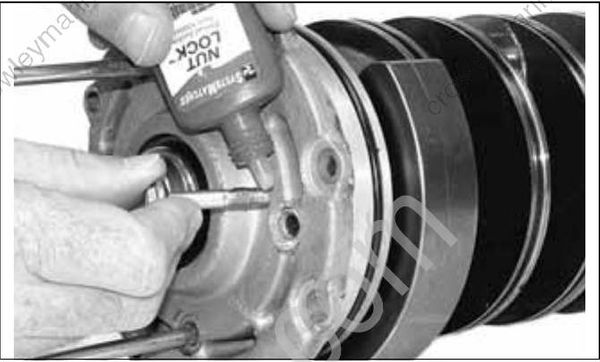
Lightly coat the outside diameter of a new upper seal with Gasket Sealing Compound. Use the flat end of Seal Installation Tool, P/N 325453, to install seal flush in upper crankcase head with the lip facing down. Coat the seal lip with Triple-Guard grease.
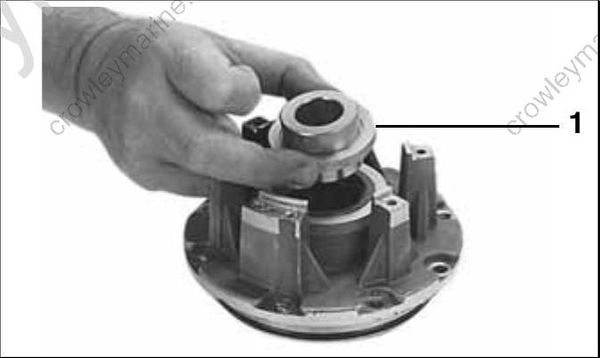
- Seal installer, P/N 325453
Lightly coat two new O-rings with Gasket Sealing Compound, and install on upper crankcase head. Keep sealer away from oil passage.
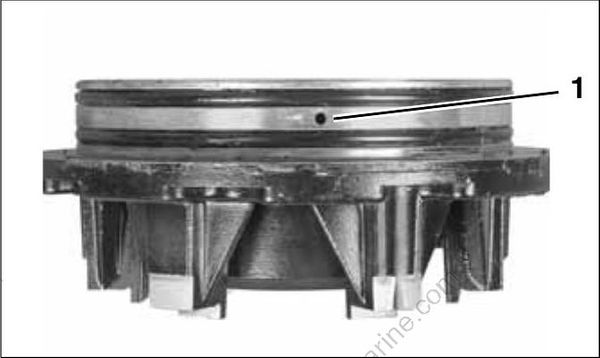
- Oil passage
Pistons and Connecting Rods
IMPORTANT: It is very important that the pistons in this engine are installed in the correct location and direction.
New pistons are stamped “PORT” or “STBD,” and “EXH.” These markings should be turned toward the exhaust side (center) of the block. The splash bowl on the dome of the piston will be located toward the flywheel and opposite the exhaust port.
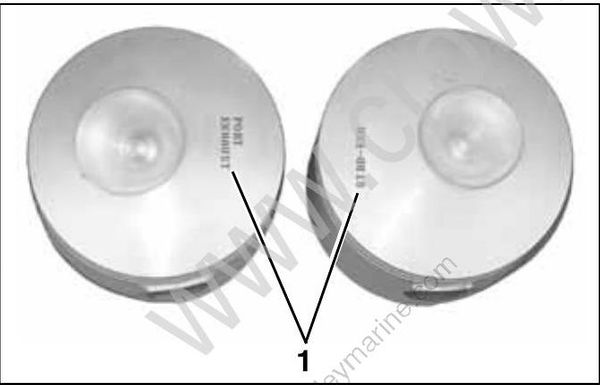
- Stamped markings
IMPORTANT: It is also very important that the connecting rods are installed with the alignment dots facing up, toward the flywheel.
Apply outboard lubricant to the wrist pin bearings. Install the bearings in the wrist pin bore.
Oil the wrist pin bore and wrist pin. Place connecting rod with bearing into the piston with the alignment dots facing the top of the piston.
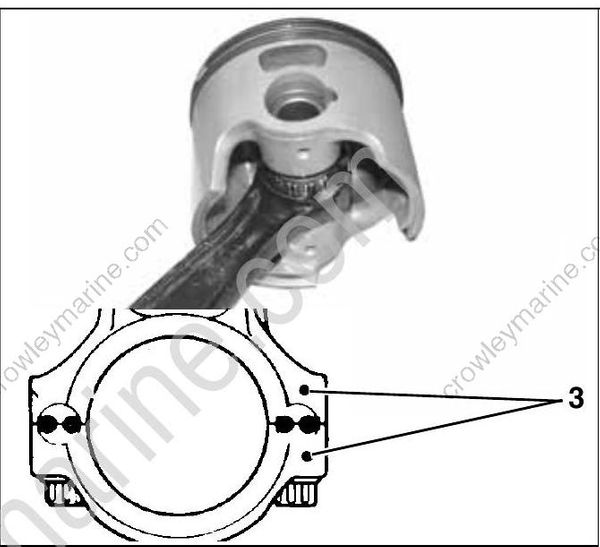
- Alignment dots
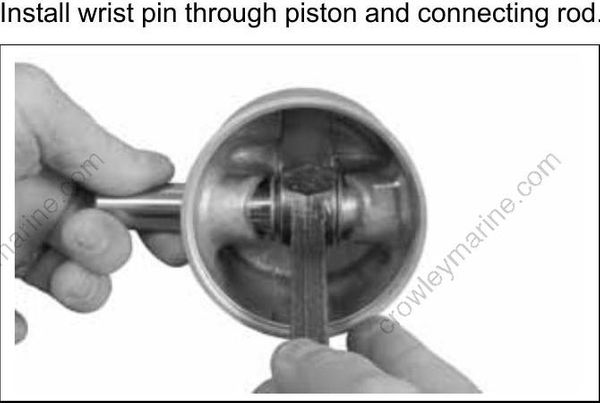
Install wrist pin through piston and connecting rod.
Use Wrist Pin Cone, P/N 331913, and Driver, P/N 396747, to install new wrist pin retaining rings in each wrist pin hole. Gap of retaining ring faces away from notch in piston.
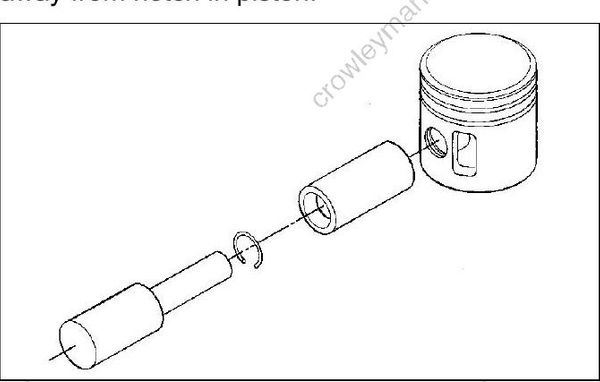
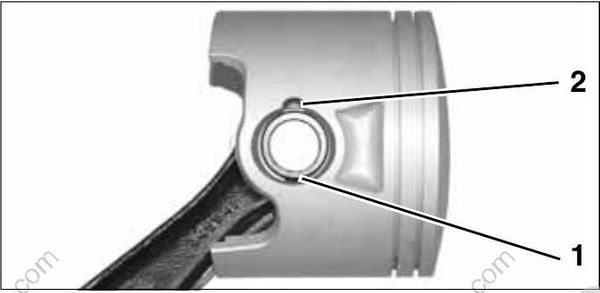
- Gap in retaining ring
- Notch in piston
Installing Pistons
When all pistons and connecting rods are assembled, install piston ring sets. Be sure rings are installed in the cylinder used to test ring end gap. Refer to POWERHEAD INSPECTION on p. 224.
IMPORTANT: Be sure gap of ring fits squarely around dowel pin.
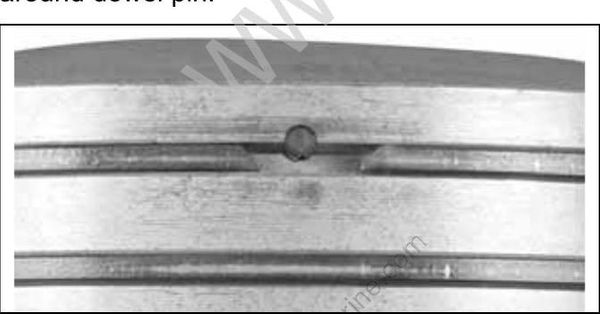
IMPORTANT: Before continuing, make sure that all Gel-Seal II has been removed from the cylinder block and crankcase mating flanges. If traces of hardened Gel-Seal II are left, main bearings could be misaligned. Refer to CYLINDER BLOCK CLEANING on p. 223.
Coat pistons, rings, cylinder walls, and ring compressor with outboard lubricant.
Center connecting rod in piston and locate piston rings on dowel pins. Place appropriate ring compressor on piston.
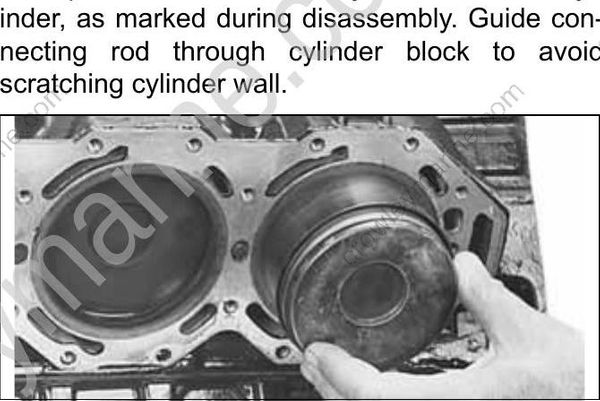
Slide piston and rod assembly into the correct cylinder, as marked during disassembly. Guide connecting rod through cylinder block to avoid scratching cylinder wall.
Cylinder Head Installation
Lightly coat both sides of a new cylinder head gasket with Gasket Sealing Compound. Place gasket on cylinder block following instructions printed on gasket.
Apply soapy water to water dam and insert into block.
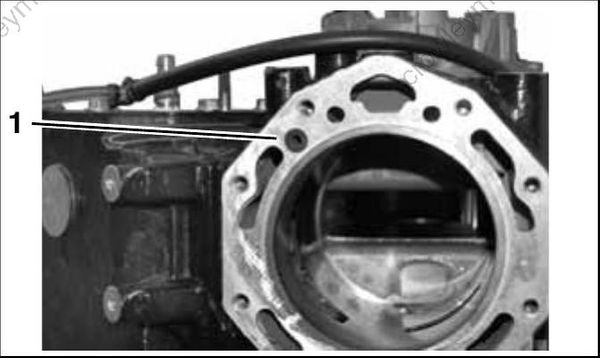
- Water dam
Install cylinder head with the thermostat toward the top. Apply Triple-Guard grease to threads and install the cylinder head screws. DO NOT use any sealant on threads.
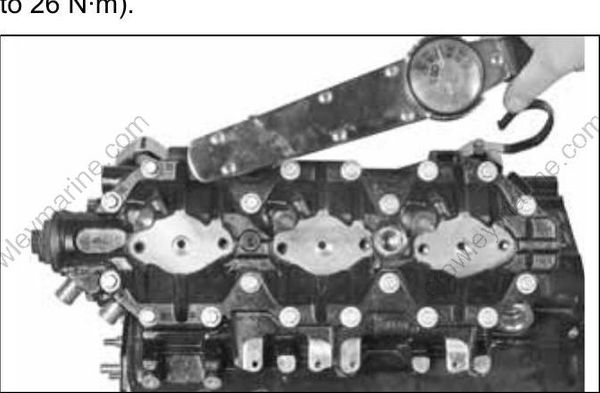
Following sequence on cylinder head, tighten all screws in stages to a torque of 17 to 19 ft. lbs. (23 to 26 N·m).
Crankshaft and Connecting Rods
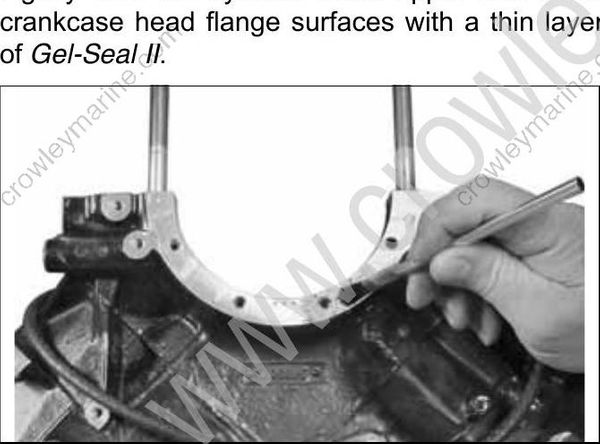
Lightly coat the cylinder block upper and lower crankcase head flange surfaces with a thin layer of Gel-Seal II.
Check that main bearing alignment dowel pins are seated in the block.
Push all pistons to the top of cylinders. Remove the numbered connecting rod caps and hold the connecting rods to the outside with rubber bands.
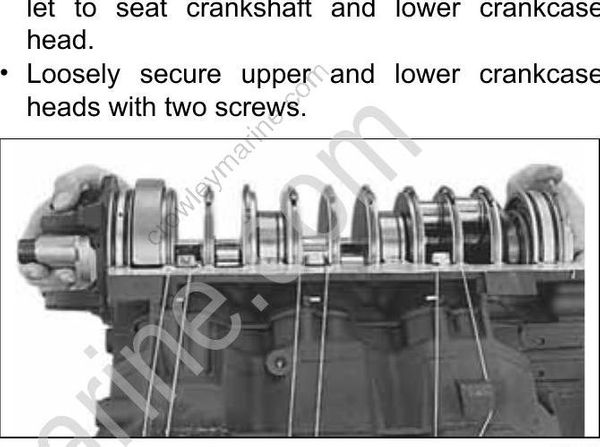
Gently lower crankshaft into place.
- Turn all crankcase seal ring gaps to face up.
- Locate each main bearing on its dowel pin. A mark placed on the bearing race opposite the dowel pin hole will help in the alignment process.
- Tap the crankshaft upward with a rawhide mallet to seat crankshaft and lower crankcase
head. - Loosely secure upper and lower crankcase heads with two screws.
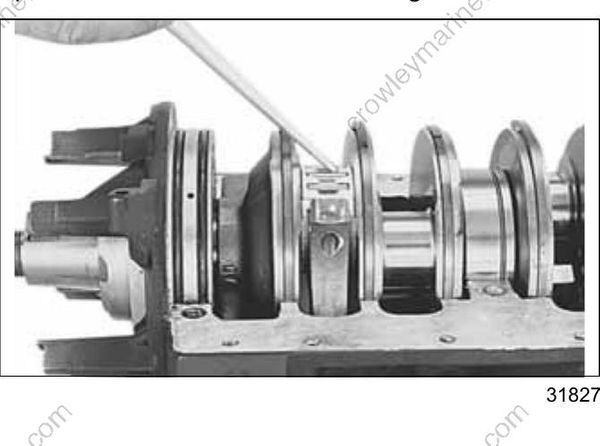
Lubricate each crankpin and bearing assembly with outboard lubricant. Slowly pull connecting rod up to crankshaft and install bearing halves.
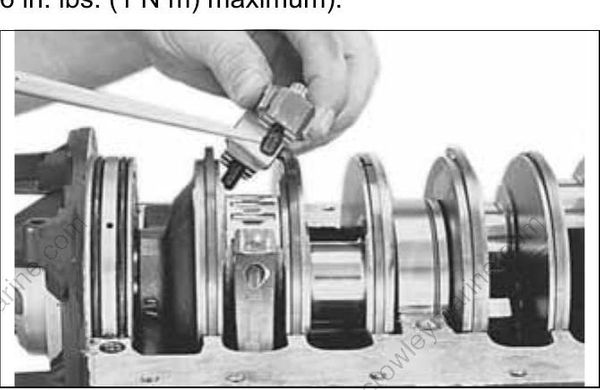
Lubricate rod cap screw threads and under screw head mating surface with a light coat of Triple-Guard grease. Apply outboard lubricant to screw hole threads in rod, and to screw head mating surface on cap.
Align dot on rod cap with dot on the connecting rod.
Install rod cap screws finger tight (NO MORE than 6 in. lbs. (1 N·m) maximum).
IMPORTANT: Be sure alignment dot on rod cap matches dot on rod and that both dots face fly wheel.
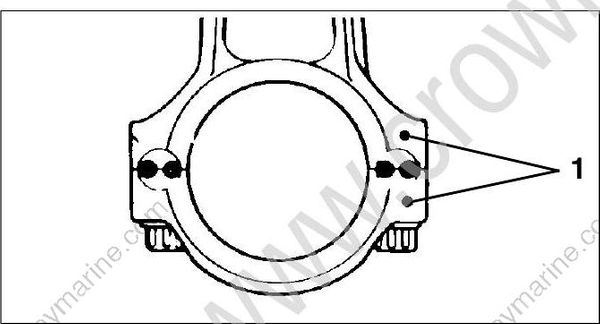
- Alignment dots
IMPORTANT: Tightening rod cap screws without Alignment Fixture, P/N 396749, or using an incorrect procedure could cause permanent dam age to the connecting rod and crankshaft. To maintain accurate torque values, keep torque wrench extension length to a minimum.
Install Rod Cap Alignment Fixture, P/N 396749, before tightening rod cap screws. Align the flat marked “SET” on the rod adjustment stop with the arrow on the frame. Position the stop at the highest setting (two lines showing). Rotate adjustment knob 180° to lock the stop in position.
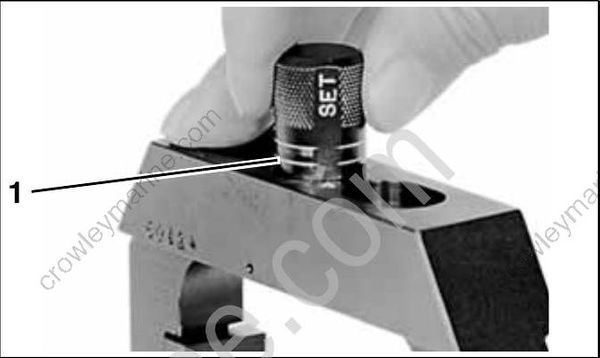
- Adjustment stop, highest setting
Secure restraining jaw “A” and forcing jaw “B” to frame.
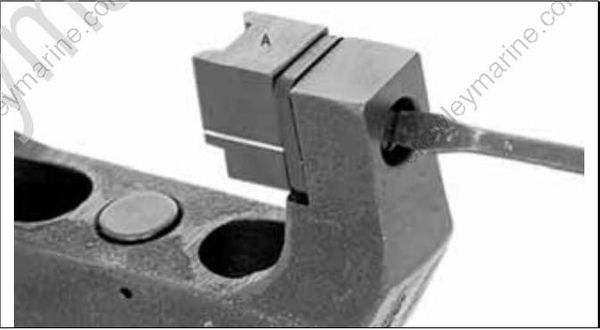
Restraining Jaw “A”
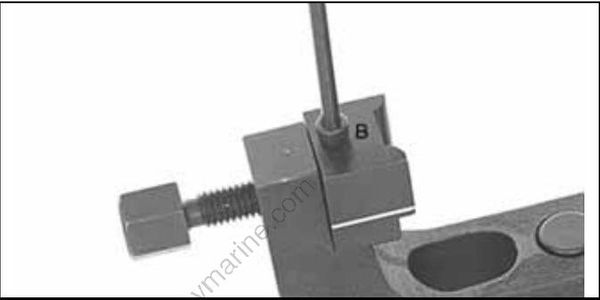
Forcing Jaw “B”
Apply a light coat of outboard lubricant to the corners of the connecting rod and rod cap. Place frame on connecting rod using the following procedure:
- Position frame onto the connecting rod so the contact area of the jaw is centered on the side of the rod.
- Tighten forcing screw until jaws contact connecting rod.
- Slide frame down until adjustment stop contacts the rod cap. The groove lines on the jaws must be centered on the rod/crankpin diameter.
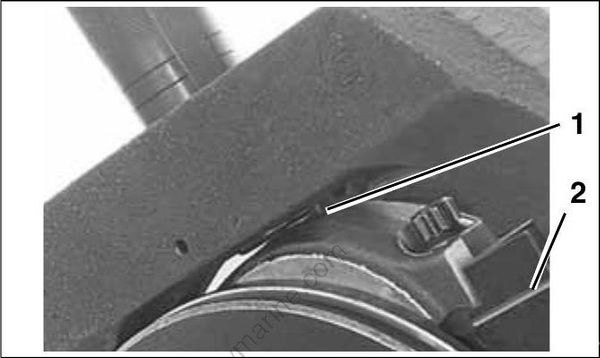
- Adjustment stop
- Groove line
- Tighten the forcing screw to a torque of 23 in. lbs. (2.5 N·m).
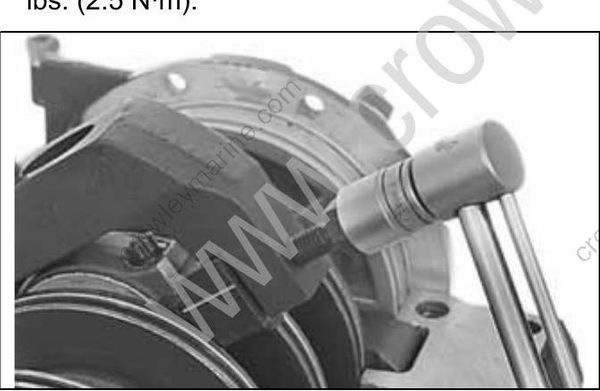
IMPORTANT: Make sure that frame is squarely in position and that rod and cap are aligned.
Loosen both rod cap screws one-quarter turn.
Use Torquing Socket, P/N 346187, to tighten rod cap screws in three stages:
- Apply first torque of 40 to 60 in. lbs. (5 to 7 N•m) to both rod cap screws.
- Tighten screws to a torque of 20 to 22 ft. lbs. (27 to 30 N•m).
- Apply final torque of 60 to 65 ft. lbs. (81 to 88 N·m).
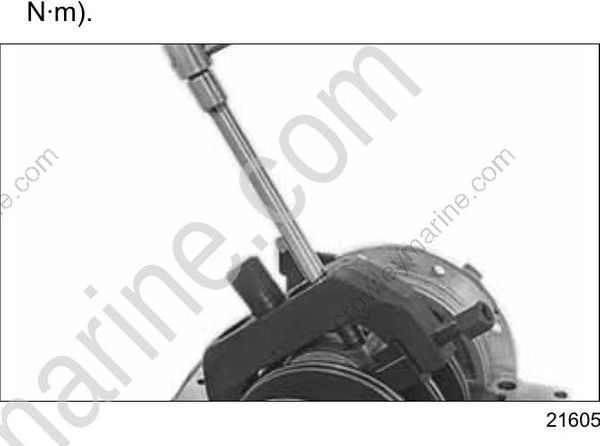
IMPORTANT: If a new screw is used, it must be installed as above. Then, it must be removed, re lubricated, and installed again.
Loosen forcing screw and remove the frame.
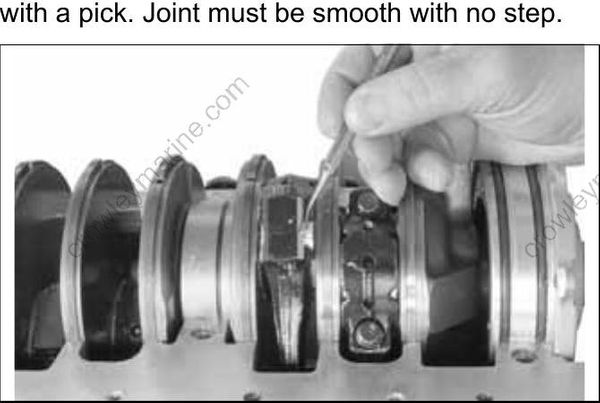
Test at least three corners of the rod and cap joint with a pick. Joint must be smooth with no step.
Crankcase Assembly
Thoroughly clean and degrease the mating flanges of the crankcase and cylinder block with a non-petroleum based solvent, such as isopropyl alcohol or acetone, and let air dry.
IMPORTANT: DO NOT allow solvent to get on internal components. Clean only the mating flanges.
Use a small brush with a tapping motion to apply a thin, even coat of Gel-Seal II sealant to the crank case mating flange. The sealer must not come within 1/4 in. (6.4 mm) of bearings.
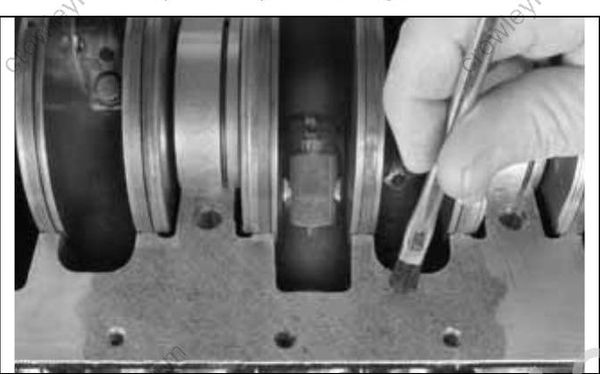
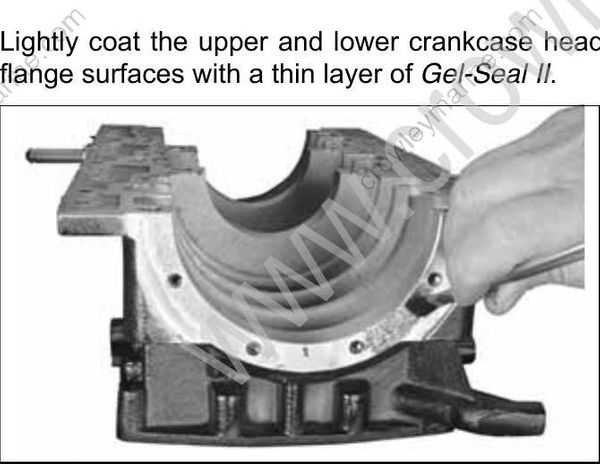
Lightly coat the upper and lower crankcase head flange surfaces with a thin layer of Gel-Seal II.
IMPORTANT: Gel-Seal II has a shelf life of at least one year when stored at room temperature. Test the Gel-Seal II or replace it if the age of the tube cannot be determined. Using old Gel-Seal II could cause crankcase air leaks.
IMPORTANT: The use of Locquic Primer is NOT recommended. If primer is used, crankcase halves must be assembled and tightened within ten minutes after the Gel-Seal II has been applied.
Lower the crankcase into place.
Install main bearing screws and nuts finger tight, no more than 60 in. lbs. (7 N•m).
When the crankcase is seated, install and firmly seat both crankcase taper pins.
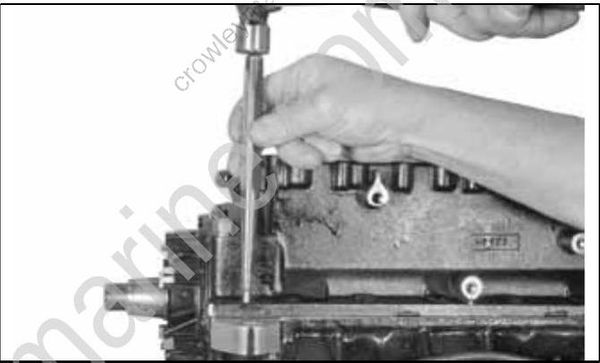
Tighten main bearing screws and nuts in stages to a final torque of:
- Screws – 48 to 53 ft. lbs. (65 to 72 N•m)
- Nuts – 38 to 42 ft. lbs. (52 to 57 N•m)
Start in the center and work outward in a spiral pattern.
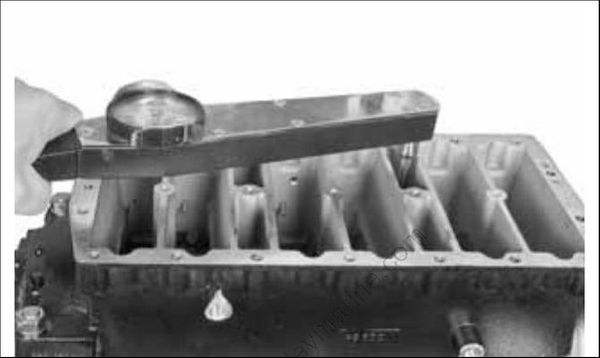
Apply Permatex No. 2 to crankcase flange screws where threaded hole is open to crankcase. Install screws and tighten to to a torque of 84 to 108 in. lbs. (9.5 to 12 N•m).
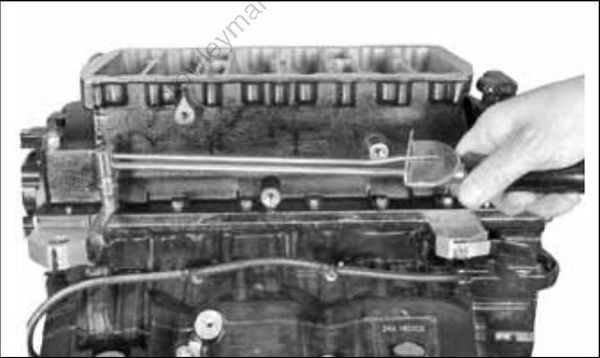
Test that the crankshaft spins freely without binding.
Apply Nut Lock to the upper and lower crankcase head screws. Install and tighten screws to a torque of 96 to 120 in. lbs. (11 to 13.5 N·m).
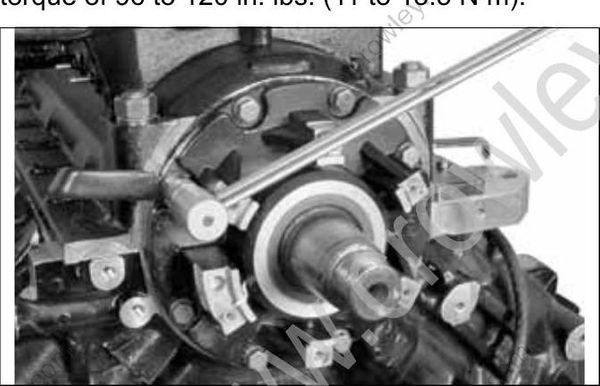
IMPORTANT: After powerhead has been assembled, allow at least two hours for Gel-Seal II to cure before running outboard.
Shift Linkage Installation
Lubricate shift linkage bosses at the base of the crankcase with Triple-Guard grease. Insert bushings into bosses.
Apply Triple-Guard grease to the shaft of the shift lever assembly. Guide shaft through bushings in crankcase.
Install shift rod lever and tighten retaining screw 60 to 84 in. lbs. (7 to 9.5 N•m).
Apply Triple-Guard grease to shoulder of shift arm screw and Nut Lock to threads. Install arm, screw, and washer and tighten screw to a torque of 120 to 144 in. lbs. (13.5 to 16.5 N•m).
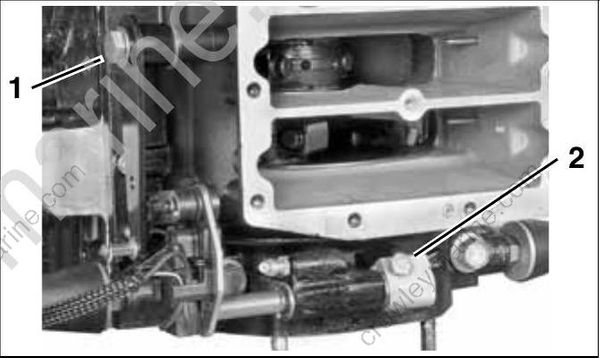
- Shoulder screw
- Shift rod lever retaining screw
Throttle Linkage Installation
Apply Nut Lock to threads of throttle lever screw.
Insert spring into cavity of throttle lever.
Install lever, screw, and washer on crankcase and hook spring on rib as shown. Tighten screw to a torque of 120 to 144 in. lbs. (13.5 to 16.5 N•m).
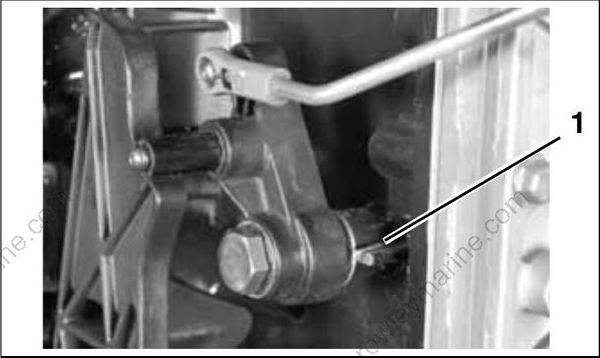
- Throttle lever spring
Apply Nut Lock to threads of throttle cam screw. Install cam, screw, and washer on cylinder block and tighten screw to a torque of 120 to 144 in. lbs. (13.5 to 16.5 N•m).
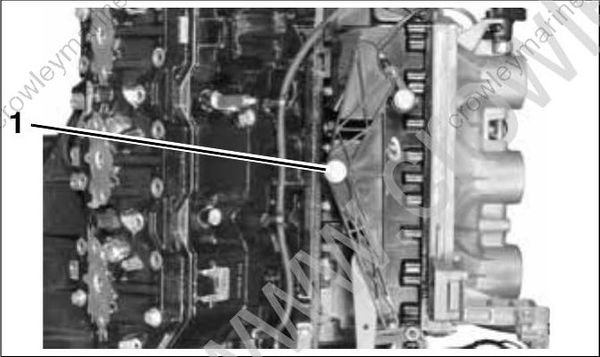
- Throttle cam screw
IMPORTANT: Do not lubricate throttle levers or shoulder screws.
Final Powerhead Assembly
Install the reed plate and throttle body assemblies. Refer to Intake Manifold Service on p. 181.
Install oil recirculating hoses and check valves. Refer to OIL RE-CIRCULATION DIAGRAMS – V6 on p. 190, or POWERHEAD VIEWS on p. 240.
Install pressure valve assembly. Refer to PRESSURE RELIEF VALVE SERVICING on p. 209.
Install shift linkage. Refer to Shift Linkage Installation on p. 235.
Install throttle linkage. Refer to Throttle Linkage Installation on p. 236.
Install fuel injectors and ignition coils. Refer to Fuel Injector Installation on p. 180.
IMPORTANT: All injectors must be reinstalled in their original location. Improper injector installation can result in powerhead failure.
Install oil pump, rear oil manifold, and oil injection hoses. Refer to OIL COMPONENT SERVICING on p. 198.
Install stator. Refer to FLYWHEEL AND STATOR SERVICING on p. 145.
Install electrical harness and EMM. Refer to EMM SERVICING on p. 108.
Install fuel pump assemblies, fuel manifolds, and filter. Refer to FUEL COMPONENT SERVICING on p. 174.
Install the electric starter. Refer to Starter Installation on p. 155.
To prevent fire and explosion hazard, make sure all electrical and ignition wiring is routed and clamped in original positions.
