

SEAL AND BEARING INSTALLATION
IMPORTANT: Make no dry assemblies. Lubricate all bearings, shafts, and gears with gearcase lubricant.
Press the bearings into the housings until the tools are seated on the housing.
Propeller Shaft Bearing Housing Bearings
Use Bearing Installer, P/N 335820, to install a new bearing in the rear end of bearing housing. Position installer against the lettered side of bearing. Press the bearing into the housing until the tool is seated on the housing.
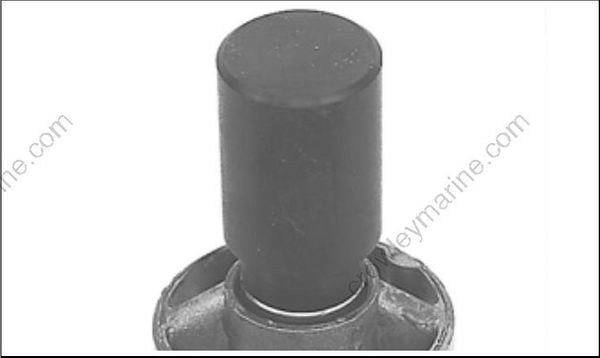
Use Bearing Installer, P/N 321428, to install a new bearing in the forward end of the bearing housing. Position installer against the lettered side of bearing.
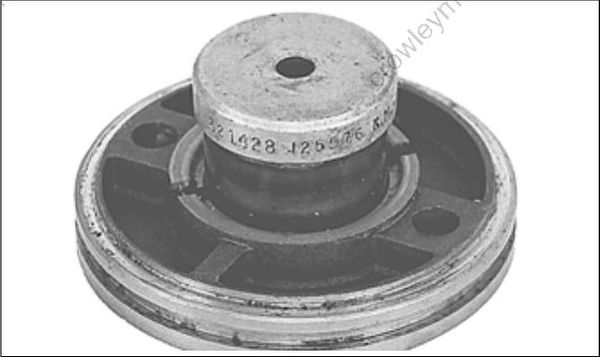
Propeller Shaft Bearing Housing Seals and O-ring
Install new seals back to back in aft end of the propeller shaft bearing housing using Seal Installer, P/N 335821. Apply Gasket Sealing Compound to the metal casing of the seals before installing. Install the inner seal with lip facing into the bearing housing and install the outer seal with lip facing away from the bearing housing. Apply Triple-Guard grease to seal lips after installing.
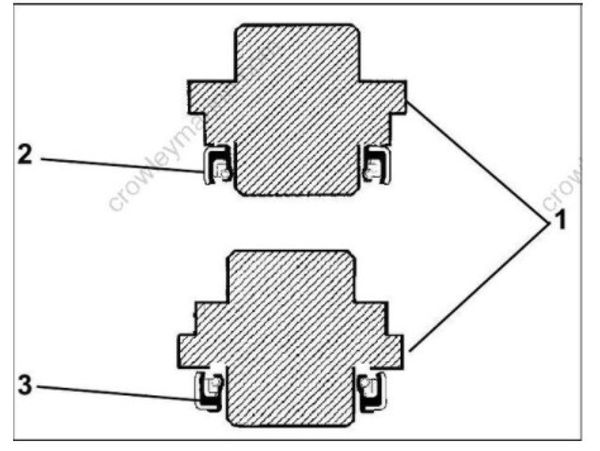
- Seal installer
- Inner seal
- Outer seal
Apply Triple-Guard grease to a new bearing housing O-ring. Place the O-ring in the bearing housing groove.
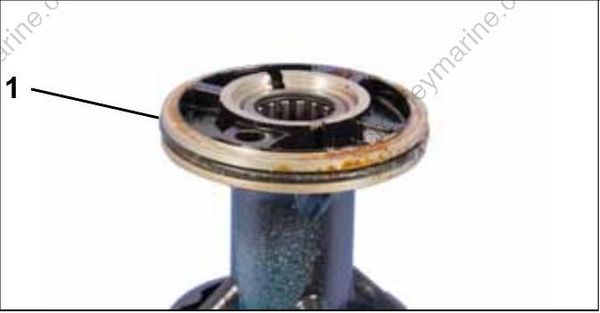
- O-ring
Shift Rod Bushing and O-ring
Coat the shift rod O-ring with Triple-Guard grease and install in shift rod bushing.
Place a new washer and bushing on Shift Rod Installer, P/N 304515. Apply Gasket Bushing Sealing Compound to the outside diameter of the shift rod bushing.
Install new bushing O-ring in outer groove of bushing.
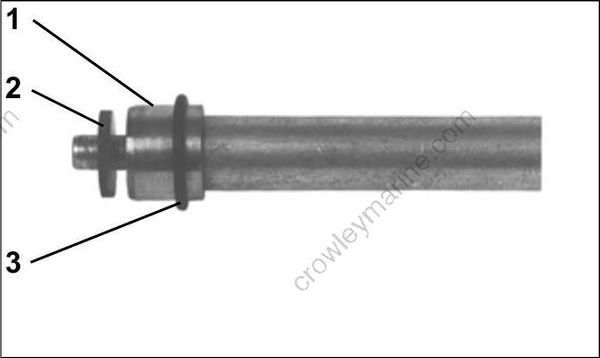
- Bushing
- Washer
- O-ring, outer groove
Use a mallet to drive the bushing into the gear case housing.
Forward Bearing
Place the nose of the gearcase on a wooden block on the floor. Use Drive Handle, P/N 311880, Bearing Cup Installer, P/N 319929, and a mallet to drive the bearing cup into position in the gearcase housing. Oil the forward bearing cup and seat it firmly in the housing.
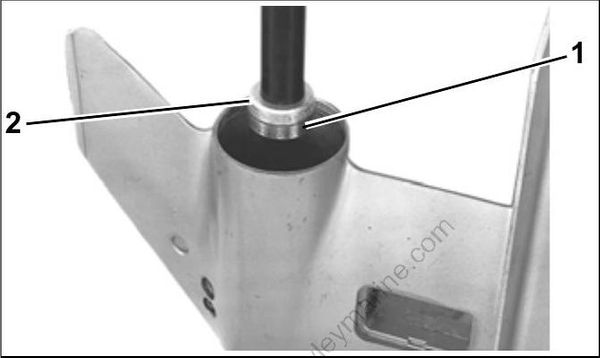
- Forward bearing cup
- Bearing cup installer
Pinion Bearings
Install the pinion bearings using the following components of the Universal Pinion Bearing Remover and Installer, P/N 5005927, and two tool spacers.
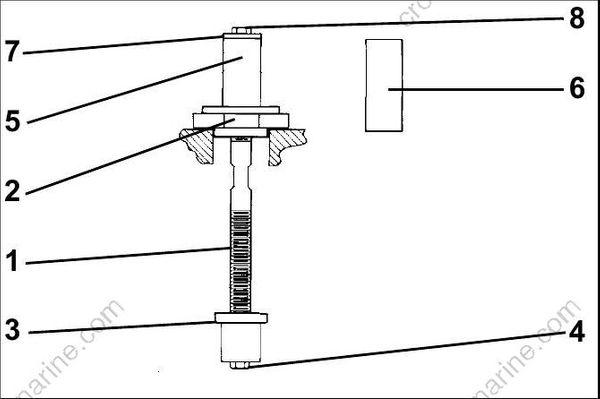
- Rod, P/N 326582
- Plate, P/N 326583
- Remover/Installer, P/N 326577
- 1/4-20 x 1 1/4 in. screw
- Spacer, Short, P/N 330067
- Spacer, Long, P/N 330068
- 1 in. flat washer
- 1/4-20 x 1/2 in. screw
IMPORTANT: To ensure accurate bearing location, washer must be flat and screw must be tight.
Install lower pinion bearing. Assemble tool using short spacer, P/N 330067, and remover/installer, P/N 326577. Position installer against the lettered side of bearing. Drive bearing into gearcase housing until washer contacts spacer.
Install upper pinion bearing. Assemble tool using long spacer, P/N 330068.
Driveshaft Bearing
Oil and install a new driveshaft bearing in the bearing sleeve using Bearing Installer, P/N 322923. Press against the lettered side of the bearing until the tool is seated in the bearing sleeve.
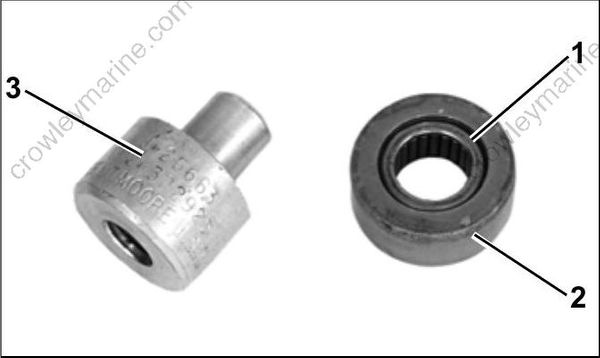
- Driveshaft bearing
- Bearing sleeve
- Bearing installer
Use the same tool, attached to Plate, P/N 318122, to press the bearing sleeve assembly into the gearcase until the plate contacts the gearcase. Position the lettered side of the bearing against the tool.
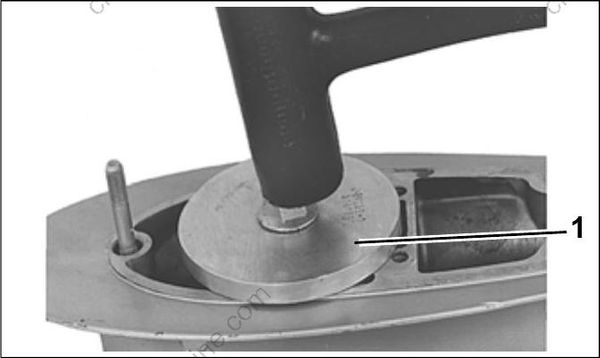
- Plate
Driveshaft Seals
Apply Gasket Sealing Compound to the metal casing of the seals before installing.
Use Seal Installer, P/N 326552, to install the inner seal with flush lip facing into the gearcase, then the outer seal with extended lip facing out of the gearcase.
Apply Triple-Guard grease to the seal lips after installing.
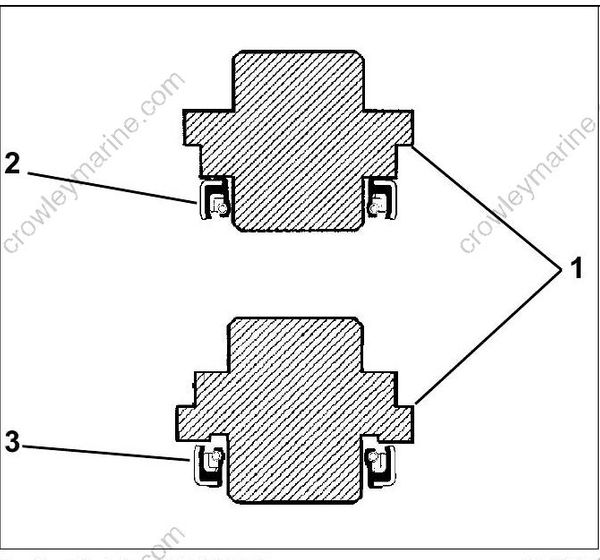
- Seal Installer, P/N 326552
- Inner seal
- Outer seal
