

DRIVESHAFT SHIMMING
IMPORTANT: If new pinion gear is needed, replace gear set before shimming.
Pinion gear backlash is achieved by using shims between the driveshaft bearing housing and the thrust washer. When installing a new thrust bearing or washer, bearing housing, pinion, or drive shaft, it is necessary to properly shim the assembly to restore factory clearance.
Use Driveshaft Shimming Tool, P/N 5005925 (replaces P/N 393185).
Shim gauge bars are precision made and should be handled carefully. The length of each bar is stamped near the part number. This dimension is 0.020 in. (0.508 mm) shorter than the actual shimmed length of the driveshaft.
“S2” TYPE GEARCASE
IMPORTANT: Clean pinion and driveshaft before assembly. Replace any damaged parts.
Assemble the driveshaft bearing housing, thrust washer, thrust bearing, and pinion onto the drive shaft. Install shimming screw, P/N 352878 and tighten to a torque of 37 to 41 ft. lbs. (50 to 56 N·m).
IMPORTANT: The original pinion screw is NOT used for shimming, but is used in final assembly. Use Shimming Screw, P/N 352878 (service tool) for shimming procedure.
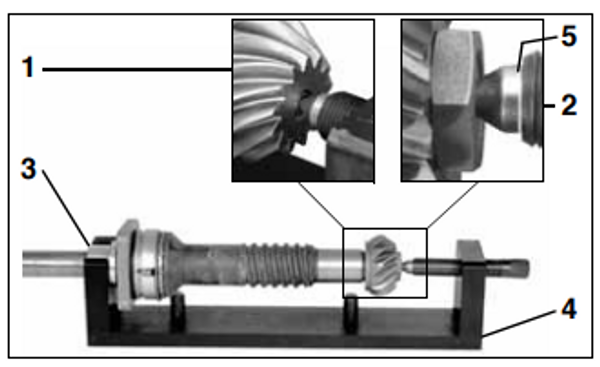
with end of threads. Tighten locking ring on preload screw.
- “S2” Type Gearcase - pinion shimming bolt
- “O”, “L”, “L2”, “M” and “M2”, Type Gearcases - pinion nut
- Collar
- Tool base
- Groove
Rotate the driveshaft several revolutions to seat bearings.
Lay the tool base on its side. Position the shim gauge bar against guide pins of the tool base.
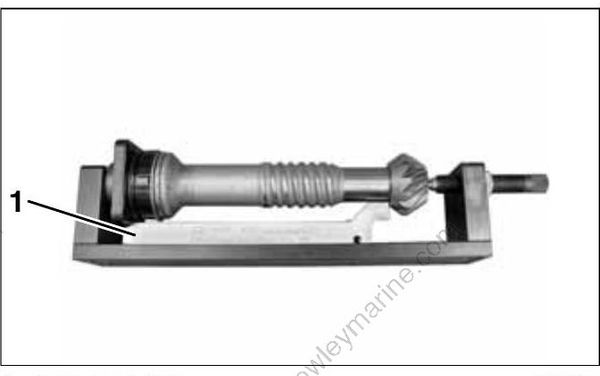
- Shim gauge bar
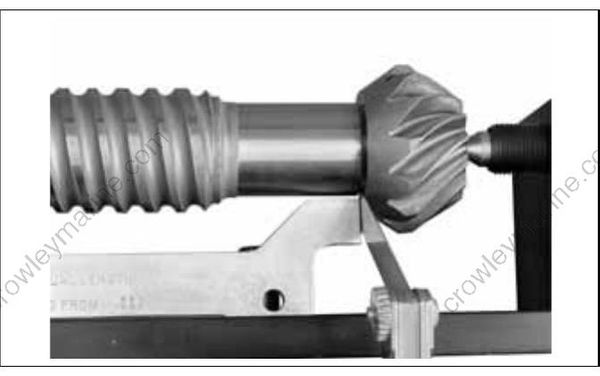
Check squareness of the bearing housing mounting surface by holding the shim gauge bar against the pinion while rotating just the bearing housing. Use a feeler gauge to measure clearance between the gauge bar and the bearing housing between each pair of screw holes. Replace the bearing housing and repeat check if variance is greater than 0.004 in. (0.010 mm).
Check squareness of the pinion to the driveshaft. Hold the shim gauge bar against the bearing housing (between the screw holes) while rotating just the driveshaft and pinion assembly. Measure clearance between the gauge bar and the pinion at several locations. If variance is greater than 0.002 in. (0.050 mm) replace the pinion or driveshaft, as necessary, and repeat check. Subtract the average clearance measurement from 0.020 in. (0.508 mm) to determine the correct shim thickness required. Select the fewest number of shims to achieve the correct thickness.
Remove the driveshaft from the tool and add the required shims between the bearing housing and the thrust washer.
IMPORTANT: Use extreme care when removing bearing housing to avoid damaging the seals.
Use Driveshaft Seal Protector, P/N 318674.
Check clearance again. The measurement between the gauge bar and pinion should be 0.020 in. (0.508 mm).
“S2” TYPE GEARCASE
Remove the shimming screw and pinion from the driveshaft.
IMPORTANT: Make sure shimming screw is not installed in assembled gearcase.
“O”, “L”, “L2”, “M” AND “M2” TYPE GEARCASES
Remove the nut and pinion from the driveshaft. Discard the nut.
