

Checking the top cowling
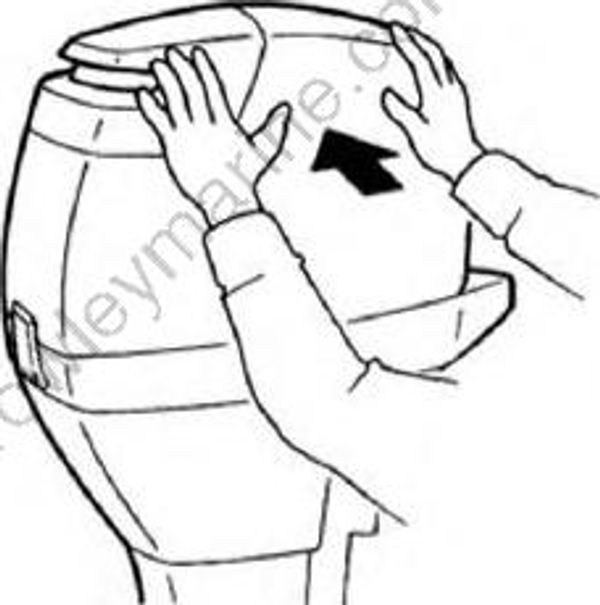
- Check the fitting by pushing the cowling with both hands. Adjust if necessary.
Loosen the nuts and bolts (1).
Move the hook (2) up or down slightly to adjust its position.
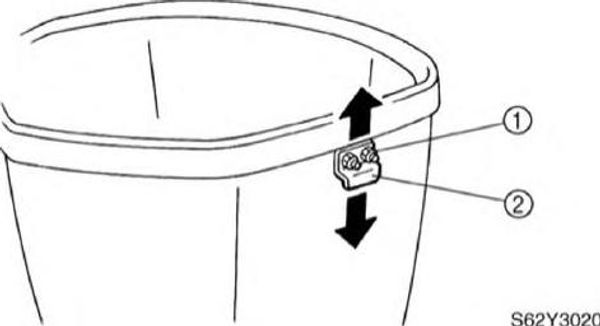
• To loosen the fitting, move the hook toward the seal.
• To tighten the fitting, move the hook away from the seal.
Tighten the nuts and bolts.
Check the fitting again and, if necessary, repeat steps 2-4.
Fuel system
Checking the fuel joint and fuel hoses (fuel joint-to-carburetor)
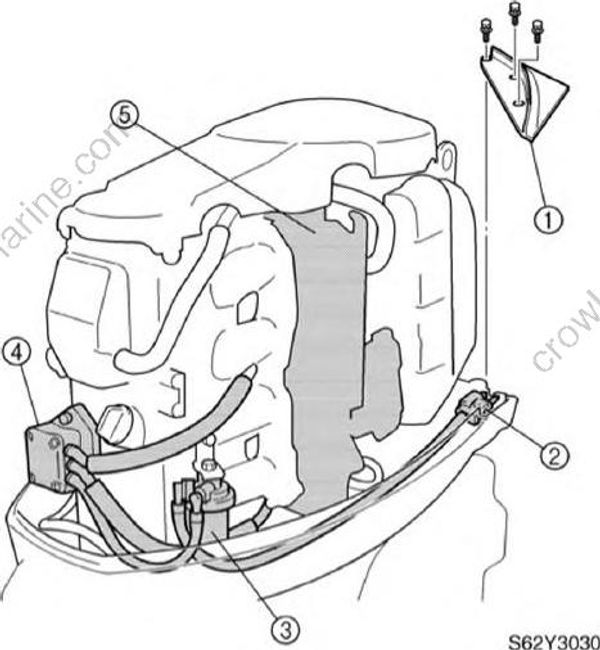
- Remove the plate (1), and then check the fuel hose connections and fuel joint (2) for leaks. Replace if necessary. Also, check the fuel filter (3), fuel pump (4), and carburetor (5) for leaks, and the fuel hoses for leaks and deterioration. Replace if necessary.
Checking the fuel filter
- Check the fuel filter element (1) for dirt and residue and check the fuel filter cup (2) for foreign substances and cracks. Clean with straight gasoline and replace the cup if necessary.
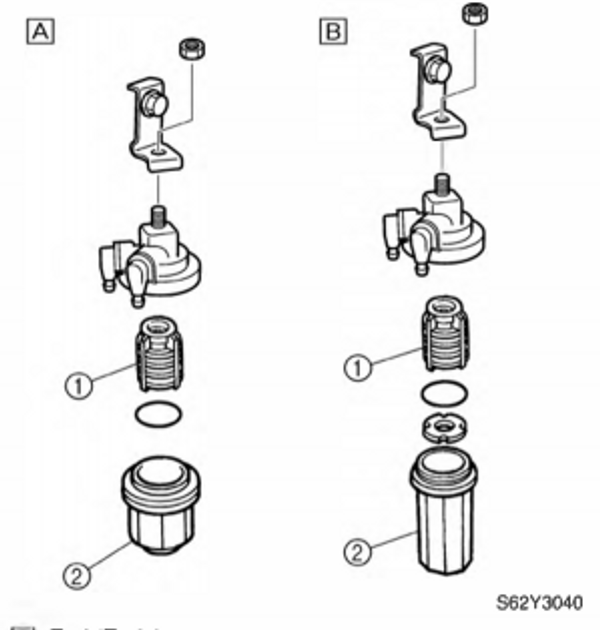
[A] F50/F50A
[B] T50/FT50B, FT50C
Be sure not to spill any fuel when removing the fuel filter cup.
Power unit
Checking the engine oil
Place the outboard in an upright position.
Remove the engine oil dipstick, wipe it clean, and then insert it back into the oil filler hole.
Remove the dipstick again to check the oil level and the oil for discoloration, and its viscosity.
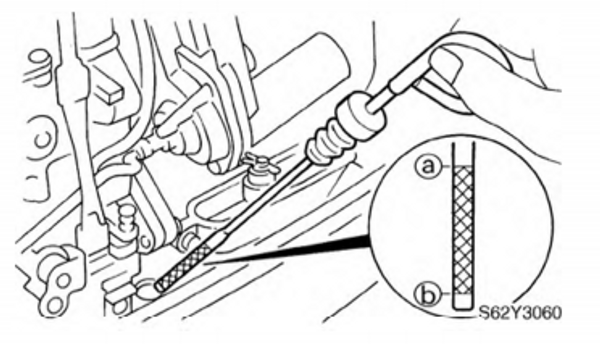
• Replace the oil if it appears milky or black.
• If the engine oil is above the maximum level mark (a), drain sufficient oil until the level is between (a) and (b).
• If the engine oil is below the minimum level mark (b), add sufficient oil until the level is between (a) and (b).
Replacing the engine oil
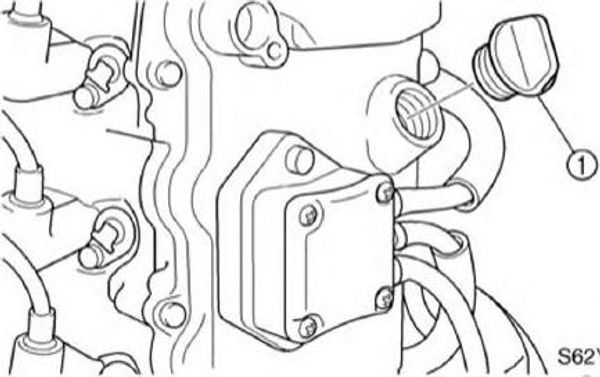
- Remove the engine oil dipstick and oil filler cap (1).
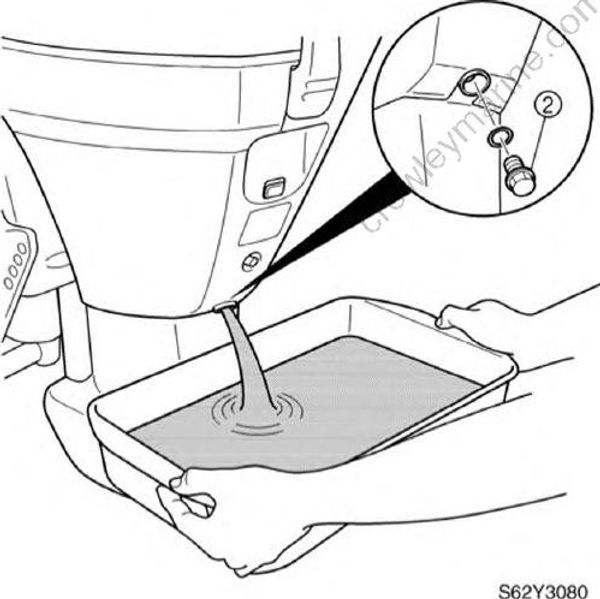
- Place a drain pan under the drain hole, and then remove the drain bolt (2) and let the oil drain completely.
- Place a rag under the oil filter, and then remove the filter.
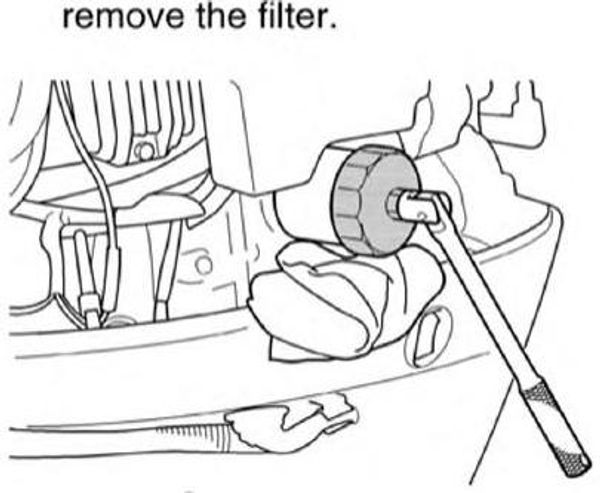
Oil filter wrench: YU-38411 / 90890-01426
Be sure to clean up any oil spills.
Apply a thin coat of the new engine oil to the O-ring of the new oil filter.
Install the oil filter, and then tighten it to the specified torque.
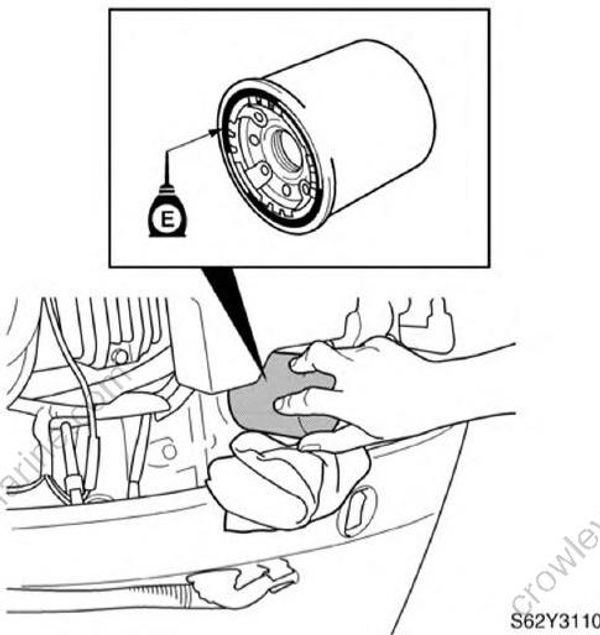
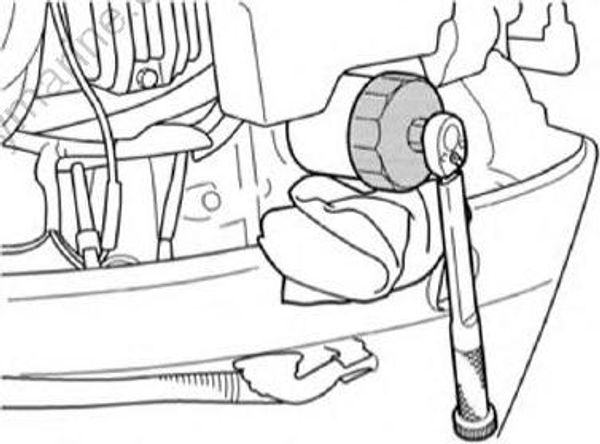
Oil filter wrench: YU-38411 / 90890-01426
Oil filter: 18 N•m (1.8 kgf•m, 13 ft•lb)
- Install the drain bolt, and then tighten it to the specified torque.
Drain bolt: 18 N•m (1.8 kgf•m, 13 ft•lb)
- Fill the specified engine oil into the oil filler hole.
Recommended engine oil: 4-stroke motor oil
API: SE, SF, SG, SH, or SJ
SAE: 10W-30 or 10W-40
