SAFETY INFORMATION
The following symbols and/or signal words may be used in this document:
Indicates a hazardous situation which, if not avoided, will result in death or serious injury.
Indicates a hazardous situation which, if not avoided, could result in death or serious injury.
Indicates a hazardous situation which, if not avoided, could result in minor or moderate personal injury.
Indicates an instruction which, if not followed, could severely damage engine components or other property.
These safety alert signal words mean:
ATTENTION!
BECOME ALERT!
YOUR SAFETY IS INVOLVED!
For safety reasons, this kit must be installed by an authorized Evinrude®/Johnson® dealer. This instruction sheet is not a substitute for work experience. Additional helpful information may be found in other service literature.
DO NOT perform any work until you have read and understood these instructions completely.
Torque wrench tightening specifications must strictly be adhered to.
Should removal of any locking fastener (lock tabs, locknuts, or patch screws) be required, always replace with a new one.
When replacement parts are required, use Evinrude/Johnson Genuine Parts or parts with equivalent characteristics, including type, strength and material. Use of substandard parts could result in injury or product malfunction.
Always wear EYE PROTECTION AND APPROPRIATE GLOVES when using power tools.
Unless otherwise specified, engine must be OFF when performing this work.
Always be aware of parts that can move, such as flywheels, propellers, etc.
Some components may be HOT. Always wait for engine to cool down before performing work.
If you use procedures or service tools that are not recommended in this instruction sheet, YOU ALONE must decide if your actions might injure people or damage the outboard.
This instruction sheet may be translated into other languages. In the event of any discrepancy, the English version shall prevail.
TO THE INSTALLER: Give this sheet and the operating instructions to the owner. Advise the owner of any special operation or maintenance information contained in the instructions.
TO THE OWNER: Save these instructions in your owner's kit. This sheet contains information important for the use and maintenance of your engine.
ICON SWITCH KITS
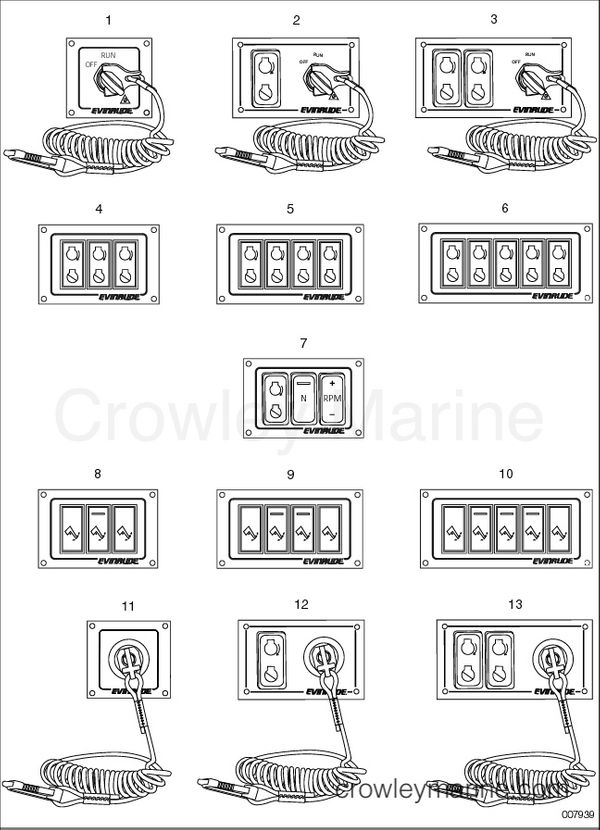
| No. | Description | P/N Switch Ay (Included in ICON Rigging Kit) | P/N Complete Switch Kit (Use for service) |
|---|---|---|---|
| Master Power/Key Switch Kits | |||
| 1 | Master Power/Key Switch | 0764923 | 0765371 |
| 2 | Master Power/Key Switch, with Single Engine Start/Stop Switch | 0764925 | 0765373 |
| 3 | Master Power/Key Switch, with Dual Engine Start/Stop Switches | 0764926 | 0765374 |
| START/STOP Switch Kits | |||
| 4 | Start/Stop Switch, 3 engines | 0764927 | 0765375 |
| 5 | Start/Stop Switch, 4 engines | 0764928 | 0765376 |
| 6 | Start/Stop Switch, 5 engines | 0764929 | 0765377 |
| Concealed Side Mount Remote Control Switch Kit | |||
| 7 | Start/Stop / NEUTRAL / RPM Switches, single engine | 0764930 | 0765378 |
| Trim and Tilt Switch Kits (3, 4, or 5 engines) | |||
| 8 | Trim and Tilt Switch, 3 engines | 0764963 | 0765388 |
| 9 | Trim and Tilt Switch, 4 engines | 0764964 | 0765389 |
| 10 | Trim and Tilt Switch, 5 engines | 0764965 | 0765390 |
| Emergency Stop Switches | |||
| 11 | Emergency Stop Switch | 0764927 | 0765372 |
| 12 | Emergency Stop Switch, with Single Engine Start/Stop Switch | 0764931 | 0765379 |
| 13 | Emergency Stop Switch, with Dual Engine Start/Stop Switches | 0764932 | 0765380 |
INSTALLATION PROCEDURES
Refer to the ICON System Quick Connection Guide, P/N 0764953, for ICON System Diagram.
Disconnect the battery cables at the battery. Always disconnect the ground cable first and the positive cable last.
Always test operation once installed.
Failure to install switches properly and to test for proper switch operation after installation can result in the loss of boat control.
Mounting Locations
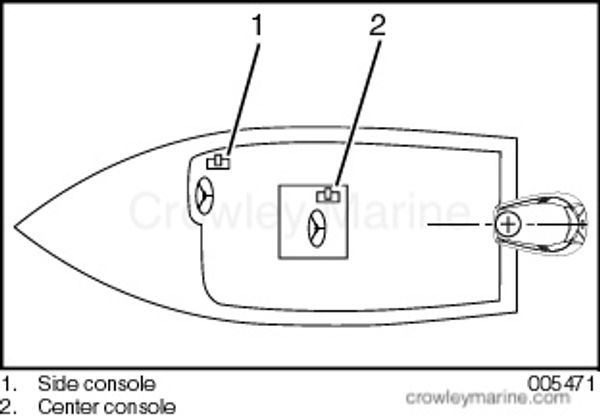
Select the appropriate mounting locations for switches based on the boat's configuration, side console or center console.
The mounting location must be a flat surface and must be strong enough to provide rigid support. Strengthen mounting surface as necessary.
Place the switch panel at the proposed location and check the clearances around the switches.
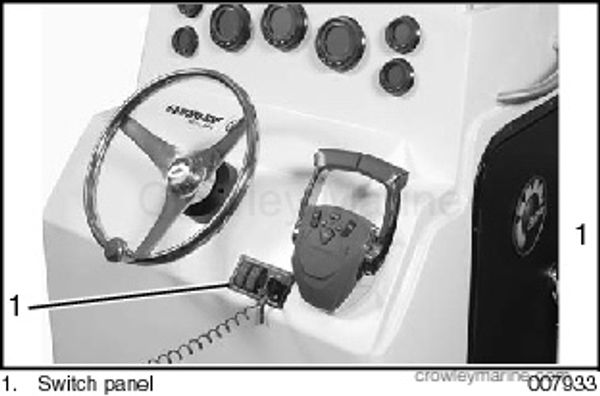
ICON start/stop switch kits should be mounted within 30 in. (76 cm) of the remote control due to wire harness length.
ICON master power/key switch kits should be mounted close to the start/stop switch kit.
On second station installations, ICON the second station start/stop switch kit should be mounted close to the second station emergency stop switch kit.
Position the switch panel in a location that allows proper access to the switches. There must be adequate space behind the switch panels for wire and cable routing; and to make switch connections.
Mounting Holes
Select the correct drill template (see pages 15, 17 and 19) to cut the mounting holes for the switch panel.
Make sure the switch panel location has all the required clearances before drilling or cutting.
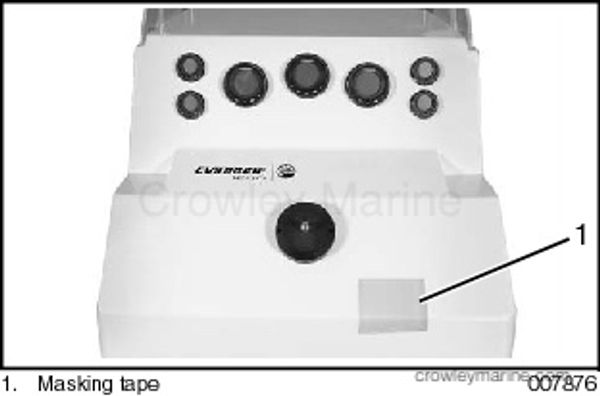
Protect mounting surfaces from damage while drilling. Apply masking tape to fiberglass surfaces. Use appropriate protection for other surfaces.
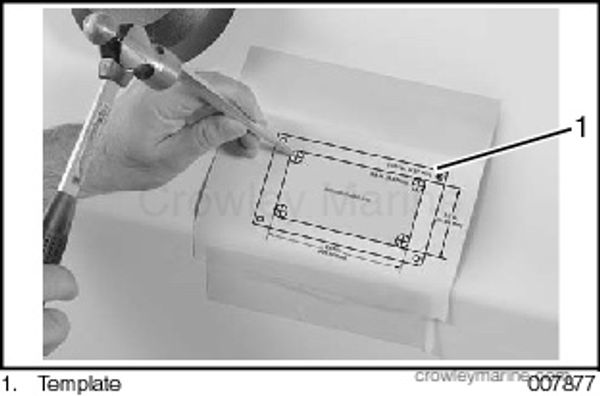
Position the template for the switch panel. Use a center punch to mark the drill locations.
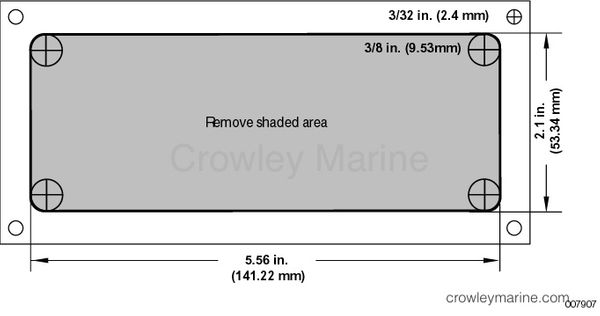
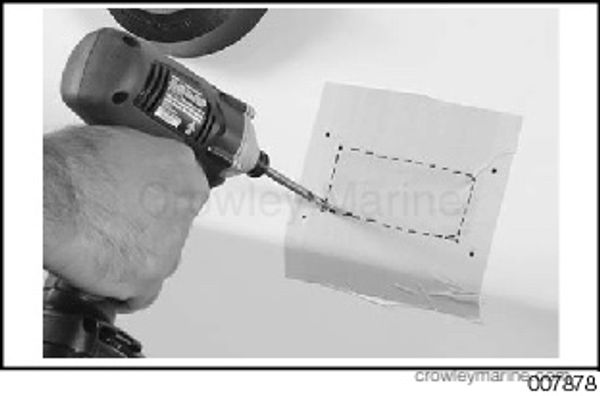
Drill a 3/8 in. (9.5 mm) hole at each corner of the shaded area of the template.
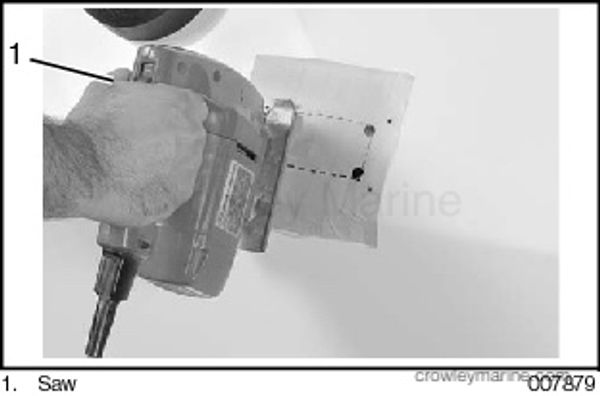
Use a reciprocating saw to cut the hole for the switch panel.
Install the switch panel on console.
Drill four (4) 3/32 in. (2.4 mm) holes to mount the switch panel. Secure the switch panel with four screws. Tighten screws securely.

Make sure the switch panel is secured to the console and does not move during operation.
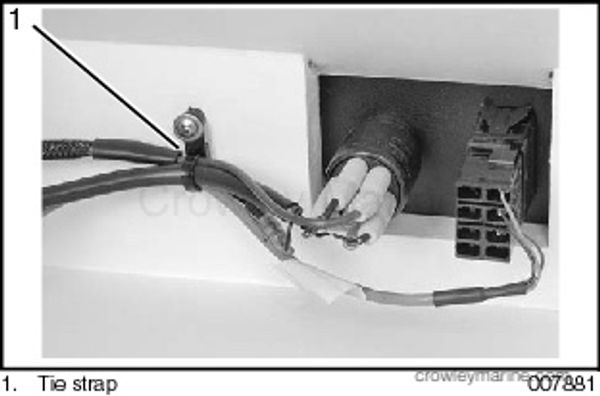
Use tie straps to secure the master power/key switch wiring.
ICON Buss Cables
The ICON System uses ICON buss cables with proprietary 6-pin threaded, Molex-type connectors.
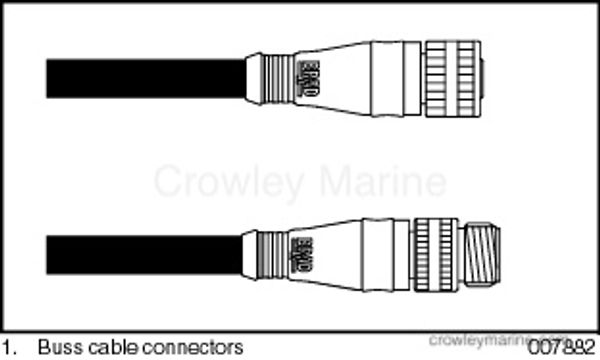
Do not force connectors or locking rings. Properly aligned connectors assemble easily.
Do not use Electrical Grease on ICON buss cable connectors.
To assemble the connectors:
Use the large tabs and small tabs to carefully align buss cable connectors.
Carefully align pins and sockets of connectors. Do NOT force connectors together.
Tighten locking rings of buss connectors finger tight. Do NOT use locking rings to force connectors together.
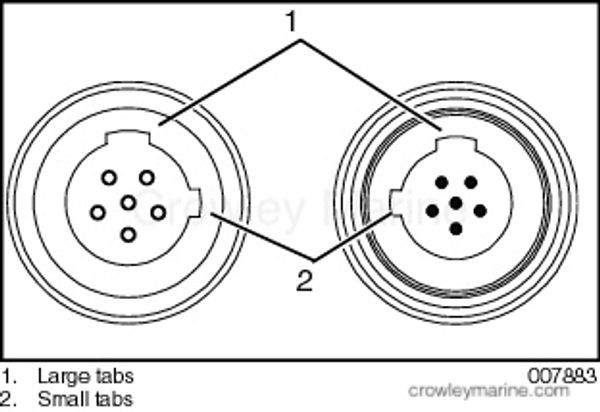
Do not rotate connectors until they align. This could result in a mismatched connection. It is possible for each pin to enter a socket even if the tabs are misaligned. Look at the tabs to ensure connector alignment prior to making the connection.
ICON Switch Connections
Connect the buss cable from the ICON master power/key switch or the ICON emergency stop switch to an ICON hub (6 ports). If the installation requires a buss cable extension, use no more than one extension.
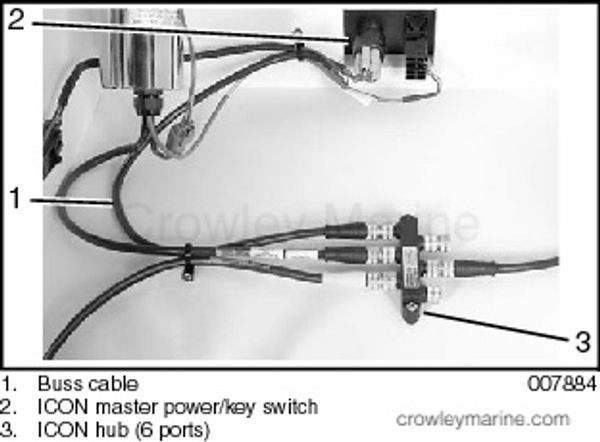
Connect the ICON start/stop switch to the ICON remote control.
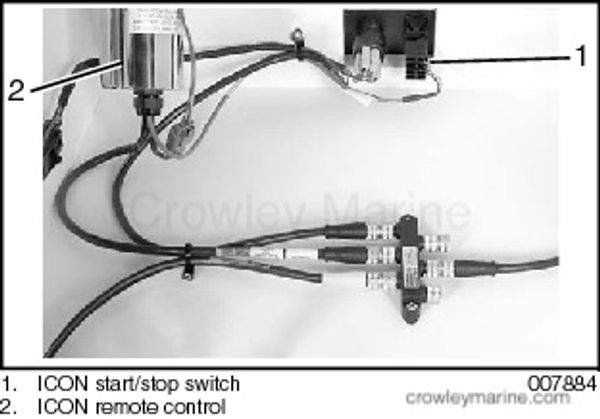
After all switch and cable connections are complete and the installation is completed, connect the battery cables. Always connect the positive cable first and the ground cable last.
Master Power/Key Switch
Connect the buss cable from the ICON master power/key switch to the ICON hub. Apply a light coat of Electrical Grease onto the seal of the Deutsch connectors. Push power cable connectors together until latched.

Master Power/Key Switch with Single Engine START/STOP Switch
Connect the buss cable from the ICON master power/key switch to an ICON hub. Apply a light coat of Electrical Grease onto the seal of the Deutsch connectors. Push power cable connectors together until latched. Install the connector from remote control onto START/STOP switch until latched.

Master Power/Key Switch with Dual Engine START/STOP Switches
Connect the buss cable from the ICON master power/key switch to an ICON hub. Apply a light coat of Electrical Grease onto the seal of the Deutsch connectors. Push power cable connectors together until latched. Install the connector from remote control into the connector of the START/STOP switches until latched.

Master Power/Key Switch and Multiple Engine START/STOP Switches (3, 4 or 5 engines)
Connect the buss cable from the ICON master power/key switch to an ICON hub. Apply a light coat of Electrical Grease onto the seal of the Deutsch connectors. Push power cable connectors together until latched. Install the connector from remote control into the connector of the START/STOP switches until latched.

Master Power/Key Switch and START/STOP, NEUTRAL, RPM Switch (Concealed Side Mount Remote Control – single engine)
Connect the buss cable from the ICON master power/key switch to an ICON hub. Apply a light coat of Electrical Grease onto the seal of the Deutsch connectors. Push power cable connectors together until latched. Install connectors from control module harness onto START/STOP, NEUTRAL and RPM switches until latched. See diagram for the locations of the alignments pins.

Trim and Tilt Switch Kits (3, 4, or 5 engines)
Push the trim and tilt plug into the trim and tilt socket of the trim and tilt switch until latched.

Emergency Stop Switch with Single Engine START/STOP Switch
Connect the buss cable from the ICON emergency stop switch to the second station ICON remote control and to a buss cable connected to an ICON hub. Install connector from remote control onto START/STOP switch until latched. Refer to ICON Buss Cables on page 6.

Emergency Stop Switch with Dual Engine START/STOP Switches
Connect the buss cable from the ICON emergency stop switch to the second station ICON remote control and to a buss cable connected to an ICON hub. Apply a light coat of Electrical Grease onto the seal of the Deutsch connector. Install connector from the remote control into the connector of the START/STOP switches until latched. Refer to ICON Buss Cables on page 6.
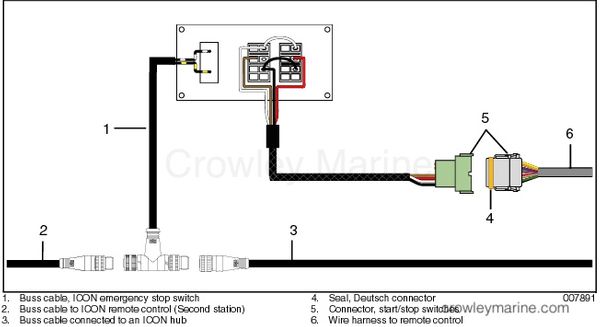
Emergency Stop Switch with Multiple Engine START/STOP Switches
Connect the buss cable from the ICON emergency stop switch to the second station ICON remote control and to a buss cable connected to an ICON hub. Apply a light coat of Electrical Grease onto the seal of the Deutsch connector. Install connector from the remote control into the connector of the START/STOP switches until latched. Refer to ICON Buss Cables on page 6. Four engine switch panel shown.

OPERATIONAL TESTS
DO NOT run outboard without a water supply to the outboard's cooling system. Cooling system and/or powerhead damage could occur. Be sure the water intake screens are below the water surface.
Once operational tests are complete, turn the master power/key switch to the OFF position.
Master Power/Key Switch
The master power/key switch turns power ON and OFF to the:
Outboard(s)
ICON System
NMEA 2000 network/gauge network
Accessory Power Harness and Relay Kit, P/N 0765296
Turn the master power/key switch to the RUN position. All devices connected to the ICON System and the gauge network should turn on.
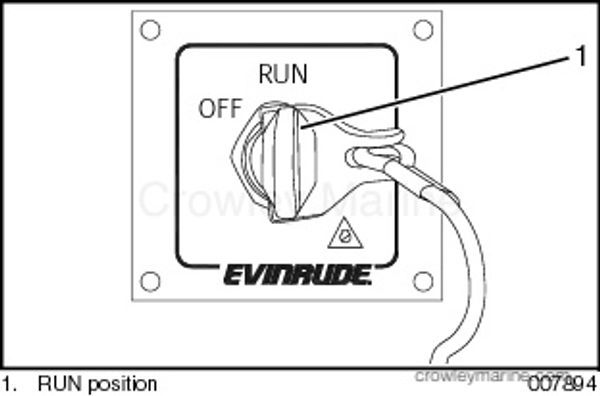
Turn the master power/key switch to the OFF position. All devices connected to the ICON System and the gauge network should turn off.
Turning the master power/key switch to the OFF position also stops all outboards and turns off power to all stations.
Emergency Stop Test
Main Station
Check emergency stop function. Push clip of emergency stop lanyard onto master power/key switch.
If boat is equipped with an optional second or remote station an emergency stop lanyard must be installed on the emergency stop switch of the second station. Engine(s) will not start without emergency stop clip in place. Refer to Second or Remote Station.
Start the outboard(s). Refer to Engine START/STOP Switches on page 13.
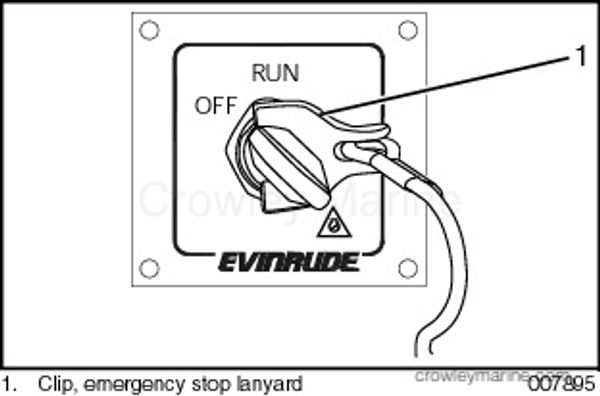
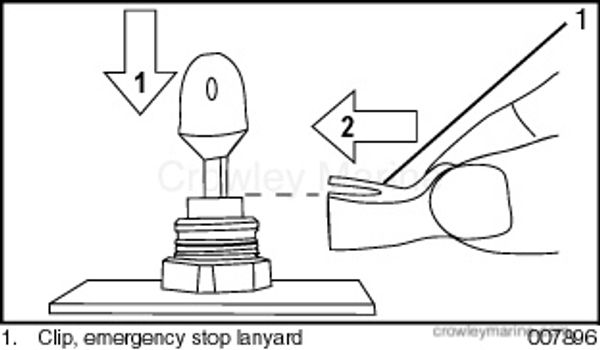
With outboard(s) running, remove emergency stop lanyard. Outboard(s) must STOP. If outboard does not stop, check master power/key switch and wiring. Repair as needed.
Reinstall clip on master power /key switch.
Second or Remote Station
Push clip of emergency stop lanyard onto emergency stop switch. Restart outboard(s).
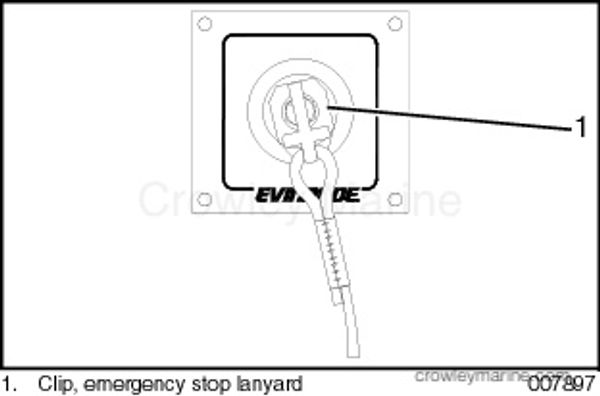
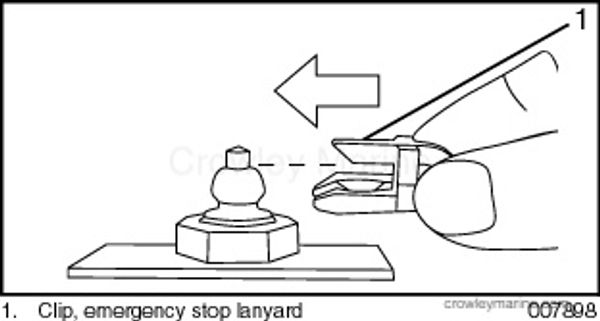
With outboard(s) running remove emergency stop lanyard from second station emergency stop switch. Outboard(s) must STOP. If outboard does not stop, check emergency stop switch and wiring. Repair as needed.
Engine START/STOP Switches
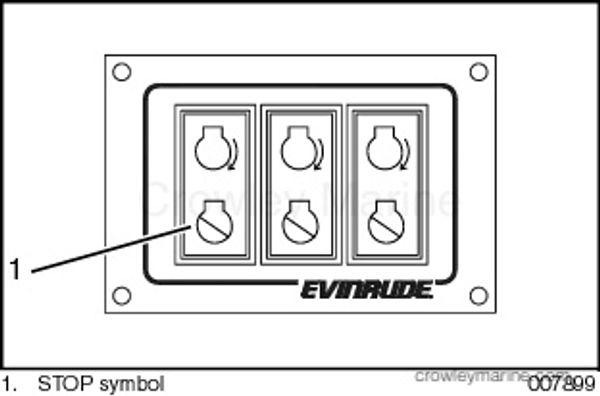
One START/STOP switch is used for each engine. START/STOP switches are used at each operator station.
Press the START symbol of switch to start the outboard. Crank the engine no longer than 20 seconds.
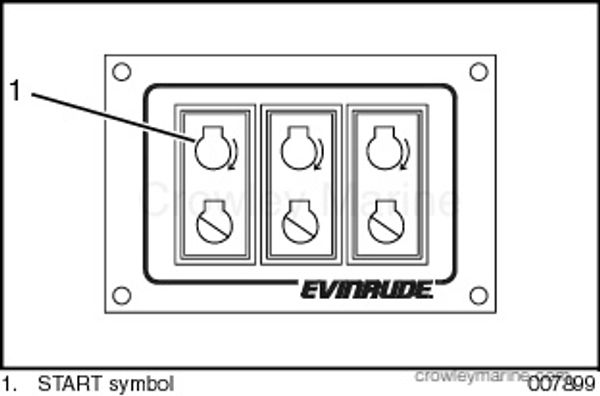
The starter motor can be damaged if operated continuously for more than 20 seconds.
Upon start-up, release the switch.
Press and release the STOP symbol of switch to stop the outboard.
START, NEUTRAL and RPM Switches
A START, NEUTRAL and RPM switch panel is used with concealed side mount remote controls.
Refer to Engine START/STOP Switches on page 13 for START/STOP switch use.
The NEUTRAL (N) throttle switch allows operation of the throttle without shifting the outboard into FORWARD or REVERSE gear.
Press the N switch. The NEUTRAL indicator LED flashes. Advance the control lever in a forward direction to increase engine speed.

The RPM switch allows the operator to gradually adjust engine RPM. The RPM adjustment range is limited to 5% of the throttle setting. Each press of the RPM switch changes throttle setting 1%. The adjustment range is approximately 100 to 200 RPM depending on engine speed.
To use the RPM adjustment feature, all control levers MUST be in FORWARD gear and engine speed must be above 500 RPM.
Press the + side of the RPM switch to increase engine speed. Press the – side of the RPM switch to decrease engine speed.
Reposition the control lever and start the process again for further adjustment. To cancel the RPM adjustment switch setting move the control lever to a faster or slower position.

Trim and Tilt Switches (3, 4, or 5 engines)
Installations of three, four or five outboards use a dashboard mounted trim and tilt switches to adjust trim and tilt on the individual outboards. Indicator LED on the center switch(s) turns ON when outboard is in NEUTRAL.
Press the upper part of the trim and tilt switch to trim/tilt the outboard up.
Press the lower part of the trim and tilt switch to trim/tilt the outboard down.

ICON MASTER POWER/KEY SWITCH, P/N 0764923, 0765371 DRILL TEMPLATE
ICON EMERGENCY STOP SWITCH, P/N 0764924, 0765372 DRILL TEMPLATE
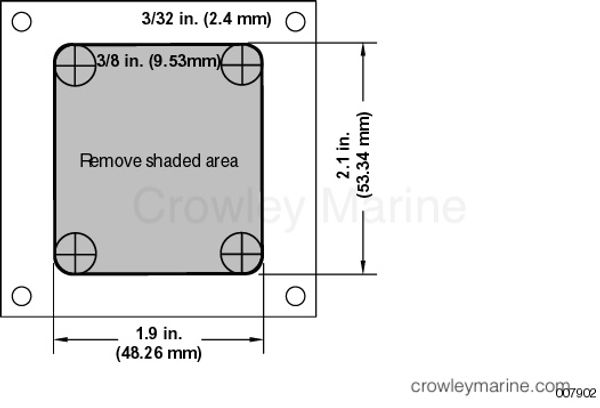
ICON MASTER POWER/KEY SWITCH WITH SINGLE START/STOP SWITCH, P/N 0764925, 0765373 DRILL TEMPLATE
ICON EMERGENCY STOP SWITCH WITH SINGLE START/STOP SWITCH, P/N 0764931, 0765379 DRILL TEMPLATE
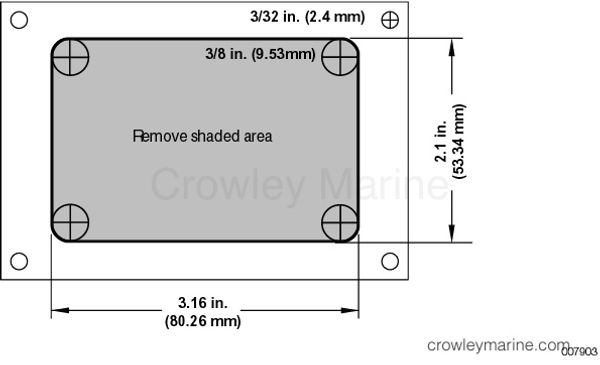
ICON MASTER POWER/KEY SWITCH WITH DUAL START/STOP SWITCH, P/N 0764926, 0765374 DRILL TEMPLATE
ICON EMERGENCY STOP SWITCH WITH DUAL START/STOP SWITCH, P/N 0764932, 0765380 DRILL TEMPLATE
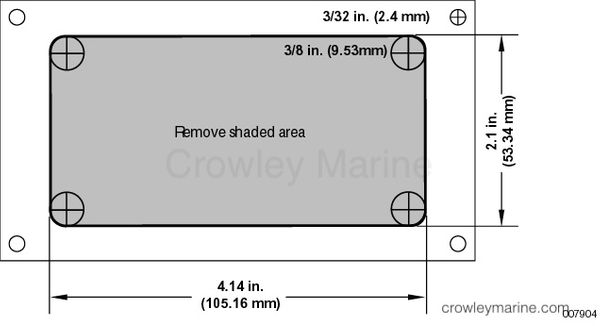
ICON START/STOP, N, RPM, SWITCH, P/N 0764930, 0765378 DRILL TEMPLATE
ICON START/STOP SWITCH, 3 ENGINE, P/N 0764927, 0765375 DRILL TEMPLATE
ICON TRIM AND TILT SWITCH, 3 ENGINE, P/N 0764963, 0765388 DRILL TEMPLATE
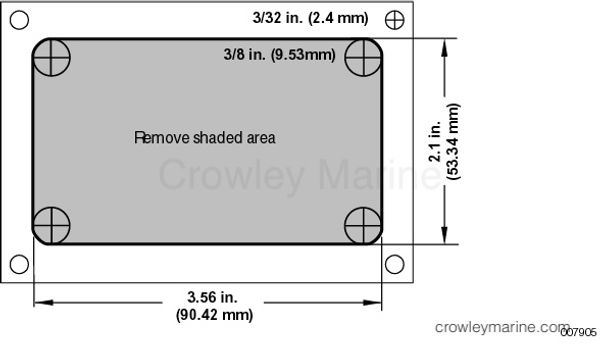
ICON START/STOP SWITCH, 4 ENGINE, P/N 0764928, 0765376 DRILL TEMPLATE
ICON TRIM AND TILT SWITCH, 4 ENGINE, P/N 0764964, 0765389 DRILL TEMPLATE
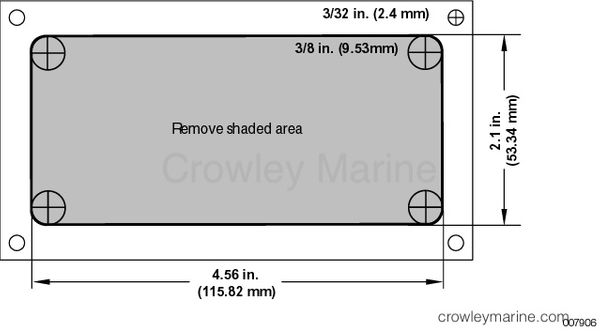
ICON START/STOP SWITCH, 5 ENGINE, P/N 0764929, 0765377 DRILL TEMPLATE
ICON TRIM AND TILT SWITCH, 5 ENGINE, P/N 0764965, 0765390 DRILL TEMPLATE