

Stator Tests
Use appropriate test leads or adapters such as Test Probe Kit, P/N 342677, when performing electrical tests.
NEVER pierce the insulation of the engine wiring, or use any piercing-style test probe. Piercing insulation damages the wire and can cause other unintended electrical problems.
The stator consists of 3 windings (6 poles each) on a 7 inch diameter core and generates an output voltage of 55 VAC (1700 watts maximum). This voltage is converted by the EMM and provides 55 VDC for fuel injector, fuel and oil pump operation. The ignition module of EMM is also powered by the 55 VDC output.
Stator Resistance Tests
Use a digital multimeter with appropriate test probe leads to check resistance of stator windings.
Disconnect the stator (6-pin) connector from the engine harness (6-pin) connector.
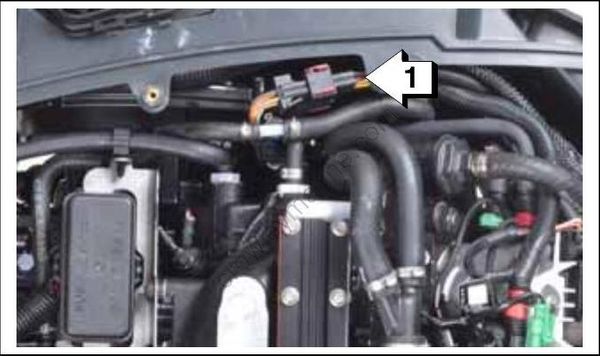
- Stator connector
Use an appropriate adapter to connect the meter leads to the following pins of the stator connector:
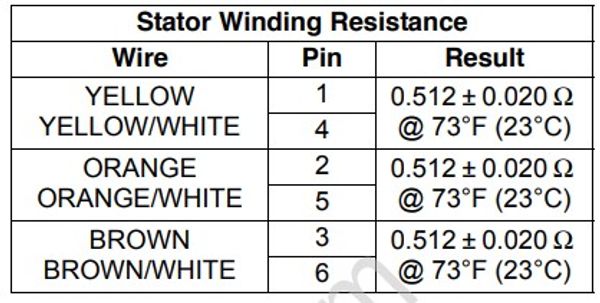
IMPORTANT: A reading of less than 2 ohms is acceptable. Make sure meter is calibrated to read 1 ohm or less.
Check for a grounded winding. Connect one meter lead to ground and alternately connect the other meter lead to each stator wire. Meter should read no continuity. If meter reads continuity, replace stator.
Stator Voltage Output Test
To prevent accidental starting of outboard, disconnect the crankshaft position sensor (CPS).
Use a voltmeter to check the stator output voltage. Set meter to read 110 VAC output. Disconnect the CPS.
Disconnect the stator (6-pin) connector from the engine harness (6-pin) connector.
Connect Stator Test Adapter tool, P/N 5006211, to the stator connector.
Connect meter leads to terminals of adapter tool.
With a fully charged battery, crank the outboard (100 RPM minimum) and observe meter reading:
- 20 VAC at 100 RPM
- 30 VAC at 150 RPM
- 42 VAC at 200 RPM
- 52 VAC at 250 RPM
- 62 VAC at 300 RPM
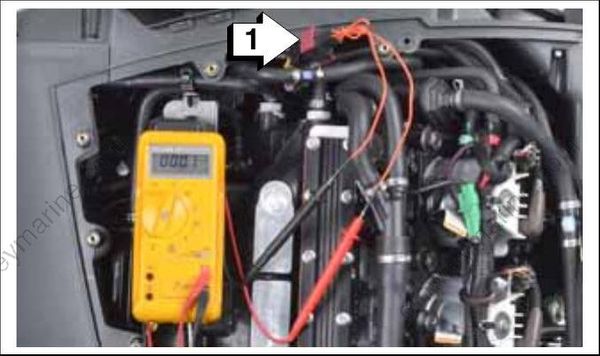
- Stator Test Adapter
Charging System Tests
The charging system provides 12 VDC for battery charging. Alternator total output, or GROSS output is:
- 10 A at 500 RPM
- 50 A from 2000 RPM to WOT.
Charging system available output to the battery, or NET output is shown in the following graph:
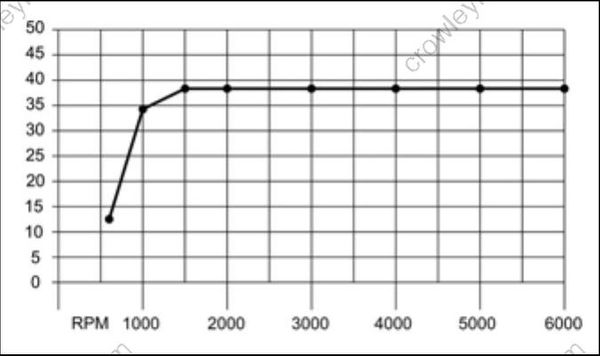
Battery Charging Current (Net) @ 14 VDC
Use Evinrude Diagnostics software to monitor battery voltage and GROSS charge current.
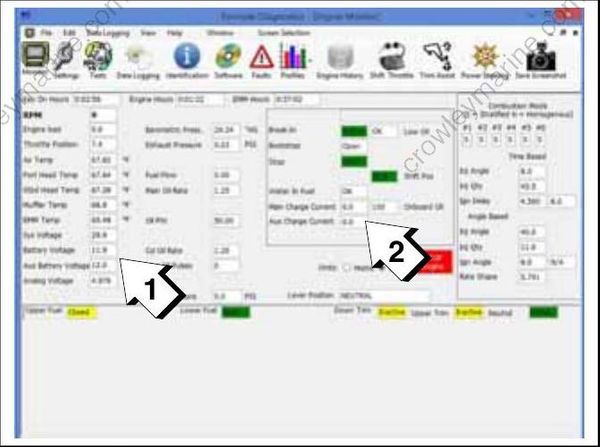
Engine Monitor Screen
- Main and auxiliary battery voltage display
- Main and auxiliary charge current display
Use an inductive amp meter to monitor NET charge current at the battery. Fluke†, Snap-On† or various other digital meters should be available through local tool suppliers.
