

Step 1: Fuel Manifolds
Removal
Disconnect the battery cables at the battery.
Relieve fuel system pressure. Refer to Relieving Fuel System Pressure on p. 168.
Remove fuel manifold retainer screws and remove retainer from fuel injector.
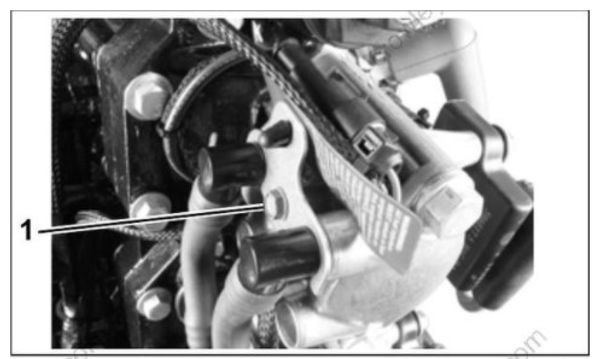
- Screw
Disconnect fuel manifold fittings from fuel injector ports.
Remove clamps and disconnect the fuel manifolds as follows:
- Fuel supply manifold to circulation pump
- Fuel return manifold to vapor separator
Remove any tie straps used to secure manifold(s) in place, then remove the manifold assembly(s).
Installation
Installation is essentially the reverse of removal. Pay close attention when performing the following additional tasks.
Connect battery cables.
Start outboard briefly to pressurize fuel system. Turn outboard OFF and inspect all fuel system components for leaks. Repair any fuel leaks.
Install lower engine covers and air silencer.
Step 2: INTAKE MANIFOLD
Removal
Disconnect throttle linkage. Remove throttle body screws and throttle body assembly.
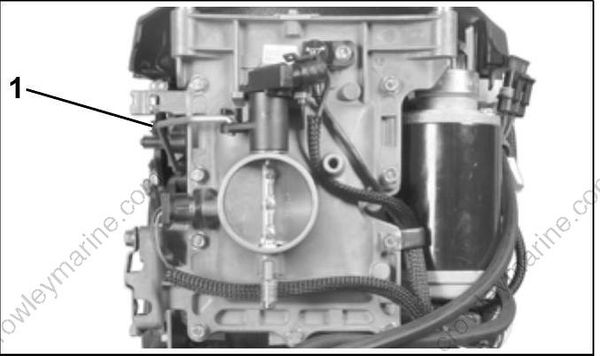
- Linkage
Remove gasket from throttle body.
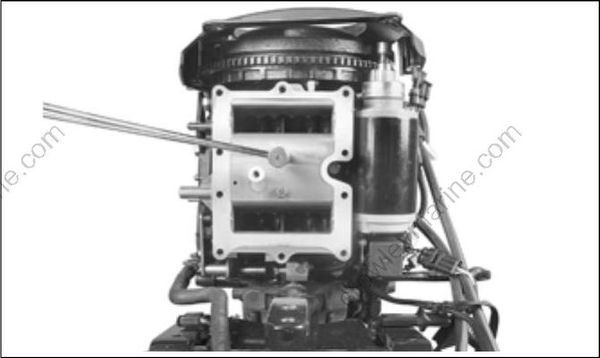
Remove screws and reed plate assembly from the cylinder/crankcase assembly.
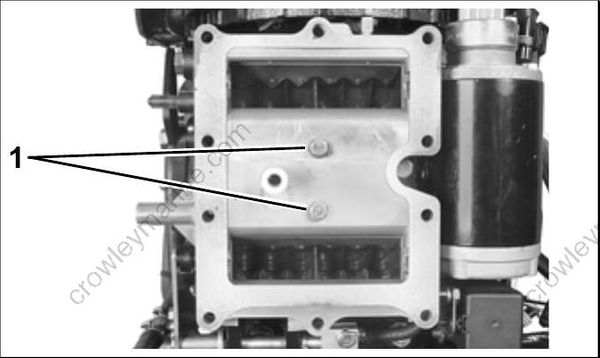
- Screws
Disassembly
Visually inspect reed valve assemblies. For disassembly of the reed valve assembly, see Inspection on p. 175.
All reed plate assembly and reed valve assemblies must be cleaned prior to reassembly. DO NOT use strong carburetor cleaner or the hot soaking tank method for cleaning.
Remove the reed valve retainer screws and remove the assembly.
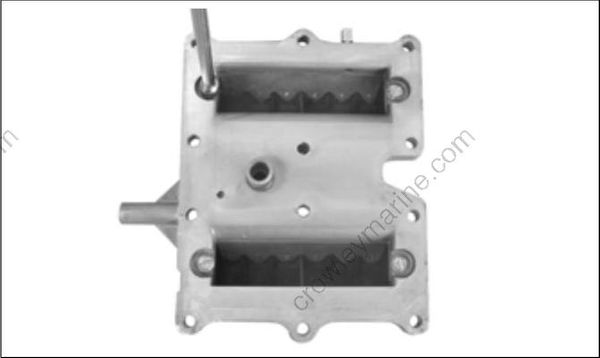
Use caution to prevent damaging reed valve assemblies.
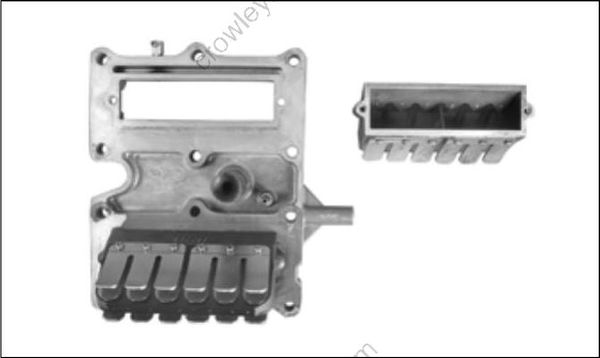
Inspection
IMPORTANT: DO NOT disassemble reed valve assemblies unless reed plate seats, reed valves, or reed stops are damaged, corroded, or contaminated with debris. Damaged reed plates are not serviceable and are replaced as an assembly.
Inspect the intake manifold. All gasket surfaces must be cleaned, smooth, and free of nicks. Use a machinist’s straight-edge to check flatness in all directions. Surface must be flat, ±0.004 in. (0.10 mm).
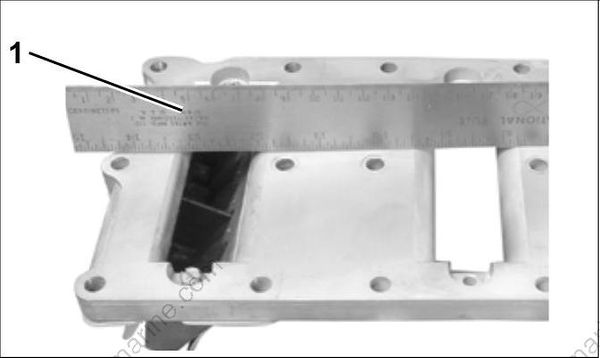
- Straight-edge
Inspect the leaf plate assemblies for damage or contamination:
- Leaf plates must not be distorted.
- Leaf valve must not be cracked or chipped.
- Leaf plate stops must not be distorted or loose.
- Leaf plate assemblies must be clean.
Assembly
Remove old adhesive from reed valve retaining screws.
Install gasket on reed plate assembly. DO NOT use sealer on the gasket.
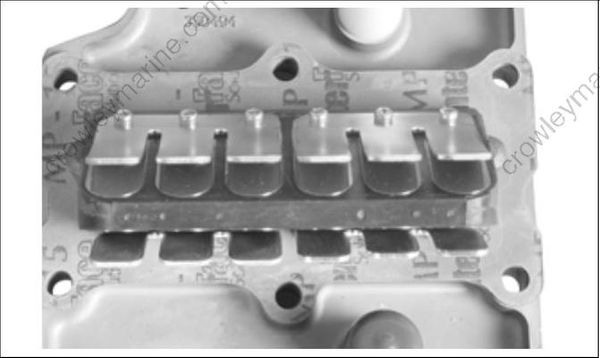
Prime the threads with Locquic Primer and let dry. Apply Nut Lock to threads. Position reed valve on reed plate and install screws. Final torque is 25 to 35 in. lbs. (2.8 to 4.0 N·m).
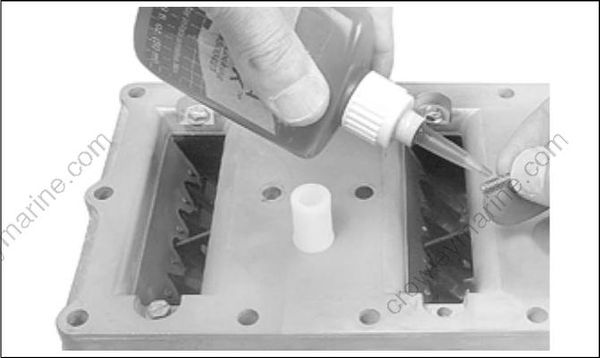
Installation
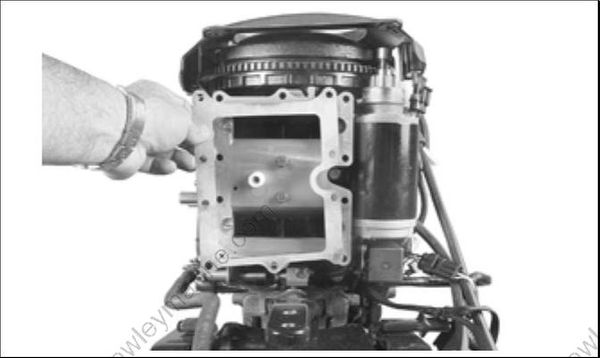
Position reed plate assembly on cylinder/crank case.
Apply Nut Lock to screws. Install all screws.
Tighten the center screws first and expand outward. Tighten in stages. Final torque is 60 to 120 in. lbs. (7 to 14 N·m).
Position gasket on throttle body. Install throttle body on reed plate and install screws.
Tighten the center screws first and expand outward. Final torque is 60 to 120 in. lbs. (7 to 14 N·m).
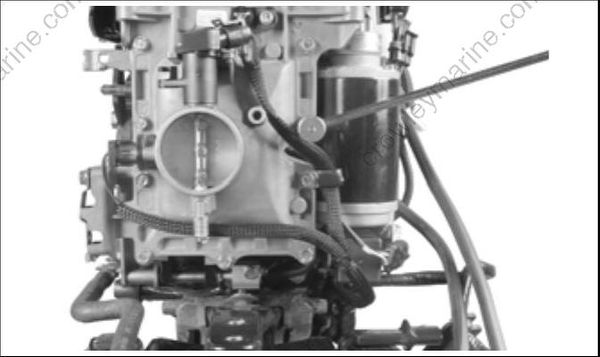
Install upper main bearing vent hose and secure with tie strap.
Connect throttle linkage and electrical connectors.
Refer to TPS Calibration on p. 143.
