

Disassembly
Remove the four impeller housing screws.
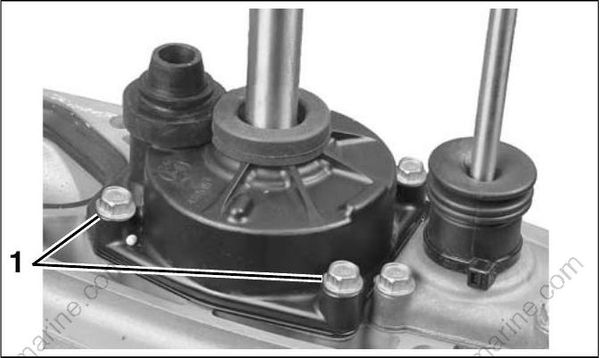
001203
- Impeller housing screws
Slide the water pump of f the driveshaft. Remove the impeller key, impeller plate, and gasket. Discard the gasket.
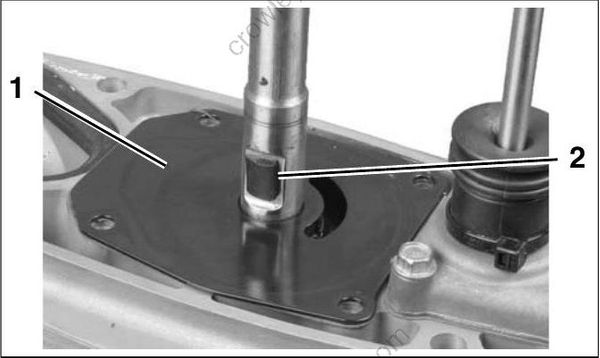
001214
- Impeller plate
- Drive key
Remove all the parts from the housing.
Inspection
Check impeller for overheating, hub separation, and other wear or damage.
Check liner and wear plate for scoring, distortion, and impeller material transfer.
Inspect the housing for cracks or melting.
Make sure gasket surface is clean and smooth.
Assembly
Lightly coat the exterior rim of the impeller cup with Gasket Sealing Compound. Install the cup in the impeller housing. The cup locks in place in the housing with a square index tab.
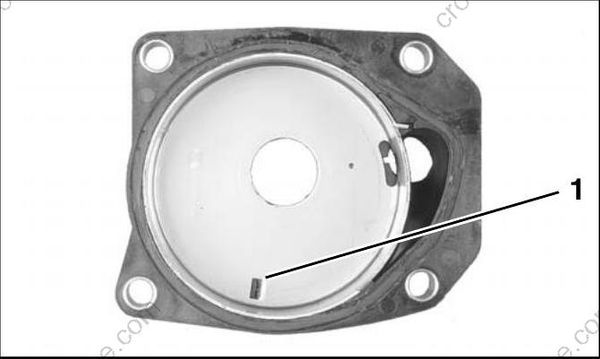
001215
- Index tab
IMPORTANT: Do not allow any sealer to get into the air bleed groove in the impeller housing. If this groove is blocked by adhesive, the pump will lose its prime and will not pump water.
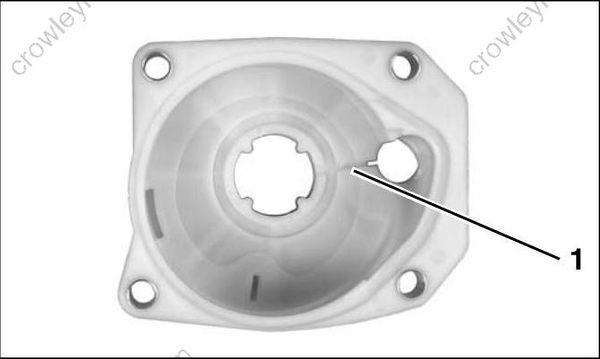
006415
- Air bleed groove
Lightly coat the inside of the liner with TripleGuard grease. With a counter clockwise rotation, install the impeller into the liner with the slot for the impeller key facing out.
Apply a thin bead of Adhesive 847 in the seal groove, and install the special shaped O-ring seal.
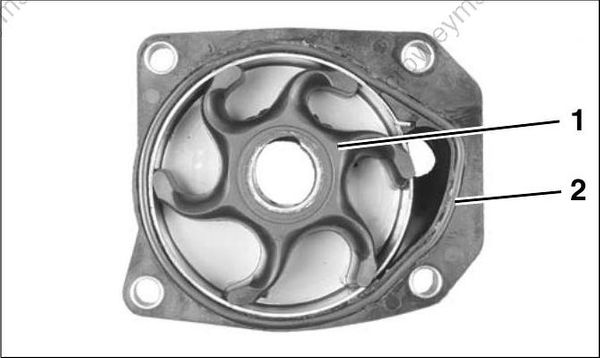
001216
- Impeller
- O-ring seal
Apply Gasket Sealing Compound to both sides of a new impeller plate gasket. Install the gasket and impeller plate.
Apply Triple-Guard grease to temporarily hold impeller key in place.
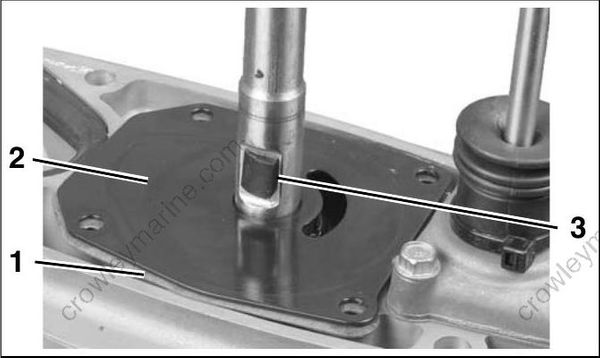
001217
- Impeller plate gasket
- Impeller plate
- Drive key
The sharp edge of the key is the leading edge in clockwise rotation.
Slide the water pump down the driveshaft. Align impeller slot with the impeller key . Rot ate the driveshaft to engage the key with the impeller, and slide water pump down over key. Be sure impeller key does not fall out of position.
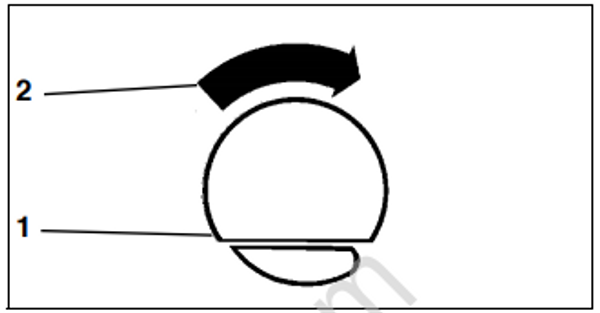
CO2995
- Sharp edge of drive key
- Direction of driveshaft rotation
Make sure the impeller engages the impeller key. Serious powerhead damage will result if impeller key is not in place.
Align the impeller housing with the gear case. Apply Gasket Sealing Compound to threads of the four impeller ho using screws. Inst all the screws and tighten to a torque of 60 to 84 in. lbs. (7 to 9.5 N·m).
Install the water tube grommet on the impeller housing.
Apply a thin bead of Adhesive 847 to g roove of the impeller housing grommet. Install the grommet on the impeller housing.
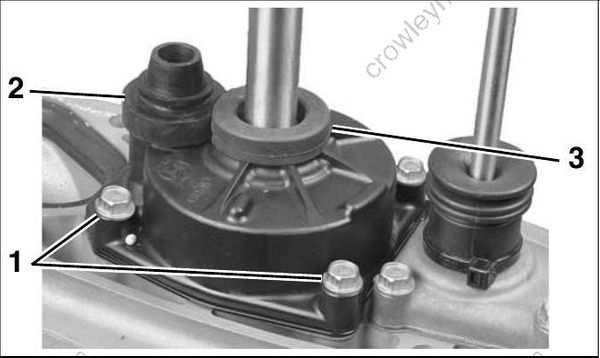
001203
- Housing screws
- Water tube grommet
- Impeller housing grommet
Before installing gearcase, shift rod adjustment MUST be checked. Refer to SHIFT ROD ADJUSTMENT on p. 244.
