Relay Testing
When the trim-UP button is pressed, the UP relay is energized and connects the blue trim motor wire to the battery positive (+) terminal. The green trim
motor wire remains grounded. When the button is released, the blue trim motor wire returns to a grounded position.
When the trim-DOWN button is pressed, the DOWN relay is energized and connects the green trim motor wire to the battery positive (+) terminal.
The blue motor wire remains grounded. When the button is released, the green trim motor wire returns to a grounded position.
Refer to TILT/TRIM RELAY TEST on p. 106 for relay testing procedure.
Trim and Tilt Motor Current Draw Tests
Careful analysis of the electric motor's current draw and trim/tilt unit operating speed aids evaluation of the electric motor and certain mechanical
components.
Use a battery rated at 360 CCA (50 Ah) or higher that is in good condition and fully charged to perform this test.
IMPORTANT: Specifications are for static hydraulic tests. DO NOT attempt to perform the following tests while the boat is moving.
Connect a 0 to 100 A DC ammeter in series between the battery side of the starter solenoid and the red lead to the trim/tilt relay module.

Observe ammeter and a stopwatch while running hydraulic unit through several complete cycles.
Compare test results to the values listed:
75 - 90 HP MODELS
| Mode | Normal Current Draw |
Time in Seconds |
|---|---|---|
| Full Range UP | <30 A | 12-18 |
| Full Range DOWN | <30 A | <18 |
| Stall | <40 A | – |
40 - 60 HP MODELS
| Mode | Normal Current Draw |
Time in Seconds |
|---|---|---|
| Stall UP | 11 to 16 Amps | – |
| Stall DOWN | 16 to 22 Amps | – |
| Full Range UP | – | 13 to 19 |
| Full Range DOWN | – | 10 to 16 |
Test results include three basic possibilities:
A. Low current draw – Check for:
- Valves leaking
- Pump damaged
- O-rings leaking
- Manual release valve damaged
B. High current draw – Check for:
- Valves sticking
- Pump binding
- Motor binding
- Cylinder binding
C. Normal current draw, slow operating speed – Check for:
- Manual release valve damaged
Trim and Tilt Motor No Load Test
IMPORTANT: Securely fasten motor in a suitable fixture before proceeding with this test.
Use a battery rated at 360 CCA (50 Ah) or higher that is in good condition and fully charged to perform this test.
Connect a 0 to 25 A ammeter in series with the battery positive (+) terminal, ammeter red lead toward terminal.
Attach or hold a vibration or mechanical tachometer to the motor while performing this test.
Monitor motor RPM and current draw.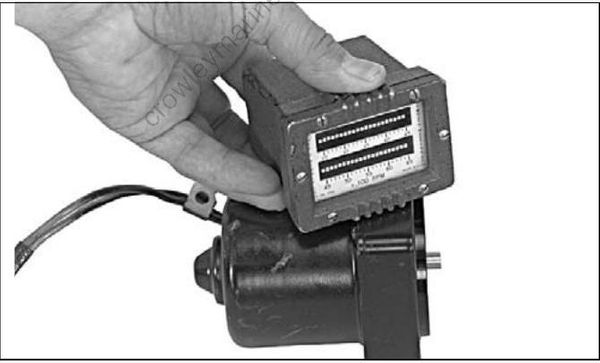
The motor shaft must rotate clockwise, as viewed from the pump end, when positive (+) is applied to the blue lead, and negative (–) is connected to
green lead.
The motor shaft must rotate counterclockwise, as viewed from the pump end, when positive (+) is applied to the green lead, and negative (–) is
applied to the blue lead.
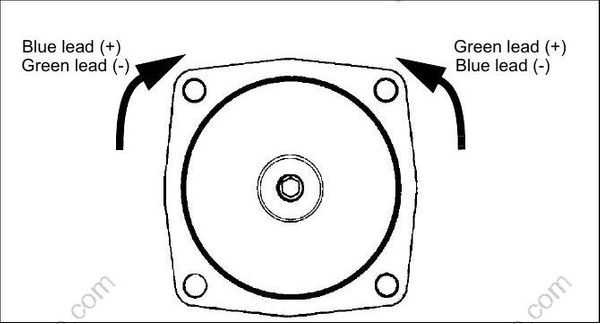
If test results vary, replace the motor.
Trim Gauge Test
STEP 1
Turn key switch ON. Using a voltmeter, check for voltage between the trim gauge “I” and “G” terminals.
- If no voltage, check condition of instrument harness, key switch, and engine 20 A fuse.
- If voltage is shown, go to STEP 2.
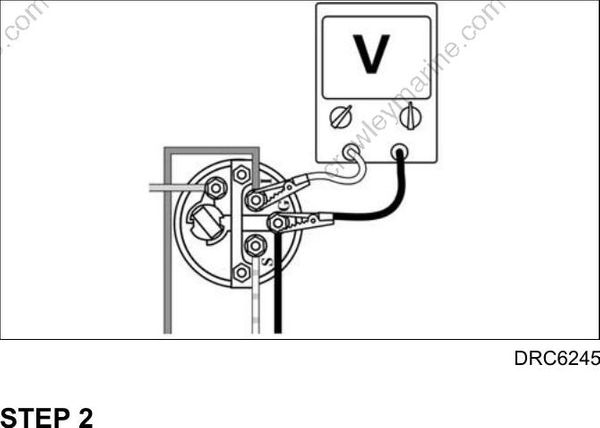
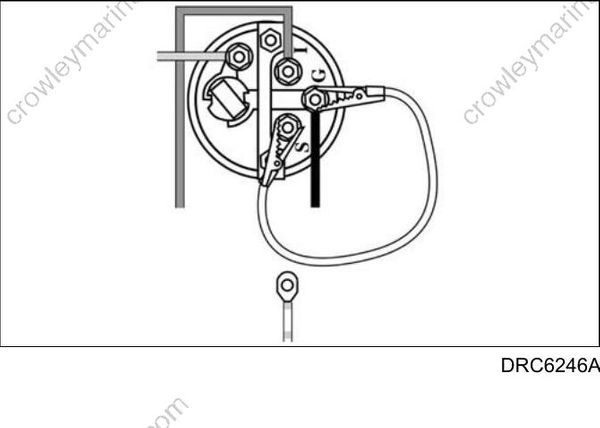
STEP 2
Remove the white/tan lead from the trim gauge “S” terminal. With key switch ON, gauge should indicate full-trim DOWN position. Now connect a jumper wire between terminals “S” and “G.” Gauge should indicate full-trim UP position.
- If results are different, replace the trim gauge.
- If results agree, refer to Trim Sender Test.
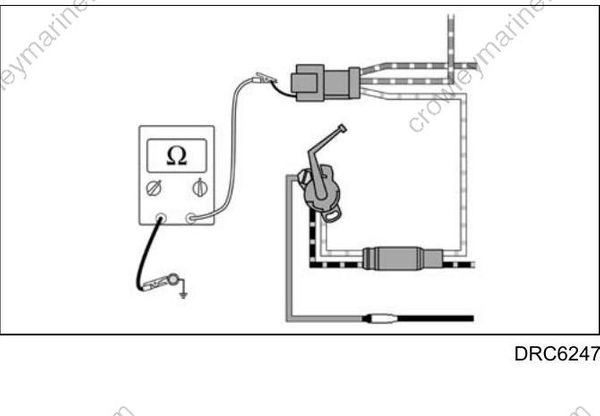
Trim Sender Test
IMPORTANT: To avoid immediate meter damage, never apply an ohmmeter to an electrical circuit where voltage is present.
Disconnect the 3-pin connector between the instrument harness and engine trim harness.
Connect an ohmmeter between the white/tan wire, terminal “C,” of the engine harness and a clean engine ground.
With the outboard fully DOWN, meter must show a reading above 80 ohms.
With the outboard fully UP, meter must show a reading below 10 ohms.
- If results agree, refer to Trim Gauge Test on p. 351.
- If results are different, replace trim sender