

Step 1: COOLING SYSTEM
Check the condition of cooling system components regularly:
- water intake screens;
- water pump;
- all internal water passages;
- thermostats;
- all external water hoses and fittings;
- vapor separator cooling passages and fittings;
- EMM cooling passages and fittings;
- overboard water pressure indicator.
Flushing
Flush the outboard with fresh water following each use in brackish, salt, or polluted water to minimize the accumulation of scale and silt deposits in cooling system passages.
The outboard can be flushed on the trailer or at dockside; running or not running.
IMPORTANT: The outboard must be located in a well ventilated area with appropriate ground drainage during the flushing procedures.
Keep water inlet pressure between 20 to 40 psi (140 to 275 kPa).
Flushing — Outboard Running
To prevent injury from contact with rotating propeller, remove the propeller before flushing.
Refer to Propeller Hardware Installation on p. 56.
Place outboard in VERTICAL (DOWN) position in a well ventilated area.
Thread garden hose into flushing port.

Shift the outboard to NEUTRAL with the propeller removed.
Turn water supply on.
START outboard. Run it at IDLE only.
Shut OFF the outboard. Turn off water supply and remove garden hose.
Leave the outboard in VERTICAL (DOWN) position long enough for the powerhead to drain completely.
Reinstall propeller.
Flushing — Outboard Not Running
Outboard can be in VERTICAL (DOWN) or TILTED (UP) position.
Thread garden hose into flushing port.
Turn water supply ON.
Flush outboard for at least five minutes.
Turn off water supply and remove garden hose.
Position outboard in VERTICAL position (DOWN) long enough to allow the powerhead to drain completely.
Water Intake Screens
Inspect condition of water intake screens. Clean or replace as needed.
Confirm function of overboard water pressure indicator.
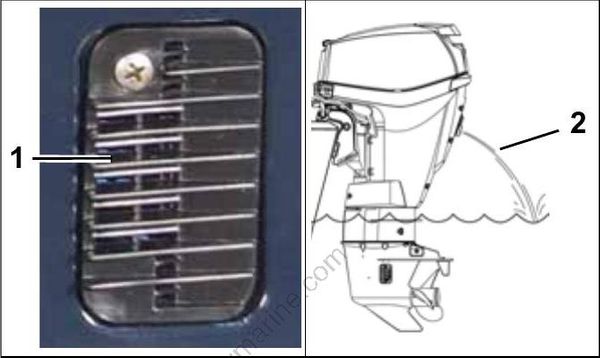
- Water intake screen
- Overboard indicator
Additional Maintenance
- Check operation or visually inspect thermostats and pressure relief valve. Clean or replace as needed.
- Check that all water passages, hoses, and fit tings for both the EMM and the vapor separator flow water freely.
- Replace water pump.
Step 2: LUBRICATION
Steering System
Failure to regrease as recommended could result in steering system corrosion. Corrosion can affect steering effort, making operator control difficult.
Grease the stainless steel output end of the steering cable with Triple-Guard grease.
Use an appropriate cleaning solvent to remove corrosion and dirt from output end of cable prior to coating it with grease. Make sure wiper nut is installed and not damaged.

- Steering cable
- Wiper nut
Tiller Handle
Lubricate the tiller handle grease fittings with Triple-Guard grease.
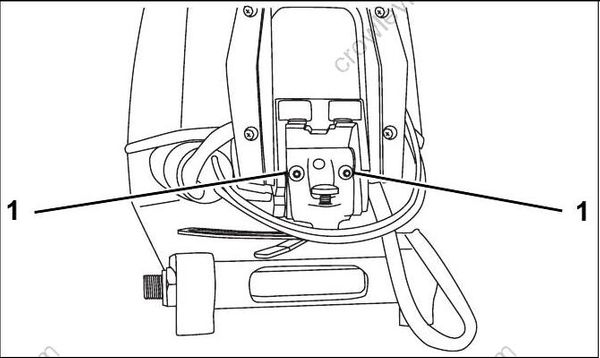
- Tiller handle fittings
