


Preface
This kit connects the boat steering cable to the steering arm of EI and newer 56 cu. in. (913 cm3) 3-cylinder, 4-cylinder, and 6-cylinder Evinrude and Johnson outboards with FasTrak mid-section. The FasTrak outboard can be identified by the six trim limiter rod holes (A) in the stern brackets, and three threaded holes (B) in the steering arm.
To the Installer
The Installation of this kit requires the use of Special Service Tools and complex service procedures.
This kit should be installed by a trained service technician using current technical literature. These instructions are not intended for consumer use.
Give these installation instructions to the future owner. The instructions contain safety warnings and other information vital to the continued safe use of the product.
To the New Owner
: Retain these instructions with your Owner's/Operator's Manual. They contain information for future reference.
Read installation instructions prior to starting work.
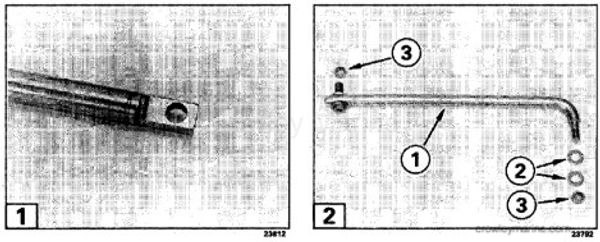
[1]
All mechanical steering cables used wit this kit should meet the current A.B.Y.C. safety standard (P-17).
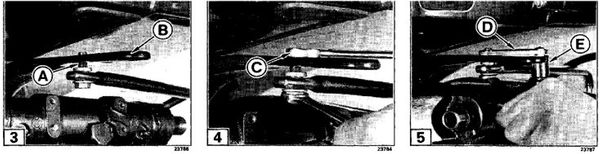
[2]
Contents of kit:
| Ref. | Name of Part | Qty. |
|---|---|---|
| 1 | Steering Connector Rod | 1 |
| 2 | Washer | 2 |
| 3 | Locknut | 2 |
Check the boats' mechanical steering: Turn steering wheel to starboard. If steering cable enters the starboards side of the motor tilt tube, the ram should extend. If steering enters the port side of the motor tilt tube, the ram should retract.
Installation of Steering Connector Rod
[3]
Thread steering connector rod screw (A) into rear tapped hole of steering arm (B). Use torx head drive to start.
[4]
Being threading locknut (C) to screw as soon as enough thread is exposed above steering arm.
Tighten steering connector rod screw until pivot nut (C) is in contact with underside of steering arm. Tighten screw an additional 1/6 turn.
[5]
Torque locknut to 18-21 ft. lbs. (25-28 N·m) using Special Tool P/N 912031 (D) attached at a 90° angle to torque wrench (E). Hold steering connector rod screw when tightening locknut.
Installation of Steering Cable

[6]
Turn steering wheel to extend steering ram to maximum extension. Apply Triple-Guard 0508298 grease to all of the exposed steering arm.
Install steering cable ram through tilt tube. Thread cable anchor nut onto tilt tube and remove end play of cable by tightly securing nut.
Do not force or bend steering cable when assembling. If necessary, pull engine away from transom.
[7]
Press steering cable jacket fitting against tilt tube and thread steering cable anchor nut onto tilt tube. Tighten anchor nut to cable manufacturer's recommended torque.
[8]
Install flat washer (F) onto steering connector rod (G) and attach to steering cable ram (H).
Install flat washer (I) and locknut (J) onto steering connector rod.
[9]
Tighten locknut to a torque of 7-8 ft. lbs. (8-11 N·m) and then loosen nut 1/8 turn.
Check for possible interference between steering system parts and any portion of motor, boat, or accessories. To do this, turn motor fully from side to side in both the running and full tilt positions. Interference may result in steering system being jammed or severed should the motor strike an underwater object and the motor tilt rapidly.
Failure to regrease steering cable as recommended (see owner's manual) could result in steering system corrosion which may effect steering effort.
If you remove the motor from the boat, save the special locking type screws and nuts used to fasten the steering system to the motor. When reattaching, use only the original fasteners and tighten carefully to the torque values given in these instructions. Replace any locking type fastener (example: lock nut or patch screw) whose locking feature becomes weak. Definite resistance to tightening must be felt or locking fastener is not suitable for continued use. Replace only with authorized replacement part or equivalent.