PROPELLER
Carefully examine propeller and outboard for the following:
- Damaged blades and signs of propeller cavitation (burned paint, etc.)
- Spun or overheated inner hub
- Worn or twisted splines and inadequate lubricant
- Damaged or missing converging ring (if applicable)
- Damage to outer hub area
- Worn, missing, or incorrect thrust washer and spacer
- Correct size and style
- Check for bent or damaged propeller shaft and twisted splines.
Refer to Propeller Hardware Installation on p. 67.
When servicing the propeller, always shift the outboard to NEUTRAL, turn the key switch OFF, and disconnect the battery cables at the battery.
LUBRICANT
Gearcase lubricant may be under pressure and/or hot. If plug is removed from a recently operated outboard, take precautions to avoid injury.
Remove the lubricant level plug, then the lubricant drain/fill plug, and drain the lube from the gearcase into a container. Inspect the lube and the magnets on the plugs for metal chips.
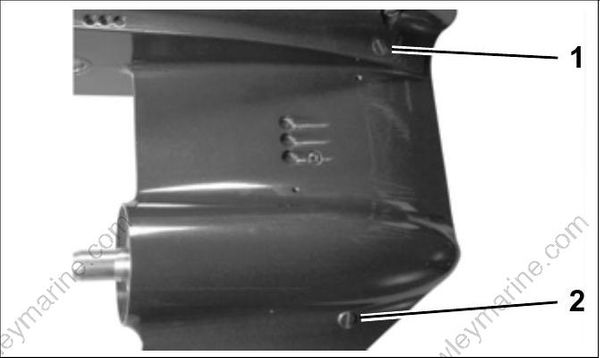
- Lubricant level plug
- Lubricant drain/fill plug
The presence of metal fuzz can indicate normal wear of the gears, bearings, or shafts within the gearcase. Metal chips can indicate extensive internal damage.
Inspection
Inspect the lubricant for water contamination. Water can make the lubricant milky in appearance. However, normal aeration can also cause the same appearance.
To check for water contamination, drain lubricant into a suitable glass container. Allow the drained oil to settle for a minimum of one hour to determine if there is an abnormal amount of water in the oil. Some gearcase lubricants are designed to mix with a small amount of water from normal water vapor condensation within the gearcase.
Refer to LEAK TEST.
Overheated lubricant will have a black color and burned odor.
Internal gearcase inspection is recommended when lubricant is contaminated or shows signs of failure.
Filling
Secure the gearcase in a vertical position.
Remove the lubricant level plug and the lubricant drain/fill plug.
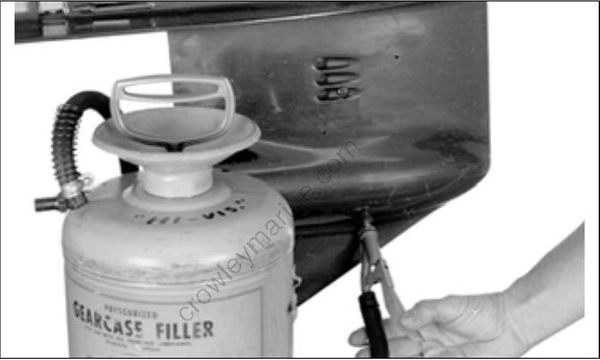
Slowly fill the gearcase with HPF XR gearcase lube through the drain/fill hole until it appears at the oil level hole. Filling the gearcase too quickly can cause air pockets and the gearcase may not fill completely. Clean plug seal area and install the lubricant level plug and new seal, then the lubricant drain/fill plug and new seal. Tighten them to a torque of 60 to 84 in. lbs. (7 to 9.5 N·m).
LEAK TEST
Drain lubricant before testing.
STEP 1
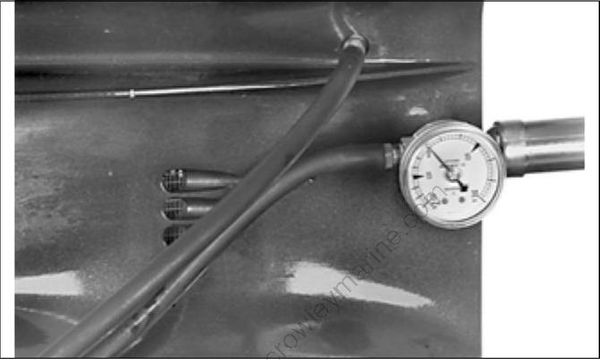
Install lubricant drain/fill plug and seal, thread pressure test gauge fitting and seal in lubricant level hole.
Pressurize 3 to 6 psi (21 to 42 kPa).
If pressure gauge indicates leakage, submerge the gearcase in water to determine source of leak.
If the gearcase pressure gauge does not indicate leakage, increase pressure to 16 to 18 psi (110 to 124 kPa). Check for leakage.
Make necessary repairs and repeat test.
STEP 2
Complete successful STEP 1 before proceeding.
Install vacuum test gauge. Apply 3 to 5 in. of vacuum (76 to 127 mm) Hg. with pump.
Check for leakage.
If leakage occurs, apply oil around suspected seal. If leak then stops or oil is drawn in, that seal is defective.
Repeat test, gearcase must hold minimum of 15 in. (381 mm) Hg.