

LEAK TEST
Drain lubricant before testing.
STEP 1
Install lubricant drain/fill plug and seal, thread pressure test gauge fitting and seal in lubricant level hole.
Pressurize 3 to 6 psi (21 to 42 kPa).
If pressure gauge indicates leakage, submerge the gearcase in water to determine source of leak.
If the gearcase pressure gauge does not indicate leakage, increase pressure to 16 to 18 psi (110 to 124 kPa). Check for leakage.
Make necessary repairs and repeat test.
STEP 2
Complete successful STEP 1 before proceeding. Install vacuum test gauge. Apply 3 to 5 in. of vacuum (76 to 127 mm) Hg. with pump.
Check for leakage.
If leakage occurs, apply oil around suspected seal. If leak then stops or oil is drawn in, that seal is defective.
Repeat test. Gearcase must hold minimum of 15 in. (381 mm) Hg.

REMOVAL AND INSTALLATION
Removal
To prevent accidental starting while servicing, twist and remove all spark plug leads.
During service, the outboard may drop unexpectedly. Avoid personal injury; always support the outboard’s weight with a suitable hoist or the tilt support bracket during service.
Remove screw from shift lever to release the lower shift rod.
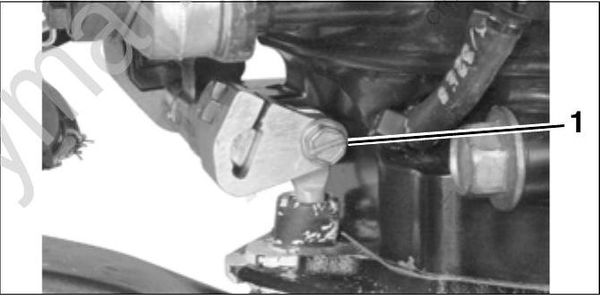
- Shift rod screw
Note where the index mark on the gearcase aligns with the index number of the adjustable trim tab so the trim tab can be installed in the same position. Remove the trim tab retaining screw, gasket and trim tab from the gearcase.
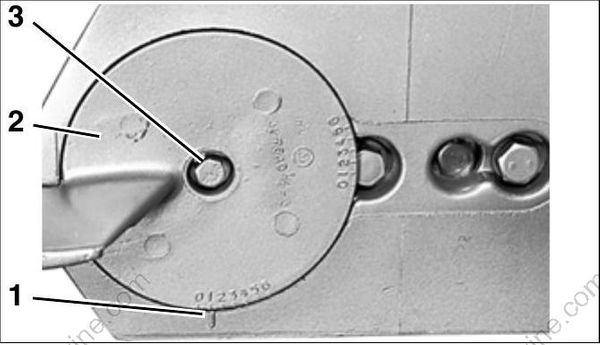
- Index mark
- Trim tab
- Trim tab retaining screw
