

Capacitor Test
IMPORTANT: Make sure the capacitor is dis charged before testing. Make a momentary connection between the two terminals to ground any stored energy.
Use an ohmmeter set on the high ohms scale to test the capacitor. Connect the meter leads to the capacitor terminals:
- If the capacitor is working correctly, it will store energy from the meter. The resistance reading will increase until it goes to (nearly) infinity.
- If the capacitor is shorted, the reading will immediately show full continuity.
- If there is an open circuit in the capacitor, the meter will show no continuity.
If the resistance reading starts as a negative number, or the reading goes down in value, the capacitor already retains some stored energy. Ground the capacitor and test again.
FUEL DELIVERY TESTS
Protect against hazardous fuel spray. Before starting any fuel system service, carefully relieve fuel system pressure.
Refer to Relieving Fuel System Pressure on p. 174.
Check the Evinrude Diagnostics software Stored Faults screen for current service codes before troubleshooting. Correct any problems and clear the codes FIRST.
Inspect all fuel hoses, filters, and connections. Check quality of fuel supply.
Fuel Pump Static Test
Use the Evinrude Diagnostics software Fuel Pump test to activate the electric fuel pump. If the pump runs, the EMM and fuel pump circuit are not at fault.
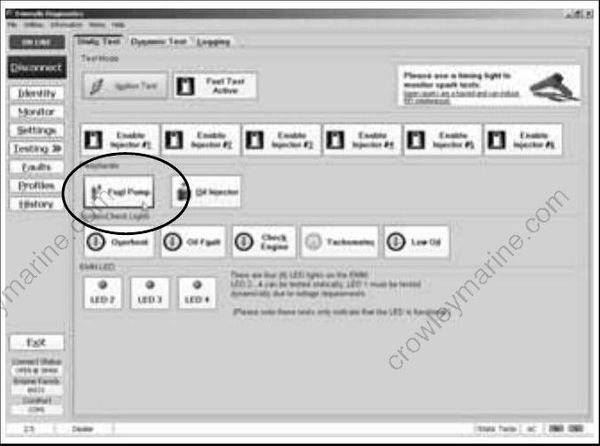
Static Tests Screen
If the pump does not run:
- The EMM controls power to the fuel pump (purple/black wire). Check voltage at pin 1 of fuel pump connector. Voltage should be 12 V when
KEY is first ON, when fuel pump test activated, or when outboard is cranking or running. - Use an ohmmeter to check continuity between pin 2 of fuel pump connector and ground.
- Refer to Circulation Pump Resistance Test on p. 172.
If the pump runs:
- Refer to Fuel System Pressure Test on p. 170.
- Refer to Running Fuel System Tests on p. 121.
Fuel Injector Static Test
Use the Evinrude Diagnostics software Fuel Injector Static Test to activate each fuel injector. Listen for an audible “click” from each injector when it is actuated. If the injector activates, the EMM and
injector circuits are not at fault.
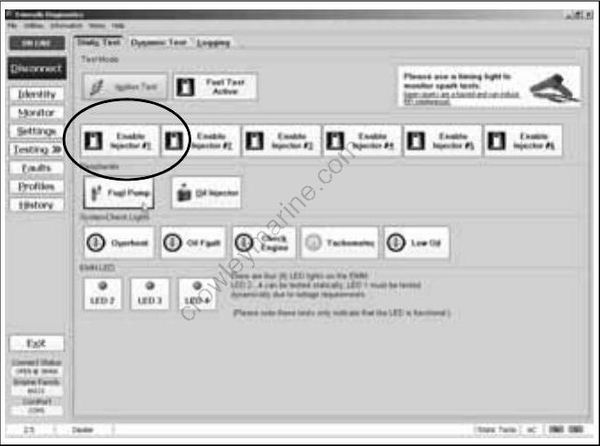
Static Tests Screen
IMPORTANT: This test is operating the injectors with 30 V on the system voltage (55 V) circuit. The start assist circuit (SAC) of the EMM converts battery voltage (12 V) to 30 V of system voltage.
Battery must be fully charged and connections must be clean and tight. Injector activation should be carefully confirmed.
Results:
No injectors actuate:
- Use the Monitor screen of the diagnostics software to make sure voltage is present on the system voltage circuit.
- Refer to Running Fuel System Tests on p. 121.
Some injectors actuate; some do not:
- Test the resistance of individual injector circuits between the injector connector and injector control wire at the EMM.
- See Fuel Injector Resistance Test on p. 172.
All injectors actuate:
- Refer to Running Fuel System Tests on p. 121.
Running Fuel System Tests
Run or crank the outboard.
Use the Evinrude Diagnostics software Monitor screen to check system voltage. If voltage is low, or drops as RPM increases, refer to Stator Voltage Output Test on p. 132.
Use an inductive timing light to monitor the injector control wire (connector pin 2) for each injector. Make sure the pickup is attached to only one wire. Flashes on the timing light indicate current in the
circuit is being switched by the EMM. The Dynamic Tests screen allows the control signal to be turned off to a particular injector.
IMPORTANT: Some timing lights may not flash consistently at cranking speeds. Always check the orientation of the timing light pickup and the operation of the timing light.
Results:
No light activation on any injector wires (outboard cranks and starter turns flywheel):
- Check stator input to EMM, CPS operation, and all grounds and wiring connections.
- Eliminate all other possibilities to isolate a faulty EMM.
Irregular or no light activation on some injector
wires:
- Test the resistance of individual injector circuits between the injector connector and injector control wire at the EMM.
- Check battery cable connections.
- Make sure all grounds are clean and tight.
- See Fuel Injector Resistance Test on p. 172.
Steady light activation on all injector wires and consistent voltage readings, EMM injector control function is good:
- Use the diagnostics software Dynamic Fuel Test to isolate a faulty cylinder. See DYNAMIC TESTS on p. 112.
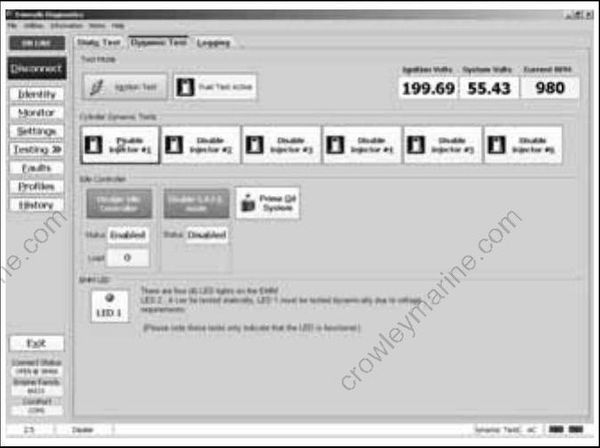
Dynamic Tests Screen
