

Pre-Disassembly Inspection
Wear safety glasses to avoid personal injury, and set compressed air pressure to less than 25 psi (172 kPa).
IMPORTANT: Clean and inspect all parts during disassembly. Replace any damaged parts, seals, O-rings, and gaskets.
Remove the propeller and mounting hardware.
Drain and inspect oil as described in Gearcase Lubricant on p. 79.
Remove gearcase as described in GEARCASE REMOVAL AND INSTALLATION on p. 287.
Remove water pump as described in WATER PUMP SERVICE on p. 290.
Before disassembling the gearcase, examine the following:
• Gearcase Housing — Check for visible damage to skeg, strut, anti-ventilation plate, bullet, and mating surface. Check seal areas for visible signs of lubricant leakage.
• Propeller Shaft — Check for bent or damaged shaft. Check for twisted splines and damaged threads.
• Shift Rod — Check for misadjusted, bent, or binding rod. A misadjusted shift rod height can cause shift difficulty, loss of boat and outboard control, and gearcase damage.
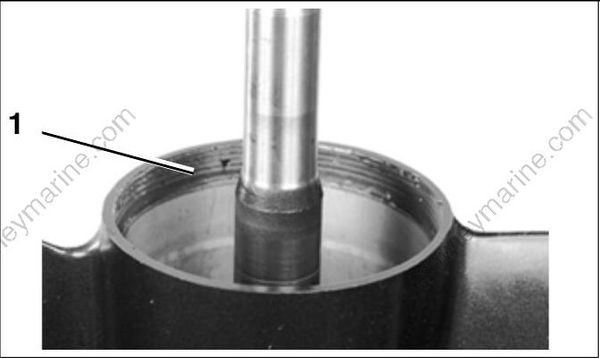
• Hydrostatic Seal Grooves — Must be in good condition to help prevent propeller ventilation.
4557
- Hydrostatic seal grooves
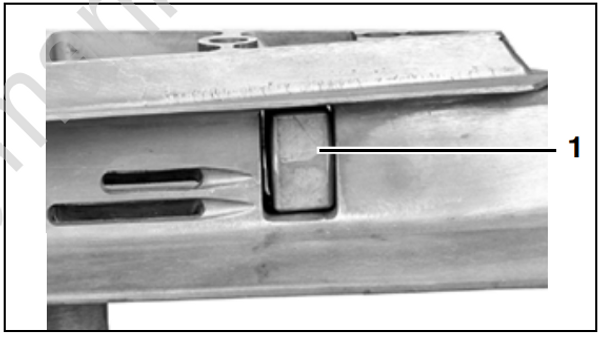
• Gearcase Anodes — If anodes have eroded to two-thirds their original size, they must be replaced.
14161
- Gearcase anode
• Drive Shaft — Check splines for visible damage, twisting and wear. Severe spline wear indicates the exhaust housing or gearcase has been distorted, possibly by impact damage.
• Water Intake Screens — Check for damage and blockage. If screens cannot be cleaned, they must be replaced. Different screens are available and should not be mixed. Refer to correct model parts manual for listing and description.
Propeller Shaft Bearing Housing Removal – “L2” and “M2” Type
IMPORTANT: Identify gearcase type before disassembly. For counter rotation gearcases, refer to GEARCASE DISASSEMBLY on p. 317.
The propeller shaft bearing housing on “L2” and “M2” models is PRESSED into gearcase housing.
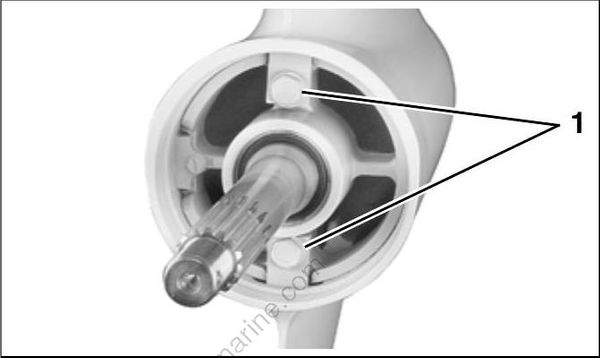
“L2” TYPE GEARCASES
Remove the two screws, washers, and retainers holding the propeller shaft bearing housing.
001989
- Retainer tab screws
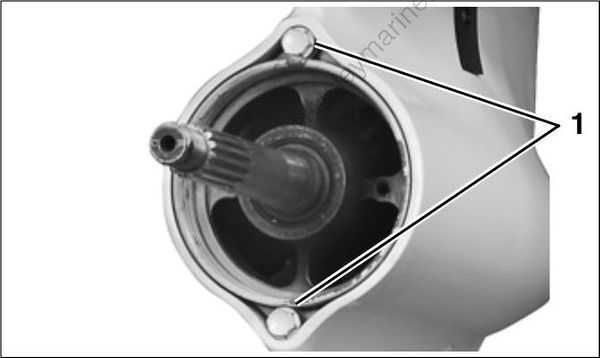
“M2” TYPE GEARCASES
Remove the two screws holding the propeller shaft bearing housing.
006835
- Retainer screws
Remove the propeller shaft bearing housing from the gearcase using:
• Propeller Shaft Bearing Housing Puller Kit, P/N 354060.
DO NOT use tools designed to push on the propeller shaft. Pushing force against the propeller shaft could damage the forward gear thrust bearing or thrust washer.
IMPORTANT: The L2 type gearcase uses the adaptor ring included with puller kit.
Install the threaded adaptor from the puller kit on to the propeller shaft until seated.
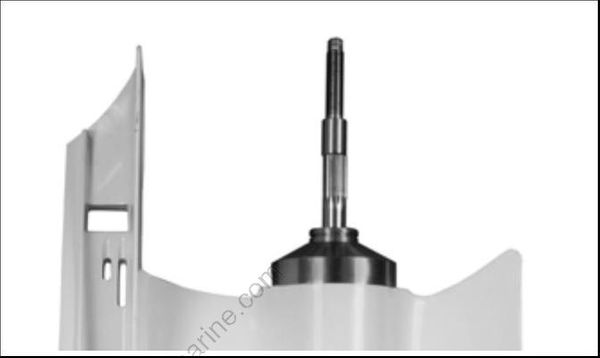
006833
“M2” Type Gearcase
Assemble puller kit components. Hold adaptor with wrench and turn nut clockwise to pull bearing housing.
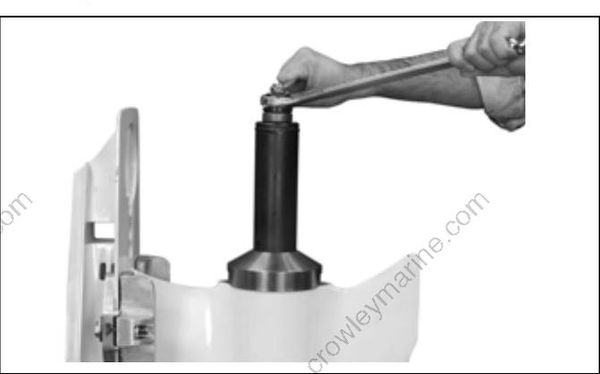
006874
Pull propeller shaft and bearing housing far enough to loosen the PRESSED bearing housing from the gearcase housing.
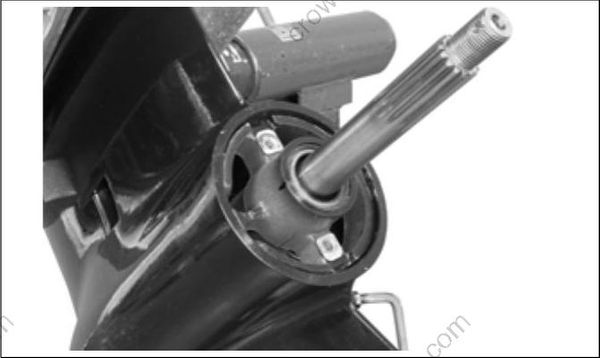
006836
“L2” Type Gearcase
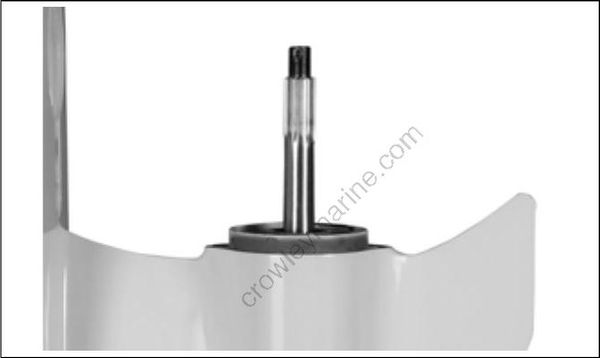
006837
“M2” Type Gearcase
Remove the bearing housing, thrust washer, thrust bearing, and reverse gear from gearcase.
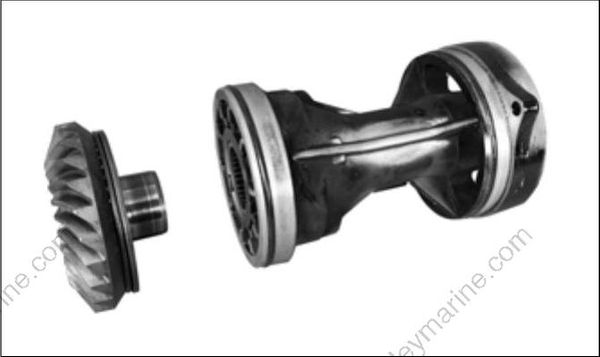
006838
Pinion Gear and Driveshaft Removal
Adjust the shift rod to move the clutch dog as far forward as possible. This will help ease removal of the pinion nut.
Use Driveshaft Holding Socket, P/N 311875, Pinion Nut Holder, P/N 334455, and Wrench Retainer, P/N 341438 to loosen the pinion nut from the bottom of the driveshaft. Pad handle of holder to prevent damage to gearcase.
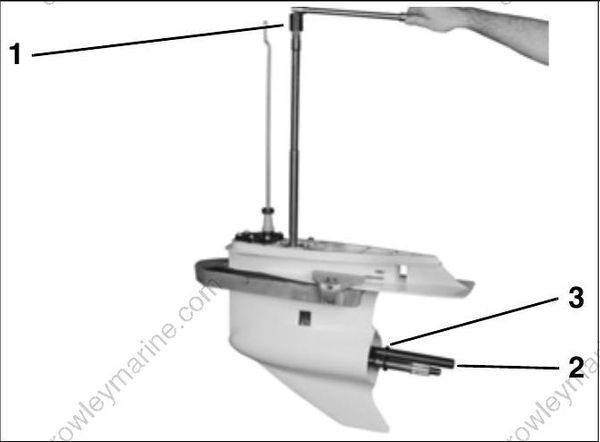
006875
- Holding socket
- Pinion holder
- Retainer
Remove the four driveshaft bearing housing screws.
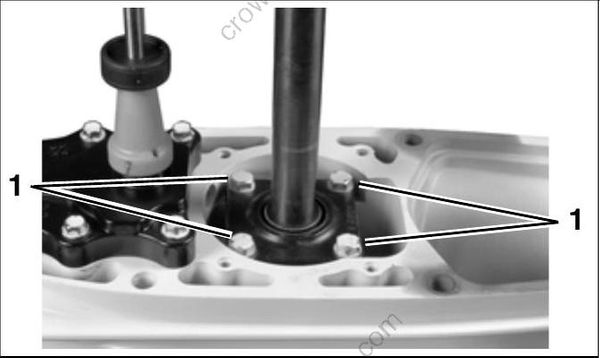
006876
- Driveshaft bearing housing screws
Remove driveshaft from the gearcase. The bearing housing, shims, thrust bearing, and thrust washer will come out with the driveshaft.
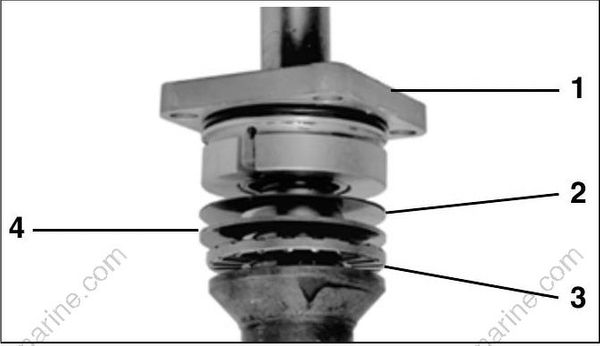
COA3558
- Bearing housing
- Shims
- Thrust bearing
- Thrust washer
If driveshaft cannot be removed, refer to Locked Driveshaft Removal on p. 298.
Remove the pinion gear and pinion nut from the gearcase.
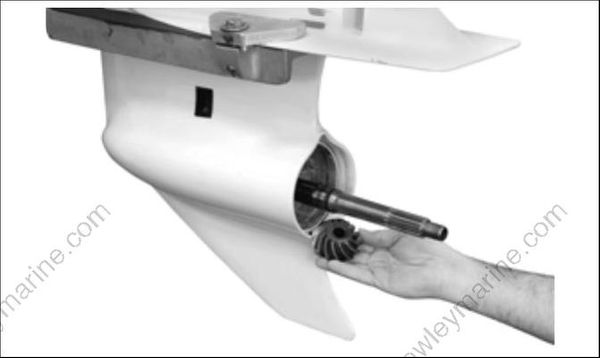
006878
Locked Driveshaft Removal
The driveshaft to pinion taper is a locking taper. If necessary, use Driveshaft Puller, P/N 390706, and Backing Plate, P/N 325867, to break the lock. Install the tools as shown by clamping them around the driveshaft. Alternately tighten the two vertical screws against the backing plate inserted between the puller and the gearcase until the driveshaft pops loose from the pinion.
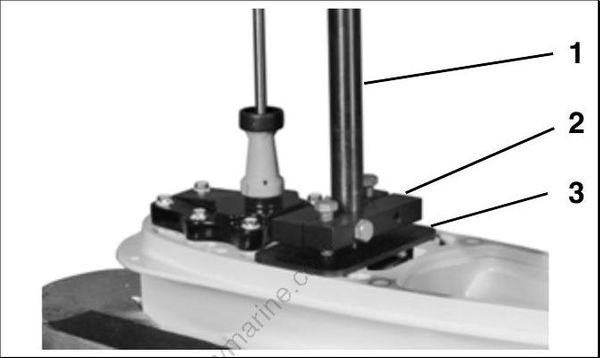
006879
- Drive shaft
- Puller
- Backing plate
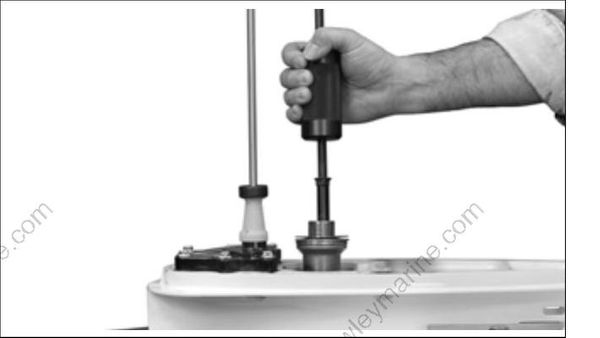
If upper driveshaft becomes separated from lower driveshaft, use Lower Driveshaft Puller, P/N 342681, to remove. Install puller into lower driveshaft and turn 90° to position hook under pin in driveshaft. Thread Slide Hammer, P/N 391008, into puller and remove driveshaft.
Driveshaft Service
To separate the upper driveshaft (if needed) from the lower driveshaft, remove the roll pin. Replace the damaged component.
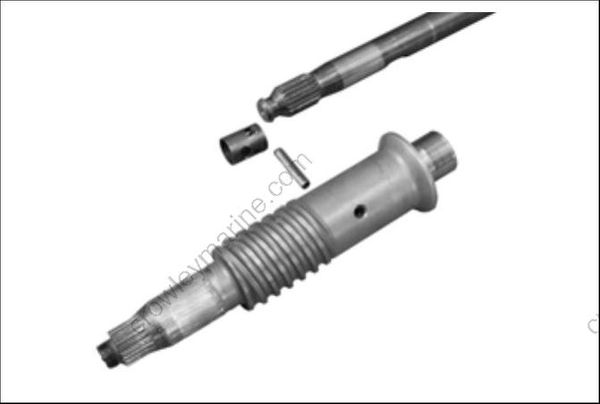
006881
To assemble the driveshaft, install new driveshaft retainer into the groove of the upper driveshaft.
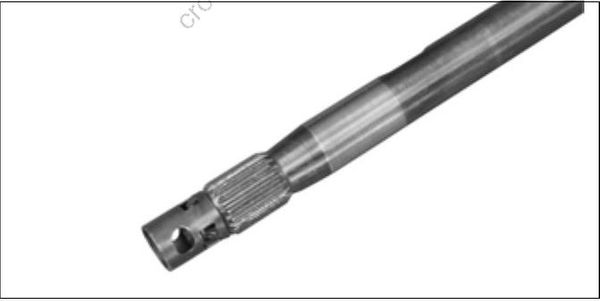
006882
Install the upper driveshaft into the lower driveshaft, aligning the holes in the driveshaft retainer and the lower driveshaft.
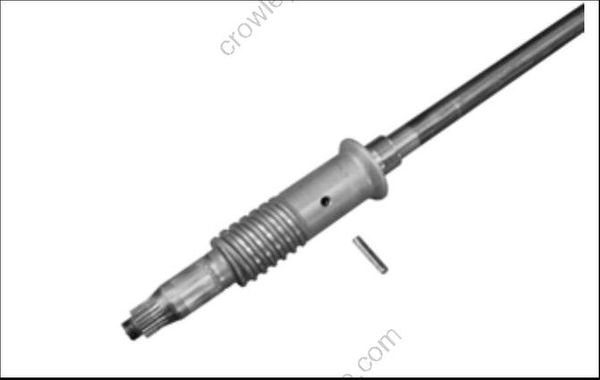
006883
Install the roll pin to the specified dimension.
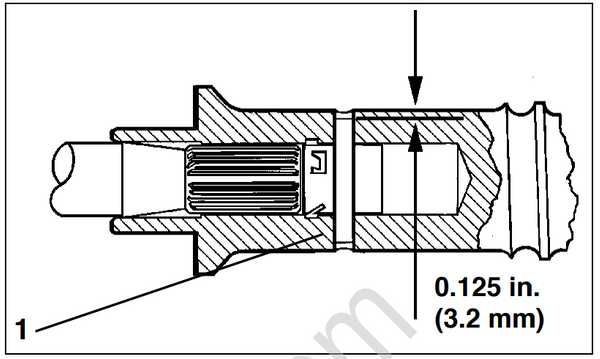
DR4610
- Roll pin
Shift Housing, Gear, and Propeller Shaft Removal
Push down on the shift rod. This will move the detent lever downward to clear the inside of the gearcase when the shaft assembly is pulled out. Unscrew the shift rod from the detent lever. Remove screws, cover, and shift rod from the gearcase.
Discard the cover gasket. Remove and discard the shift rod O-ring from inside of cover.
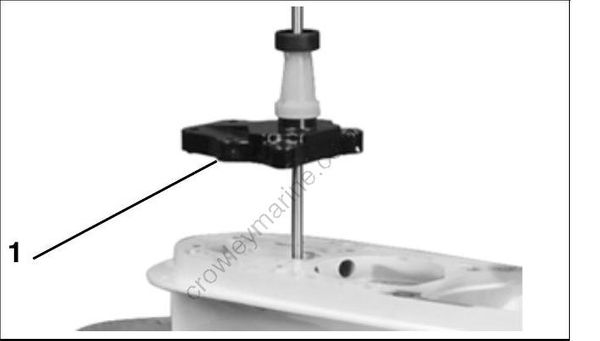
006884
- Cover gasket
Remove propeller shaft assembly from gearcase.

006839
Water Intake Screens
Remove and clean water intake screens. Replace if damaged.
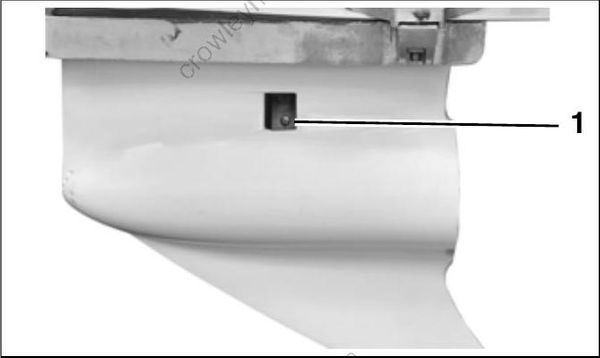
006886
- Water intake screen
Gearcase Housing Inspection
Thoroughly clean gearcase housing to remove all dirt and debris prior to inspection. Inspect pinion bearing and forward thrust surface of gearcase housing.
Use Gearcase Alignment Gauge Kit, P/N 5006349 to check the condition of gearcase housing prior to reassembly. Refer to instructions provided with kit. Use additional Gauging Head as follows:
• P/N 5007750, for “L2” Type gearcase housings
• P/N 5007749, for “M2” Type gearcase housings
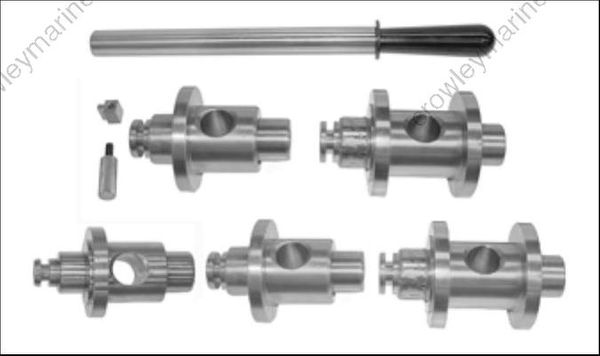
006787
IMPORTANT: DO NOT force gauging shaft into alignment hole. Shaft MUST slide easily into hole of gauging head. If shaft does not slide into hole, gearcase housing is damaged and must be replaced.
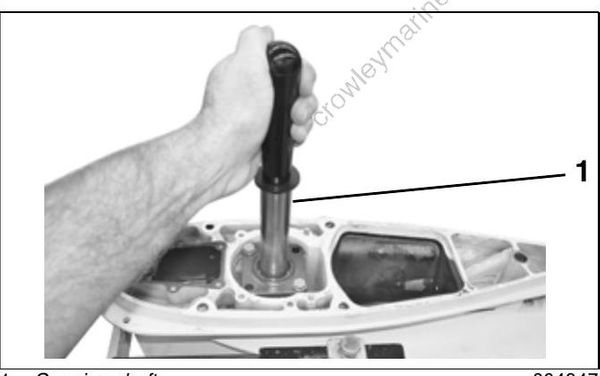
004347
- Gauging shaft
