

Steering Friction Adjustment
Steering friction device is not intended to hold boat on a set course.
DO NOT overtighten steering friction for “hands-off” steering. Reduced steering control of the boat could result in loss of control by the operator, creating a risk of personal injury or property damage.
Initial Adjustment
Perform this adjustment after installing steering friction device, or if steering friction device no longer provides enough steering friction.
Position steering friction lever as shown. Tighten locking nut so that a slight drag is felt when steering.
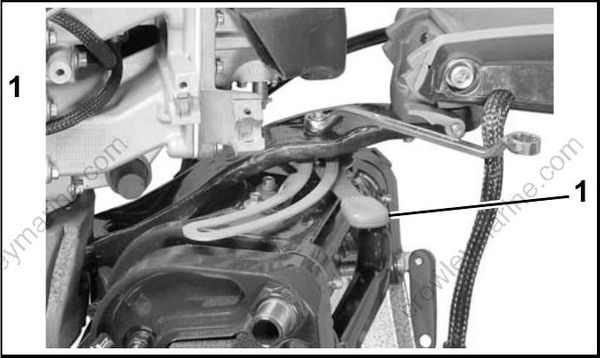
3. Steering friction lever
Operational Adjustment
A slight drag should be felt when turning the out board with the steering handle. If adjustment is necessary, move the throttle friction lever:
- To PORT to increase friction; or
- To STARBOARD decrease friction.
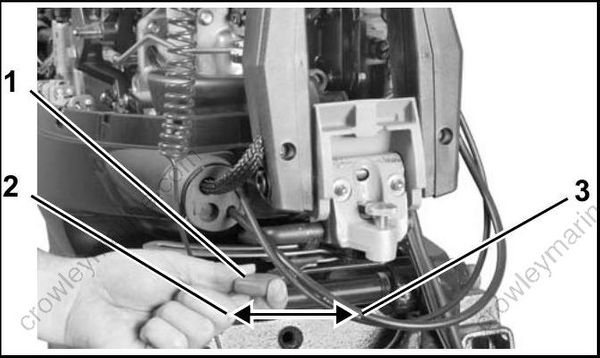
- Steering friction lever
- Decrease friction
- Increase friction
Throttle Friction Adjustment
Tiller models are equipped with a throttle friction adjustment knob located on the steering handle. Tighten the knob to reduce the effort required to hold a throttle setting.
Turn the knob:
- clockwise to increase friction
- counterclockwise to decrease friction
Tighten knob only enough to hold throttle at a constant engine speed. Overtightening will prevent quick throttle change in case of emergency.
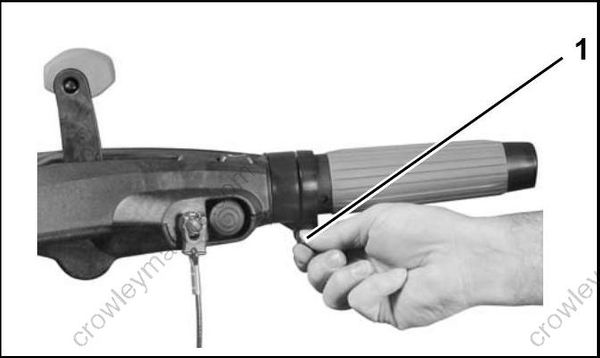
- Throttle friction knob
Tiller Height Adjustment
The angle of the tiller handle can be raised or lowered by adjusting a thumbscrew under the handle.
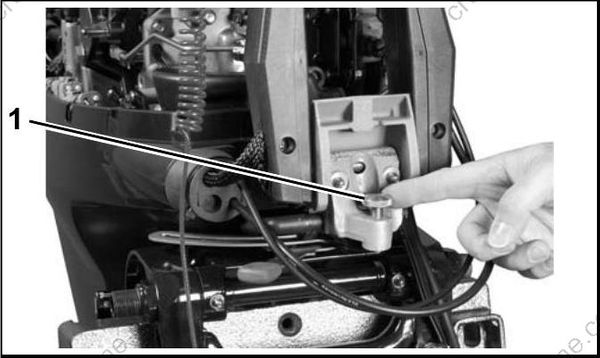
- Height adjustment screw
Tiller Handle Ratchet
Tiller models feature a ratchet which holds the tiller arm at approximately 30° or 90° positions. To release the tiller arm, press up on the release lever.
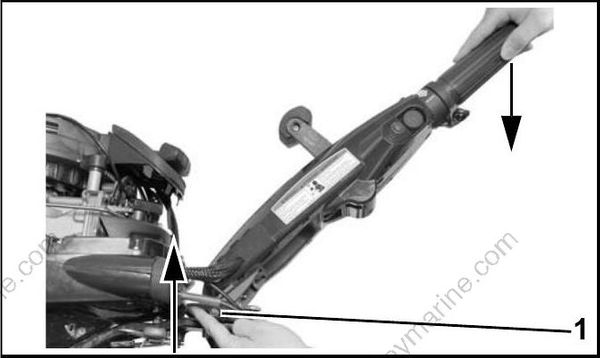
- Release lever
Tiller Handle Friction
The tiller handle screw may be tightened to adjust the amount of friction when tilting the tiller handle.
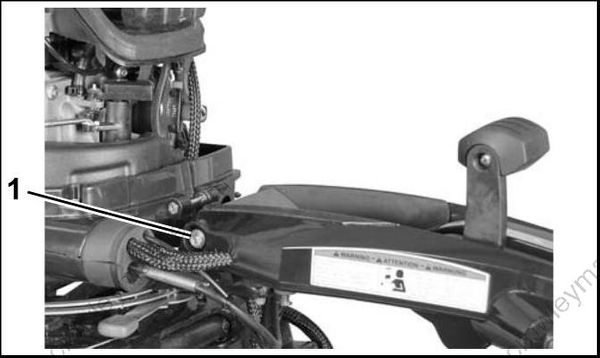
- Screw
Neutral Switch Adjustment
Adjust neutral switch as follows:
Make sure neutral switch is centered on shift lever detent.
- Loosen two neutral switch bracket screws.
- Center the neutral switch on lobe of the shift lever detent.
- Hold neutral switch bracket in position and tighten screws to a torque of 35 to 60 in. lbs. (4 to 6.8 N·m).
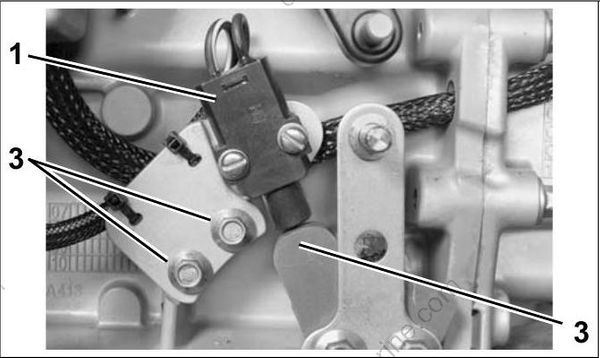
- Neutral switch
- Lobe of shift lever detent
- Neutral switch bracket screws
Check Neutral Switch Operation
Use Evinrude Diagnostics software “Monitor” screen to confirm neutral switch operation.
Shift the engine from NEUTRAL to FORWARD gear. The Neutral/In Gear indicator must indicate “In Gear.”
Shift the engine from FORWARD gear to NEUTRAL. The Neutral/In Gear indicator must indicate “Neutral.”
Shift the engine from NEUTRAL to REVERSE gear. The Neutral/In Gear indicator must indicate “In Gear.”
Shift the engine from REVERSE gear to NEUTRAL. The Neutral/In Gear indicator must indicate “Neutral.”
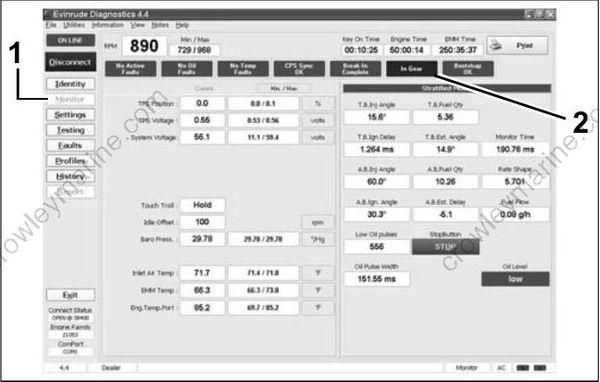
- Monitor screen
- Neutral/In Gear indicator
Readjust the neutral switch and confirm neutral switch operation if the Neutral/In Gear indicator does not match engine shift position.
Trim Sending Unit Adjustment
The sending unit eccentric cam must be adjusted so that the gauge needle is aligned with the lowest gauge mark with the outboard trimmed all the way DOWN.
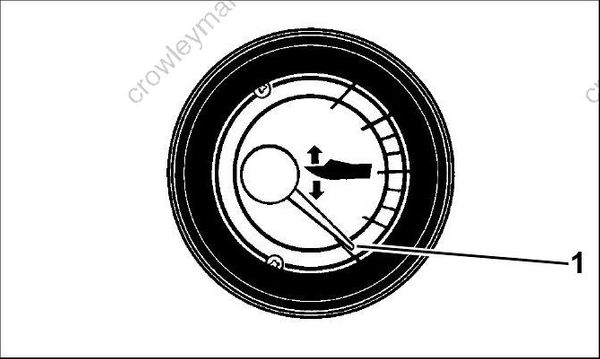
- Lowest gauge mark
Check if the gauge needle is above or below the lowest gauge mark. Tilt engine UP and engage trailering lock.
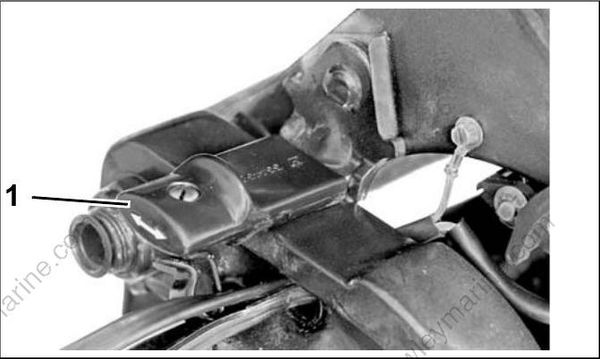
- Trailering lock
To avoid personal injury, do not adjust the sending unit eccentric cam while the engine is being tilted.
When the outboard is trimmed all the way DOWN, the sending unit lever touches the eccentric cam just forward of the top of the cam at the contact point.
Loosen cam screw and rotate eccentric cam to adjust full down gauge position:
- If the needle was above the lowest mark, move the thick part of the cam TOWARD the contact point. Tighten the screw, and recheck the gauge reading.
- If the needle was below the lowest mark, move the thick part of the cam AWAY from the contact point. Tighten the screw, and recheck the gauge reading.
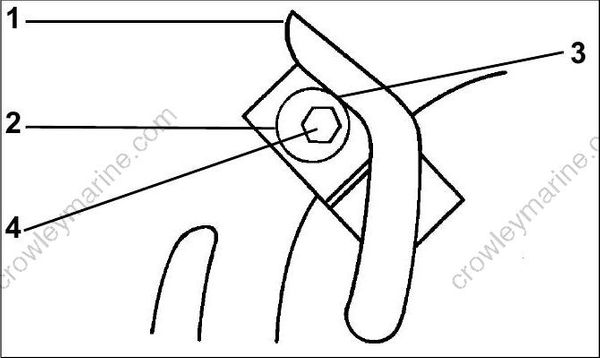
- Lever
- Eccentric cam
- Contact point
- Cam screw
Tighten eccentric cam retaining screw and check needle position at full trim DOWN.
Trim Tab Adjustment
Improper trim tab adjustment can cause difficult steering and loss of control.
A propeller will generate steering torque when the propeller shaft is not running parallel to the water’s surface. The trim tab is adjustable to compensate for this steering torque.
IMPORTANT: A single trim tab adjustment will relieve steering effort under only one set of speed, outboard angle and load conditions. No single adjustment can relieve steering effort under all conditions.
If the boat pulls to the left or right when its load is evenly distributed, adjust the trim tab as follows:
- With the remote control in NEUTRAL and the engine OFF, loosen the trim tab screw.
- If the boat pulled to the right, move rear of the trim tab slightly to the right.
- If the boat pulled to the left, move rear of the trim tab slightly to the left.
Tighten the trim tab screw as follows:
• 15 – 30 HP: 60 to 80 in. lbs. (7 to 9 N·m)
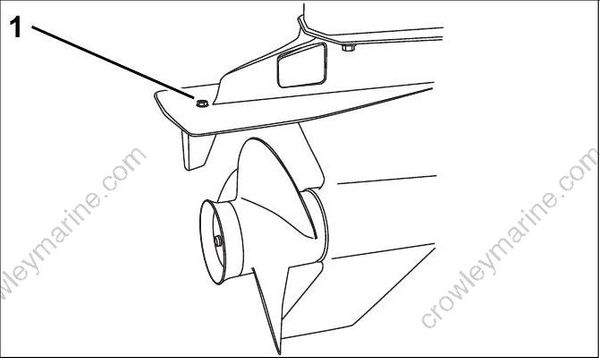
- Trim tab screw
Test the boat and, if needed, repeat the procedure until steering effort is as equal as possible.
Outboards with High Transom Heights
The trim tab may be above the surface of the water when the outboard is trimmed out. Steering effort might increase. Lower the trim setting to submerge the trim tab and to reduce steering effort.
