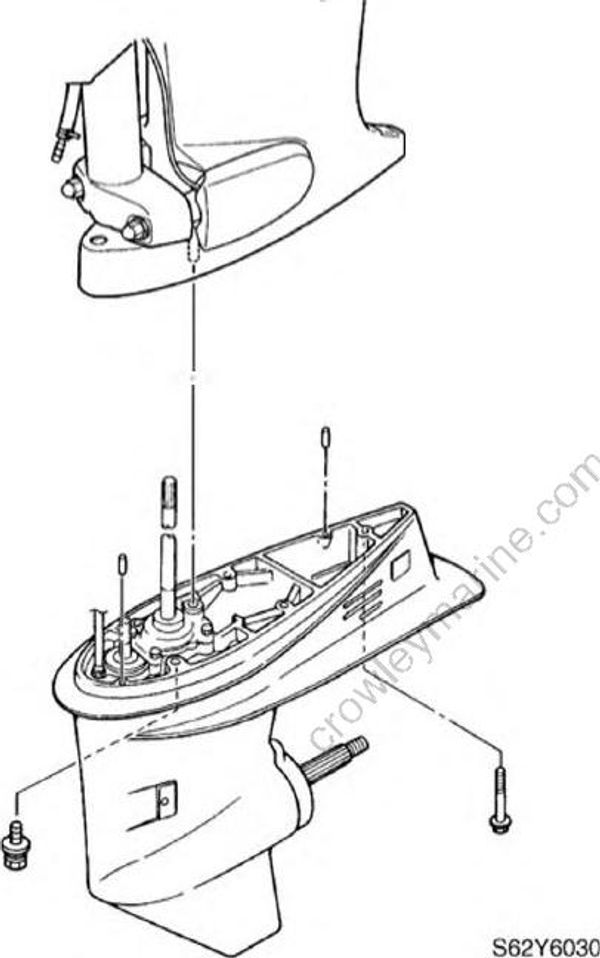
Lower unit
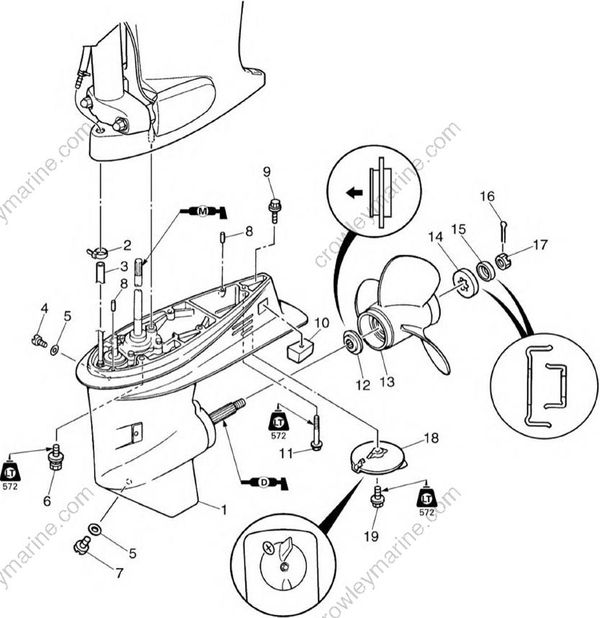
| No. | Part name | Q'ty | Remarks | Tightening torues | |||
|---|---|---|---|---|---|---|---|
| Stage | N-m | kgf-m | ft-lb | ||||
| 1 | Lower unit | 1 | |||||
| 2 | Plastic tie | 1 | Not reusable | ||||
| 3 | Hose | 1 | |||||
| 4 | Check screw | 1 | 7 | 0.7 | 5.1 | ||
| 5 | Gasket | 2 | Not reusable | ||||
| 6 | Bolt | 4 | M10 x 40 mm | 40 | 4.0 | 29 | |
| 7 | Drain screw | 1 | 7 | 0.7 | 5.1 | ||
| 8 | Dowel pin | 2 | |||||
| 9 | Bolt | 1 | M8 x 35 mm | ||||
| 10 | Anode | 1 | |||||
| 11 | Bolt | 1 | |||||
| 12 | Thrust washer | 1 | |||||
| 13 | Propeller | 1 | |||||
| 14 | Washer | 1 | |||||
| 15 | Washer | 1 | |||||
| 16 | Cotter pin | 1 | Not reusable | ||||
| 17 | Propeller nut | 1 | 35 | 3.5 | 25 | ||
| 18 | Trim tab | 1 | |||||
| 19 | Bolt | 1 | M8 x 20 mm |
Removing the lower unit
Drain the gear oil. For draining procedures, see Chapter 3, “Replacing the gear oil.”
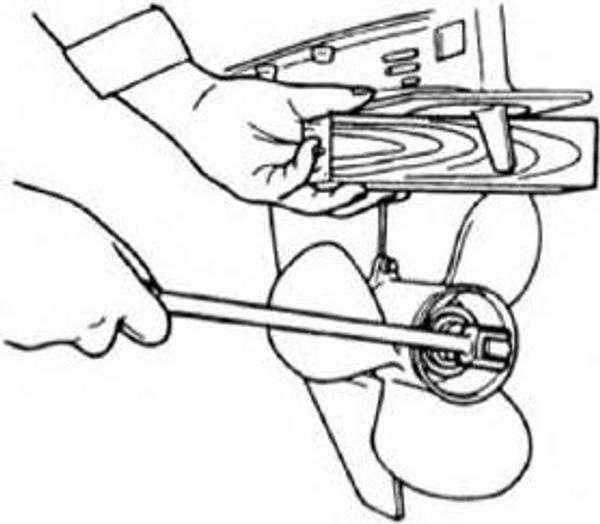
Set the gearshift to the neutral position,and place a block of wood between the anti-cavitation plate and propeller to keep the propeller from turning, and then remove the propeller nut and propeller
WARNING
Do not hold the propeller with your hands when loosening or tightening it. Be sure to remove the battery leads from the batteries and the engine stop lanyard switch. Put a block of wood between the cavitation plate and propeller to keep the propeller from turning.
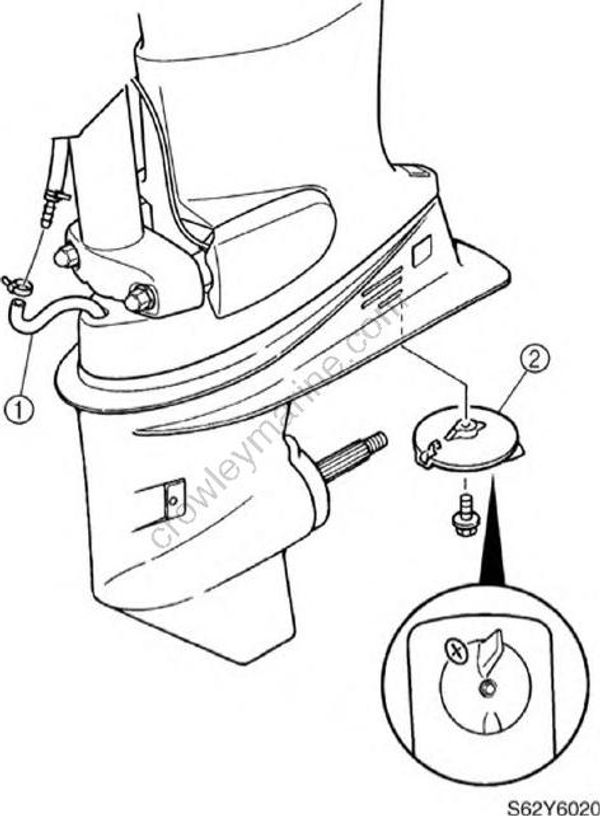
Disconnect the speedometer hose (1).
Mark the trim tab (2) at the area shown, and then remove it.
- Loosen the bolts, and then remove the lower unit from the upper case.