

EXPLODED DIAGRAM
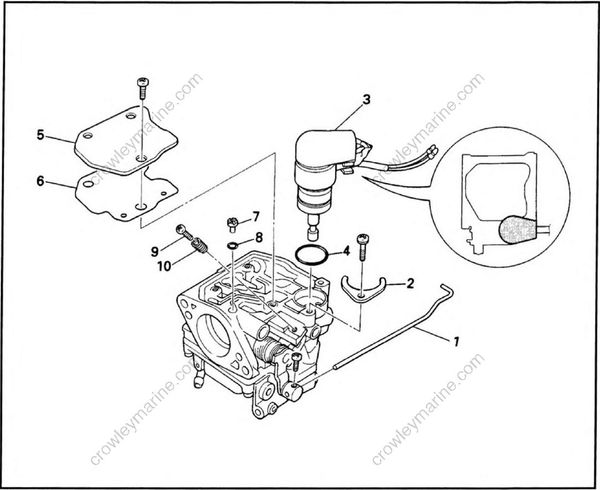
REMOVAL AND INSTALLATION CHART
| Step | Procedure/Part name | Q'ty | Service points |
|---|---|---|---|
| CARBURETOR DISASSEMBLY 1 | Follow the left "Step" for removal. | ||
| Carburetor unit | |||
| 1 | Throttle link rod | 1 | |
| 2 | Electrothermal ram retainer | 1 | |
| 3 | Electrothermal ram | 1 | |
| 4 | O-ring | 1 | |
| 5 | Carburetor top cover | 1 | |
| 6 | Gasket | 1 | |
| 7 | Pilot outletjet | 1 | |
| 8 | O-ring | 1 | |
| 9 | Throttle stop screw | 1 | |
| 10 | Spring | 1 | |
| Reverse the disassembly steps for installation |
EXPLODED DIAGRAM
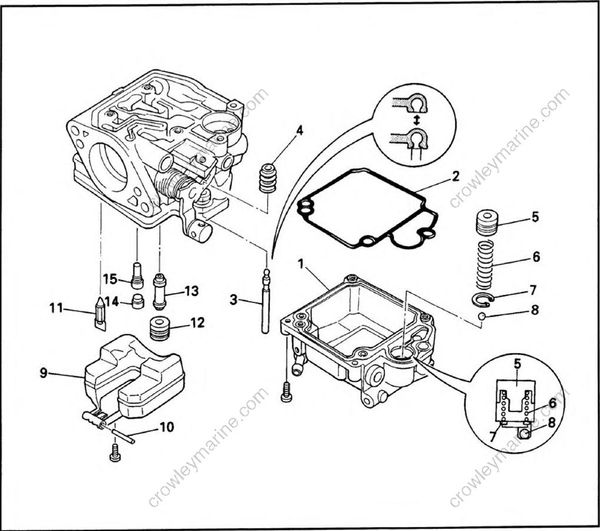
REMOVAL AND INSTALLATION CHART
| Step | Procedure/Part name | Q'ty | Service points |
|---|---|---|---|
| CARBURETOR DISASSEMBLY 2 | Follow the left "Step" for removal. | ||
| Carburetor unit | |||
| 1 | Float chamber | 1 | |
| 2 | Packing | 1 | |
| 3 | Plunger rod | 1 | |
| 4 | Rubber boot | 1 | |
| 5 | Plunger | 1 | |
| 6 | Spring | 1 | |
| 7 | Circlip | 1 | NOt reusable |
| 8 | Ball | 1 | |
| 9 | Float | 1 | |
| 10 | Float pin | 1 |
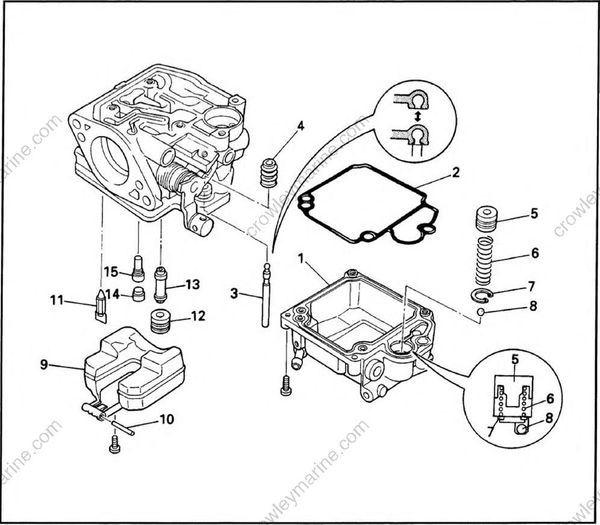
| Step | Procedure/Part name | Q'ty | Service points |
|---|---|---|---|
| 11 | Needle valve | 1 | |
| 12 | Mainjet | 1 | |
| 13 | Main nozzle | 1 | |
| 14 | Pilotjet plug | 1 | |
| 15 | Pilotjet | 1 | |
| Reverse the disassembly steps for installation |
SERVICE POINTS
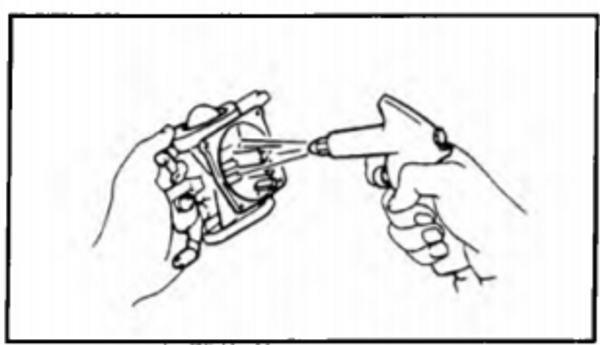
Do not use a steel wire to clean the jets. This may enlarge the jet diameters and seriously affect performance.
Carburetor inspection
- Inspect.
- Carburetor body
Cracks/damage -> Replace.
Contamination -> Clean.
- Inspect:
Mainjet
Pilotjet
Main nozzle
Contamination -> Clean.
- Inspect:
- Needle valve
Grooved wear —> Replace.
- Inspect:
- Float
Cracks/damage -> Replace.
Carburetor
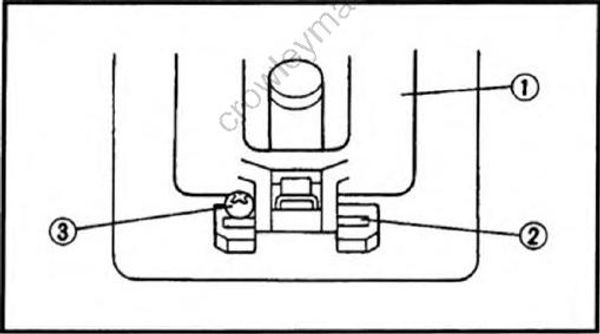
- Install:
Needle valve
Float (1)
Float pin (2)
Screw (3)
• The float pin should fit into the slit in the carburetor and be retained with the screw.
• When installing the float into the carburetor, place the needle valve into the needle valve seat.
• After installation, make sure that the float operates smoothly.
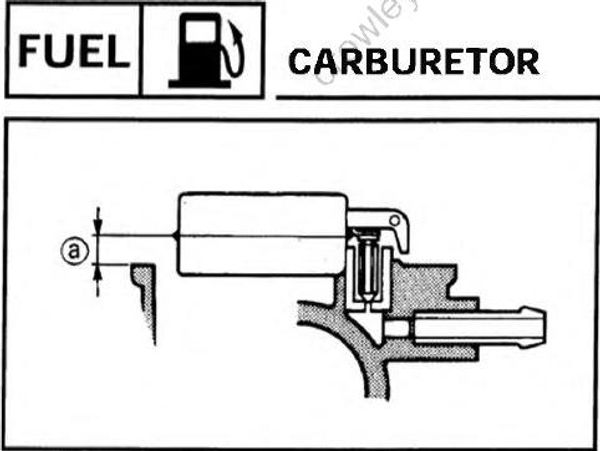
- Measure:
- Float height (a)
Out of specification -> Replace.
Float height: 10.0 ± 0.5 mm (0.39 ± 0.02 in)
• The float should be resting on the needle valve, but not compressing it.
• Take measurements at the midline of the float, opposite the side it pivots on. 4-9
