

Power trim and tilt motor
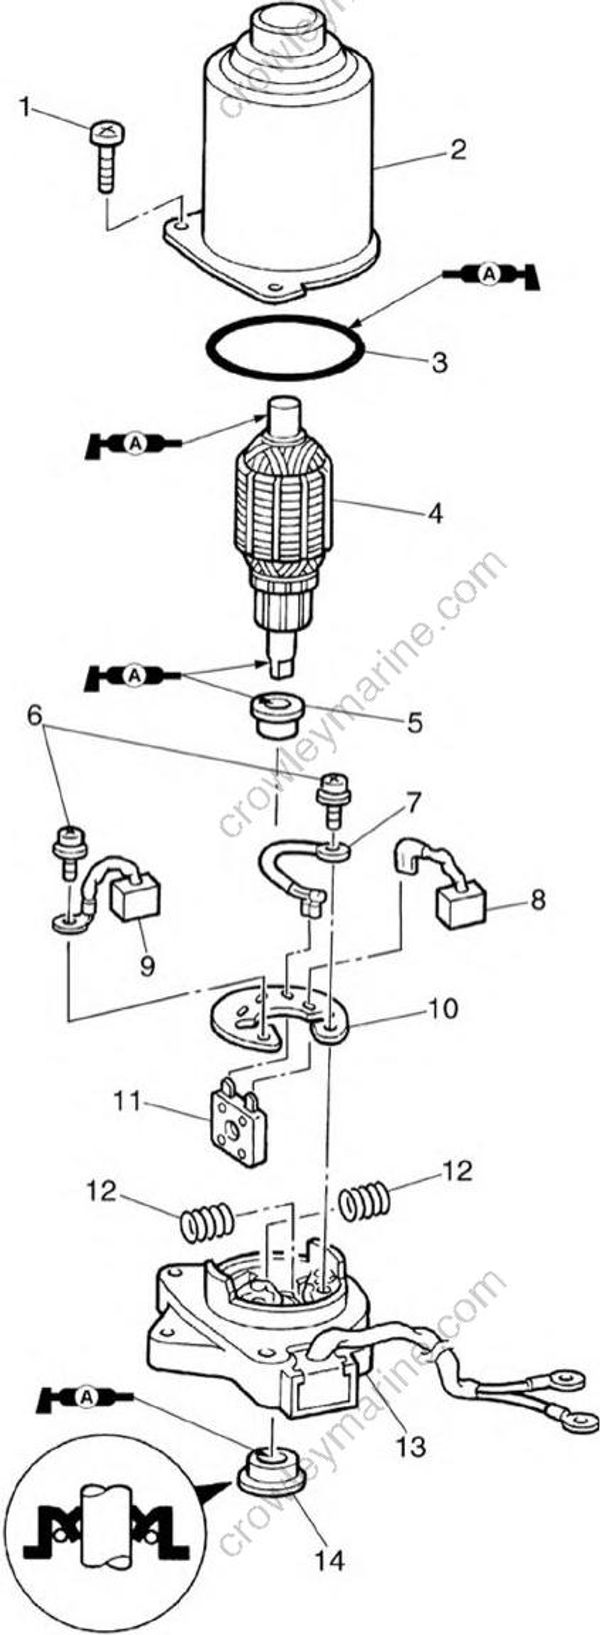
S62Y7890R
| Tightening torques | Tightening torques | Tightening torques | Tightening torques | ||||
|---|---|---|---|---|---|---|---|
| No | Part name | Q’ty | Remarks | Stage | N•m | kgf•m | ft•lb |
| 1 | Screw | 3 | M5 x 20 mm | ||||
| 2 | Yoke | 1 | |||||
| 3 | O-ring | 1 | Not Reusable | ||||
| 4 | Armature | 1 | |||||
| 5 | Bushing | 1 | |||||
| 6 | Screw | 2 | M4 x 12 mm | ||||
| 7 | Wire lead | 1 | |||||
| 8 | Brush 2 | 1 | |||||
| 9 | Brush 1 | 1 | |||||
| 10 | Brush holder | 1 | |||||
| 11 | Circuit breaker | 1 | |||||
| 12 | Brush spring | 2 | |||||
| 13 | PTT motor base | 1 | |||||
| 14 | Oil seal | 1 | Not Reusable |
Checking the power trim and tilt motor
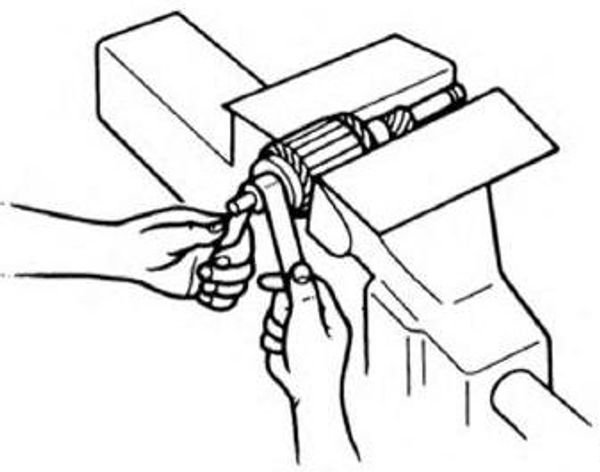
- Check the commutator for dirt or foreign substances. Clean with #600 grit sand paper if necessary.
S62Y7900
Check the commutator undercut for dirt or foreign substances. Clean with com pressed air if necessary.
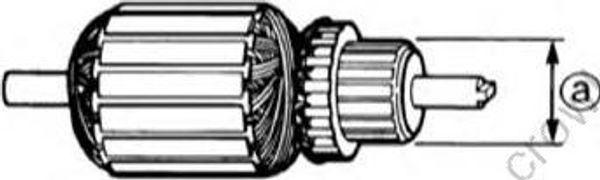
Measure the commutator diameter (a). Replace if out of specification.
S62Y7910
Commutator diameter limit (a): 21 mm (0.83 in)
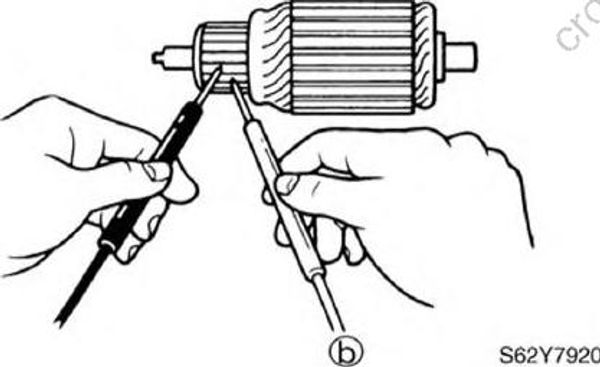
- Check the armature coil for continuity. Replace if out of specifications.
S62Y7920
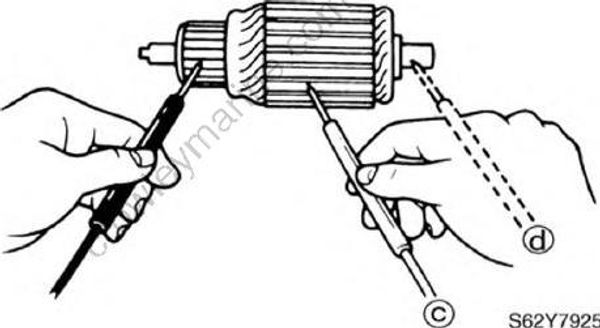
S62Y7925
| Armature coil continuity | |
|---|---|
| Commutator segments (b) | Continuity |
| Segment-laminations (c) | No continuity |
| Segment-shaft (d) | No continuity |
- Check the circuit breaker for continuity. Replace if there is no continuity.
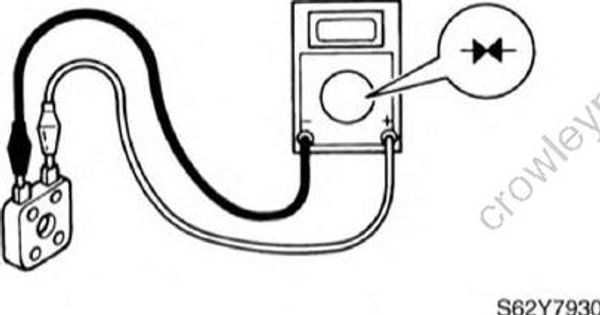
S62Y7930
- Measure the brush length. Replace if out of specification.
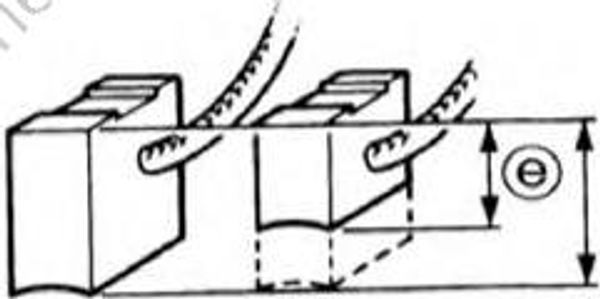
S62Y79940
Brush length limit 3.5 mm (0.14 in)
- Check the base for cracks or damage. Replace if necessary.
- Check the bushing (1) for damage or wear. Replace if necessary.
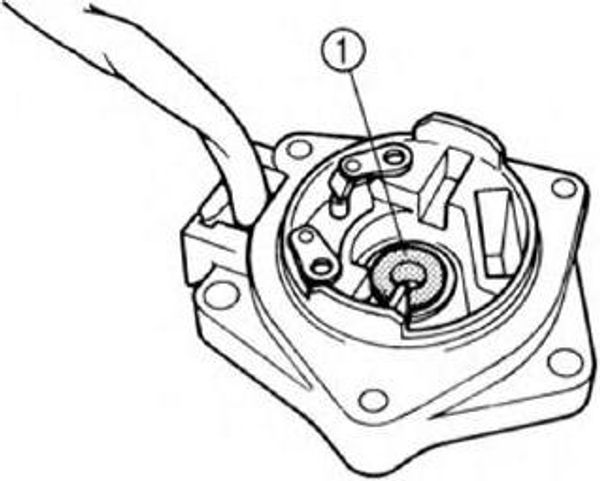
S62Y7950
Assembling the power trim and tilt motor
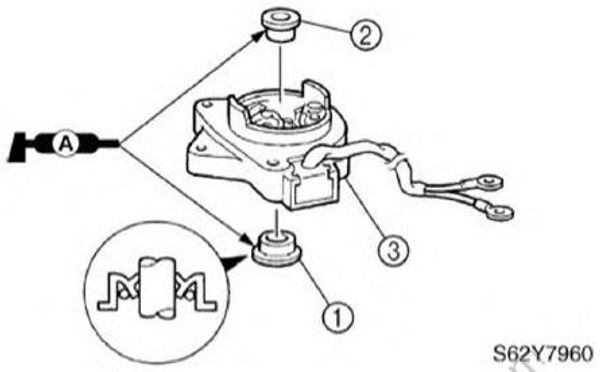
- Install the oil seal (1) and the bushing (2) into the motor base (3) as shown.
S62Y7960
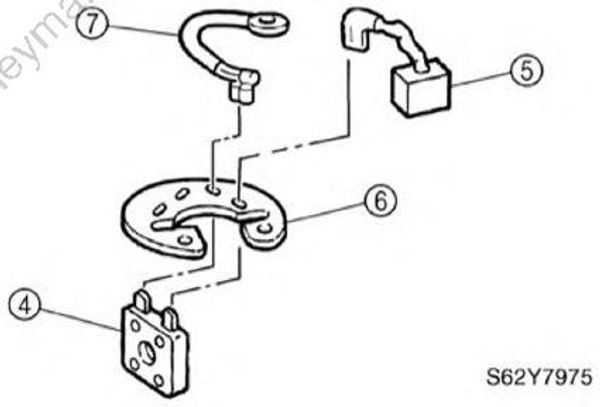
- Attach the circuit breaker (4) onto brush 2 (5) together with the brush holder (8) and connect the wire lead (7).
S62Y7975
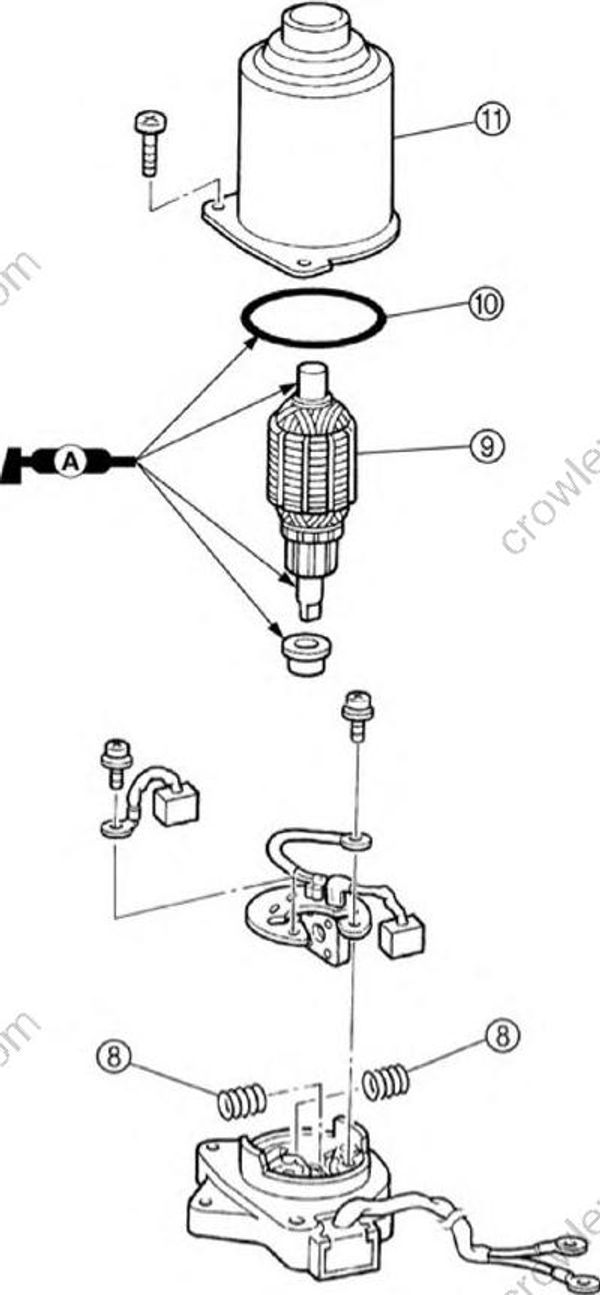
Install the springs (8) into the motor base, then the brush holder into the motor base together with the brushes and circuit breaker.
Install the armature (9), O-ring (10), and yoke (11).
S62Y7985
Installing the power trim and tilt
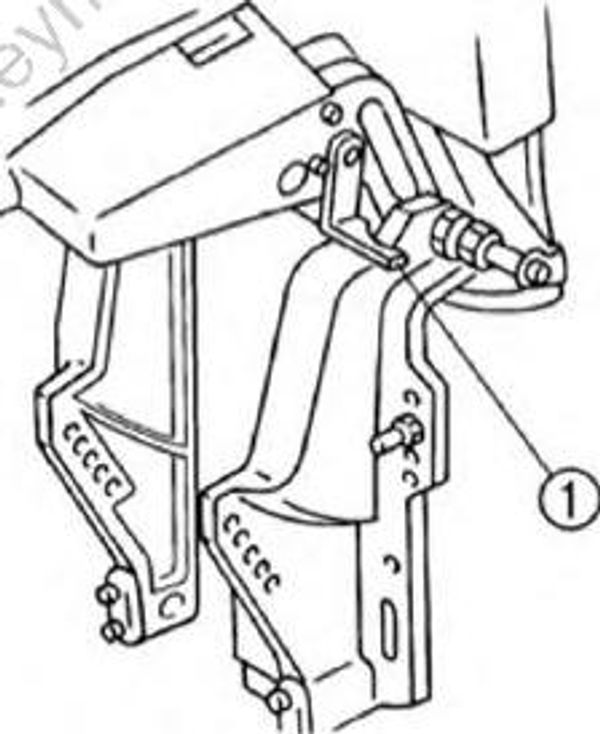
- Fully tilt the outboard up, and then sup port it with the tilt stop lever (1).
S62Y7990
WARNING
After tilting up the outboard, be sure to support it with the tilt stop lever.
Otherwise, the outboard could suddenly lower if the power trim and tilt unit should lose fluid pressure.
2.Install the shaft (2) and bolts (3) onto both clamp brackets together with the power trim and tilt/hydro tilt (4).
3.Install the tilt ram upper end into the swivel bracket with the shaft (5) and cir clip(s) (6).
- Install the tilt pin (7).
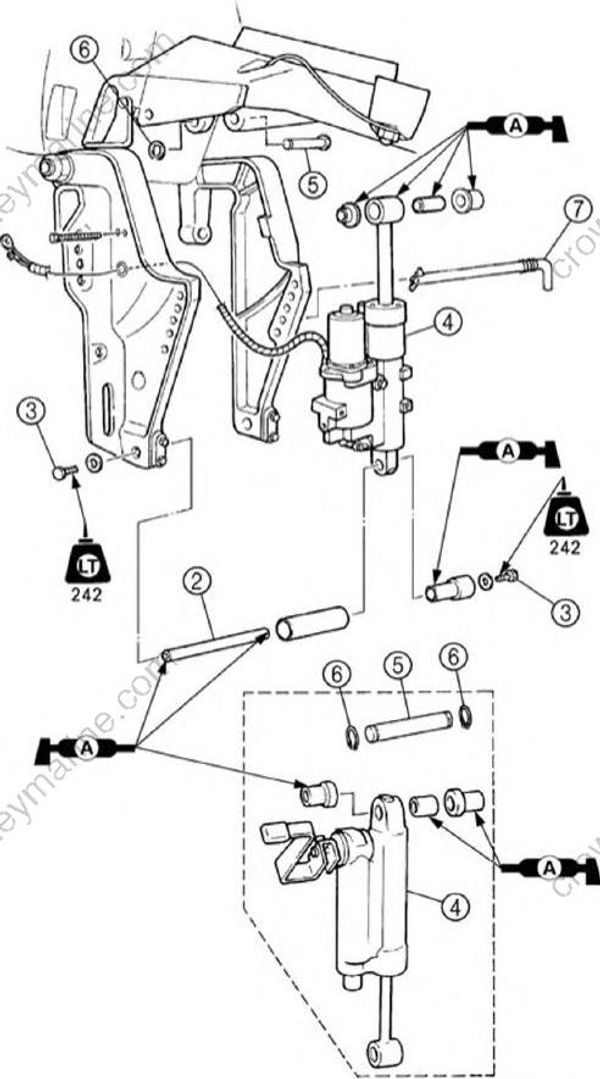
S62Y7A10
Power trim and tilt electrical system
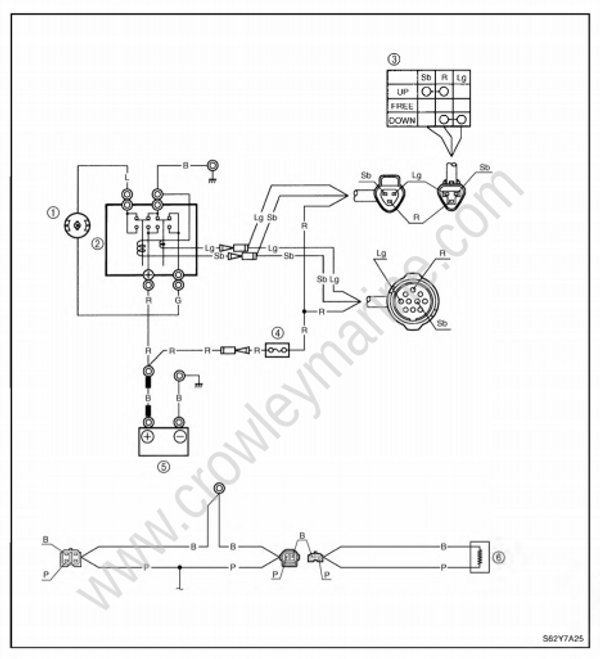
(1) Power trim and tilt motor
(2) Power trim and tilt relay
(3) Power trim and tilt switch
(4) Fuse
(5) Battery
(6) Trim sensor
B : Black
G : Green
L : Blue
Lg : Light green
P : Pink
R : Red
Sb : Sky blue
