

FUEL DELIVERY
Protect against hazardous fuel spray. Before starting any fuel system service, carefully relieve fuel system pressure.
Refer to Relieving Fuel System Pressure on p. 168.
IMPORTANT: Use the Evinrude Diagnostics Software program to review service codes prior to troubleshooting. Correct all conditions related to
service codes FIRST.
Inspect all fuel hoses, filters, and connections. Check quality of fuel supply.
Manifold Pressure Test
If the outboard runs, check pressure with the outboard running. Perform pressure tests outlined in Fuel Supply on p. 165.
If the outboard does not run, use the primer bulb to fill the vapor separator. Make sure circulation pump activates with outboard cranking.
The Fuel Pump test of the diagnostic program can be used to activate electric fuel pump.
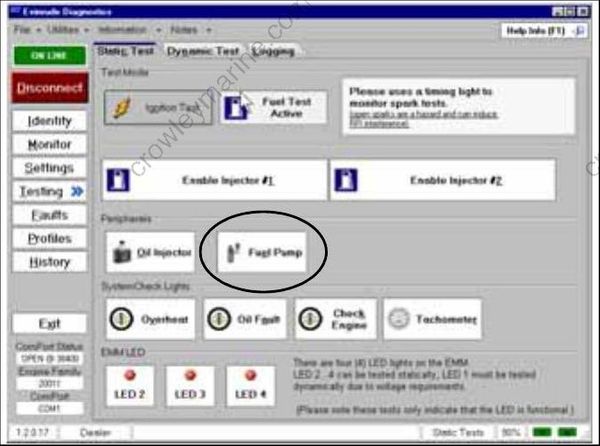
Static Tests Screen
Results:
Pressure test indicates 20 to 30 psi (138 to 207 kPa):
- Circulation pump output is good. Make sure fuel system pressure does not fall below 15 psi (103 kPa) after outboard (pump) is OFF for five minutes. Leakdown indicates a fuel system leak or leaking injector.
Low or no pressure, pump runs:
- Suspect damaged fuel pressure regulator in vapor separator or faulty circulation pump. Perform Pressure Regulator Test on p. 165.
Pump does not run:
Check voltage at pin 1 of fuel pump connector. Voltage should be 12 V key ON, 55 V cranking or running.
Check voltage at pin 2 of fuel pump connector. The EMM controls the fuel pump ground (brown wire). Use the fuel pump test of the diagnostic program to activate the ground control function of the EMM. Connect voltmeter positive lead to pin 2 and negative meter lead to ground. Activate Fuel Pump test or run outboard. Voltage reading should drop slightly as EMM connects the control circuit to ground.
Excessive pressure:
- Check for restricted pressure regulator in vapor separator or restricted fuel return manifold.
Vapor Separator Checks
Fuel Supply
The vapor separator must provide “solid” fuel to the fuel circulation pump. Make sure the vapor separator receives the proper fuel supply from the
fuel lift pump.
Perform Lift Pump Pressure Test on p. 166.
Use primer to check fuel movement through fuel lift pump.
Outboard runs: Check pressure with outboard running.
Outboard does not run: Check pressure with outboard cranking.
Venting
Monitor the vapor separator vent hose. No fuel or a trace of fuel is acceptable. Excessive fuel discharge indicates a vapor separator vent malfunction. Monitor vent for presence of fuel during testing. Temporarily install clear tubing for monitoring. Replace vapor separator if the venting of fuel is continuous.
Fuel Delivery to Lift Pump
Perform the Lift Pump Vacuum Test on p. 167. Make sure no restrictions or air leaks exist in the fuel supply hose or boat fuel system.
FUEL INJECTOR OPERATION
Neutral Switch
The powerhead mounted neutral switch provides a ground signal for the EMM to indicate shift linkage position. The engine Monitor screen of the diagnostic program provides a display which indicates switch position, NEUTRAL or IN GEAR. Make sure switch is operating properly. Refer to Neutral Switch on p. 90.
Static Tests
Perform the Fuel Injector Static Test using the diagnostic program. Static tests are performed with the outboard “static” or not running. Listen for
an audible “click” from each injector when it is actuated.
IMPORTANT: Battery must be fully charged and connections must be clean and tight.
Results:
No injectors actuate:
- Use the diagnostic software to monitor 55 V output. Check individual injector circuits from EMM to injectors. Check alternator 55 V input to
EMM. See Stator Voltage Output Test on p. 129.
Some injectors actuate; some do not:
- Make sure individual injector circuits and injectors are functional. See Injectors on p. 164.
All injectors actuate:
- Confirm fuel system pressure and fuel supply to injectors.
