

GEARCASE
Discard the cover gasket. Remove and discard the shift rod O-ring from inside of cover.
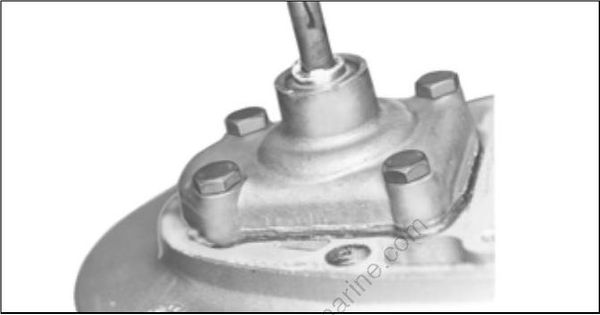
Remove the fill/drain plug and then remove propeller shaft assembly from gearcase.
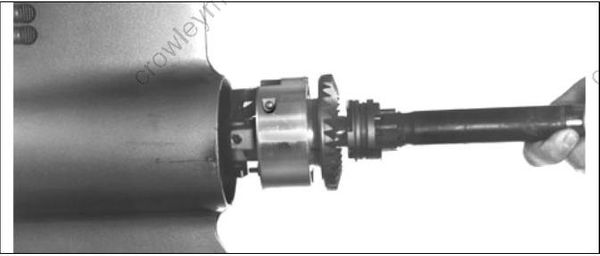
BEARING AND SEAL REMOVAL
Shift Housing
Wear safety glasses to avoid injury.
IMPORTANT: The shift housing and forward gear bearing are serviced as an assembly. If either are worn or damaged, replace the complete assembly.
Disassembly
Insert a suitable tool under one end of the clutch dog spring and remove it from its groove by unwrapping it from around the clutch dog. Discard the spring.
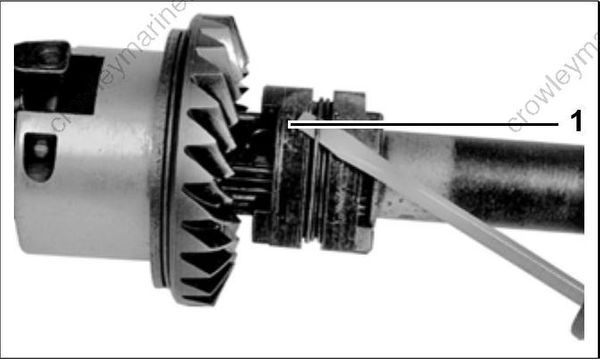
- Clutch dog spring
Push the pin out of the clutch dog. Remove all components.
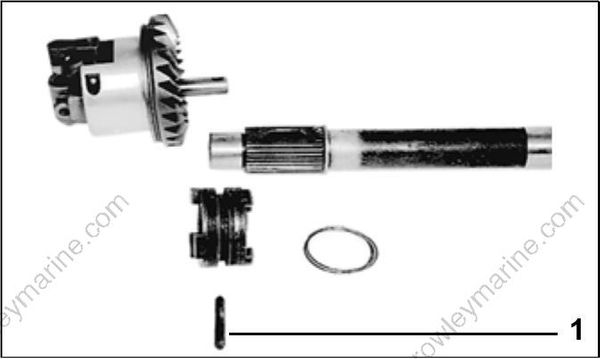
- Pin
Remove the gear, thrust bearing, and thrust washer from the shift housing.
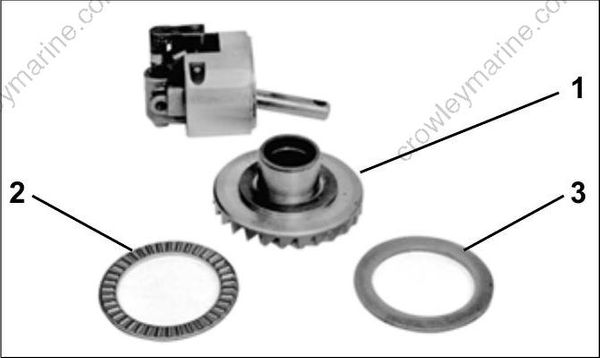
- Gear
- Thrust bearing
- Thrust washer
Remove the shift lever pin from the housing. Remove shift shaft, cradle and shift lever. Move shifter detent accordingly to assist in removal of components.
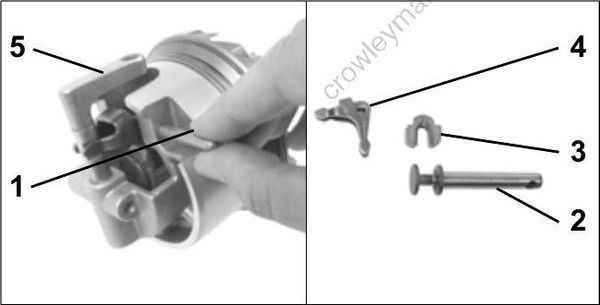
- Shift lever pin
- Shift shaft
- Cradle
- Shift lever
- Shifter detent
Wear safety glasses to avoid personal injury. The detent ball and spring and come out with great force.
Wrap the housing with a shop cloth to catch ball and spring. Rotate the shifter detent 90° in either direction, then pull the detent out of the housing.
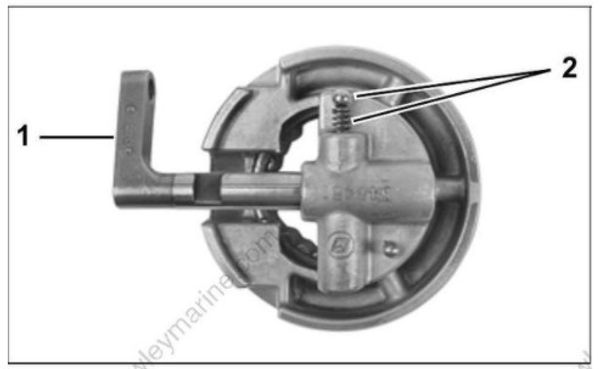
- Shifter detent
- Ball and spring
Remove the detent ball and spring.
Pinion Gear Bearing
Inspect the pinion bearing for damage without removing it. If the bearing is removed for any rea son, it must be replaced.
Removal
If the pinion bearing must be replaced, remove the bearing retaining screw from the gearcase. Discard the O-ring from the screw.
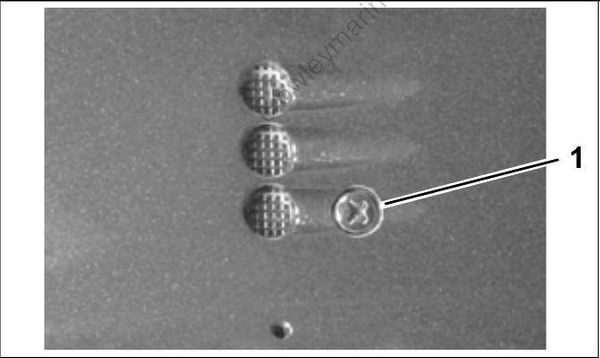
- Bearing retaining screw
Assemble Pinion Bearing Remover and Installer, P/N 391257, in the gearcase as follows:
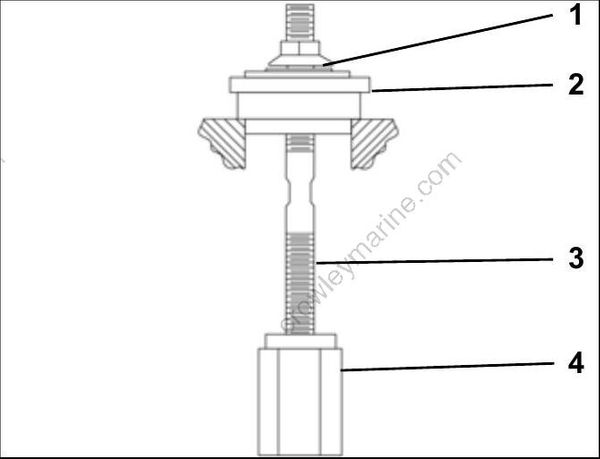
- Flange Nut, P/N 326586
- Plate, P/N 391260
- Rod, P/N 326582
- Remover, P/N 326580
Use a 1 in. wrench to hold the remover in place. Using a 3/4 in. wrench, turn the flange nut clockwise and draw the bearing up and out of the gearcase.
Water Intake Screen
Inspect the water intake screen for blockage and remove it by depressing the tabs on either side of the screen and pushing upward.
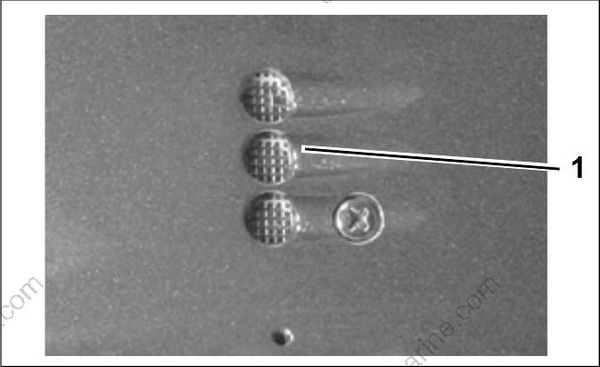
- Water intake screen
Driveshaft Bearing Housing
The driveshaft bearing is not serviceable. Replace the bearing housing assembly if the bearing is worn or damaged. Also, inspect the driveshaft bearing surface if the bearing is damaged.
Seal Removal
Remove the driveshaft bearing housing seal using Puller Bridge, P/N 432127, and Large Puller Jaws, P/N 432129. Discard the seal.
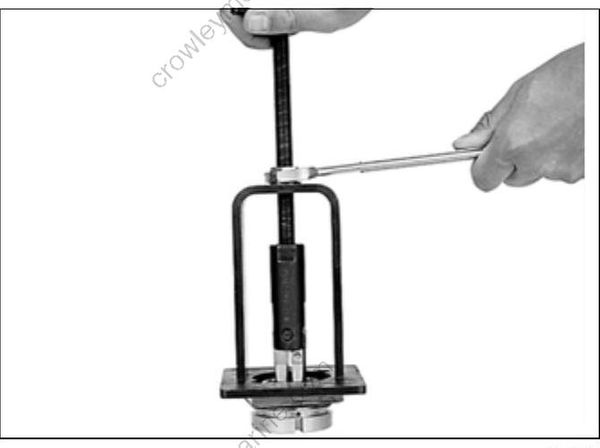
Remove and discard the O-ring from the bearing housing.
Clean the bearing housing in solvent to remove sealer from the seal bore and the O-ring groove.
Propeller Shaft Bearing Housing
Rear Seal Removal
Remove seals using Puller Bridge, P/N 432127, and Large Puller Jaws, P/N 432129. Position the plate on top of the housing to support the bridge, and tighten jaws securely behind the inner seal.
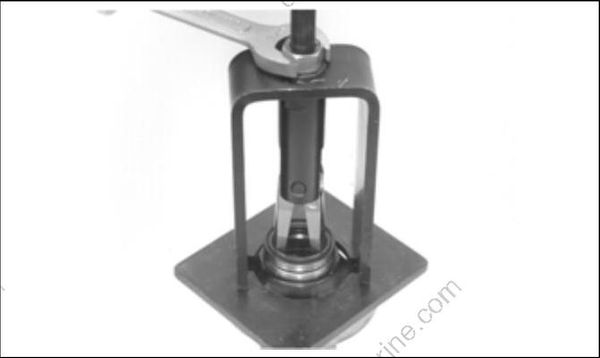
Bearing Removal
Rear seals must be removed if bearing replacement is needed. See Rear Seal Removal.
IMPORTANT: Inspect bearings in place. If a bearing is removed for any reason, it must be discarded.
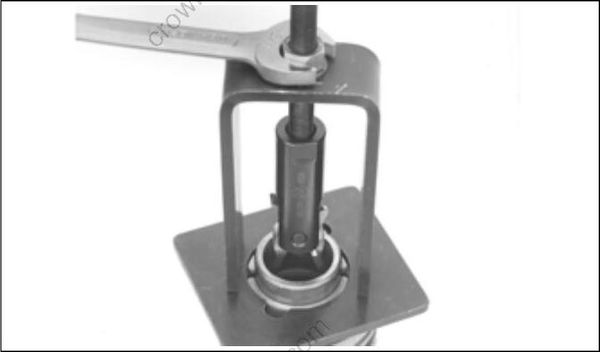
Remove rear bearing using Puller Bridge, P/N 432127, and Large Puller Jaws, P/N 432129. Rest the puller plate on top of the housing to support the bridge, and tighten the jaws securely behind the bearing.
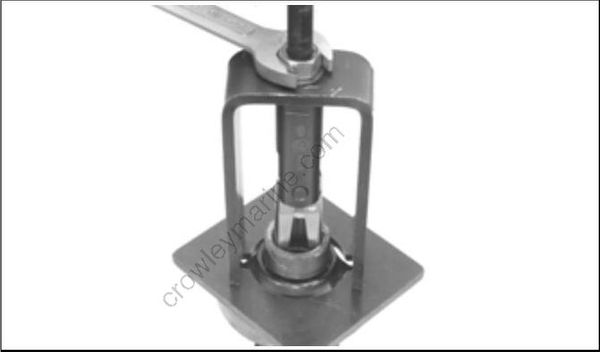
Remove front bearing using Puller Bridge, P/N 432127, and Bearing Puller, P/N 432130. Rest the puller plate on top of the housing to support the bridge, and tighten the jaws securely behind the bearing.
Inspect the bearing housing anode. Replace anode if it is reduced to two-thirds of original size.
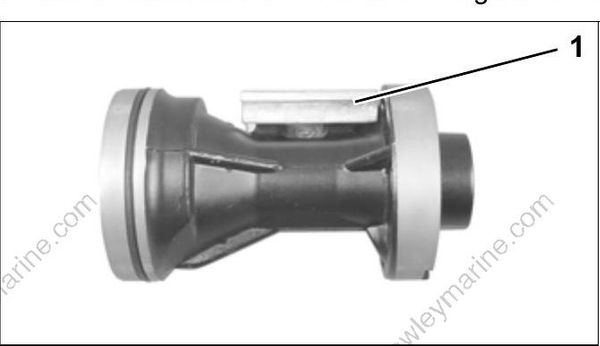
- Anode
Discard the bearing housing O-ring. Clean the housing and bearings in solvent and dry thoroughly. If bearings were not replaced, rotate the needles to check for freedom of movement.
Inspect O-ring groove, and sand off any sharp edges that would cut O-ring and prevent its sealing. Check for and remove any nicks or burrs on front of bearing housing.
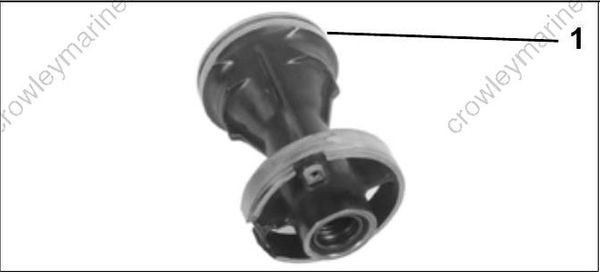
- O-ring groove
Thoroughly clean the four bearing housing retaining screws in solvent. Discard the O-rings.
