ICON COMPONENT SERVICING
To prevent accidental starting while servicing, disconnect the battery cables at the battery.
Electronic Servo Module (ESM)
Disconnect the battery cables at the battery. Remove the flywheel cover and air silencer.
Removal
Disconnect the:
ICON buss cable from ESM
ESM CANbus harness from EMM
ESM throttle actuator harness
ESM shift actuator harness
ESM power supply harness from solenoid and ground stud
Remove the ESM from studs.
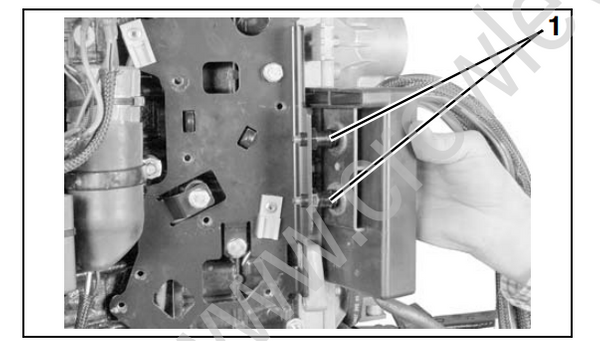
- Studs
Installation
Install grommets on ESM. Apply soapy water to grommets and push assembly on to studs.
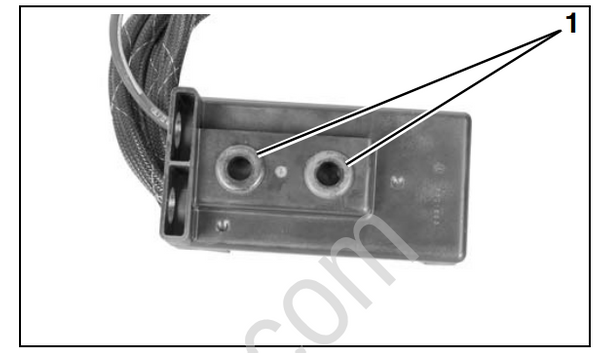
- Grommets
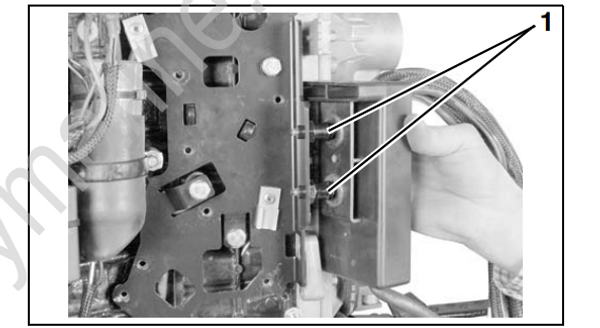
- Studs
Route the CANbus harness from the ESM around the flywheel cover to the EMM as shown and secure with tie straps.
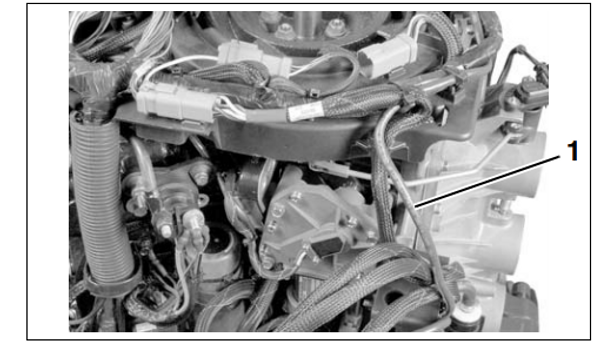
- CANbus harness
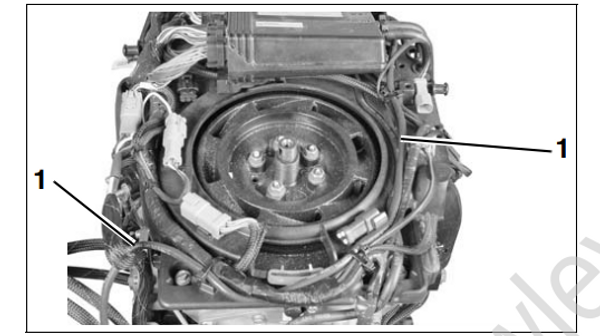
- CANbus harness
Continue harness routing to the EMM connector. Make sure harness is not strained.
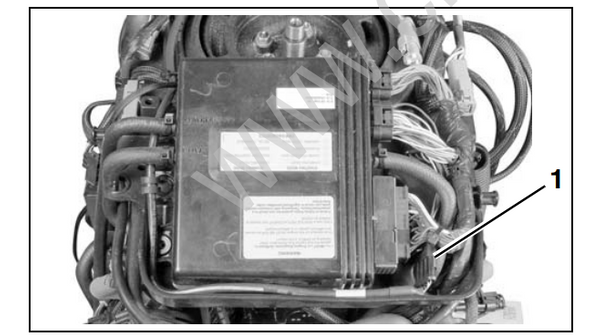
- EMM CANbus connector
Route ESM harnesses as shown and secure with tie straps. ESM to boat network cable should go behind and to the port side of the other cables.
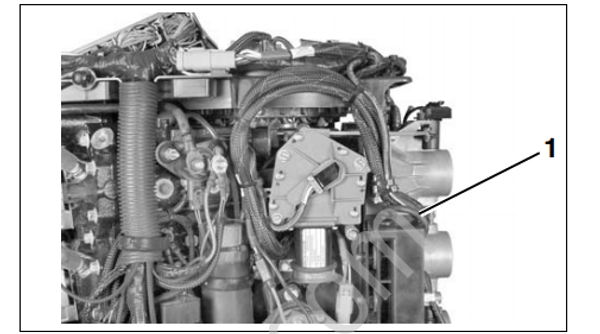
- Network cable
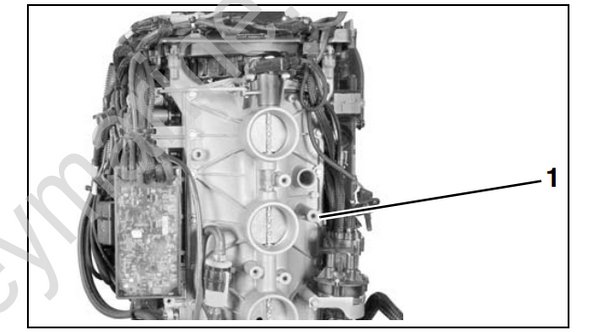
- Network cable
Route ESM power supply harness negative (–) terminal to engine main ground screw. Tighten screw to a torque of 60 to 84 in. lbs. (7 to 9.5 N·m).
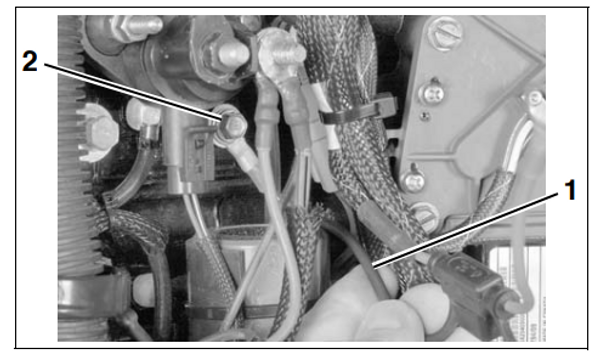
- ESM Power supply negative (–)
- Ground screw
Route ESM power supply harness positive (+) terminal to solenoid positive terminal. Install copper crush washer over ESM positive ring terminal.
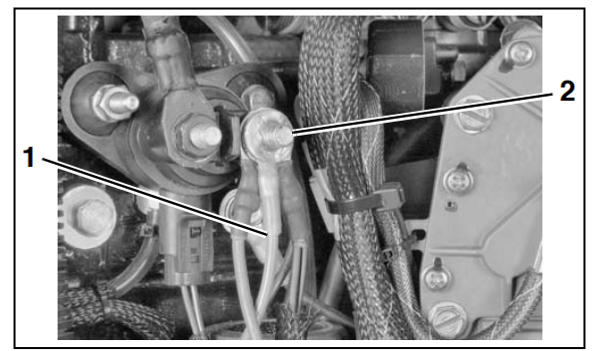
- ESM Power supply positive (+)
- Copper washer
Route battery cable as shown. Install negative cable on double-ended stud. Install star washer, positive battery cable, and nut on solenoid terminal. Tighten nuts to a torque of 60 to 84 in. lbs (7 to 9.5 N·m). Coat connections with Black Neoprene Dip.
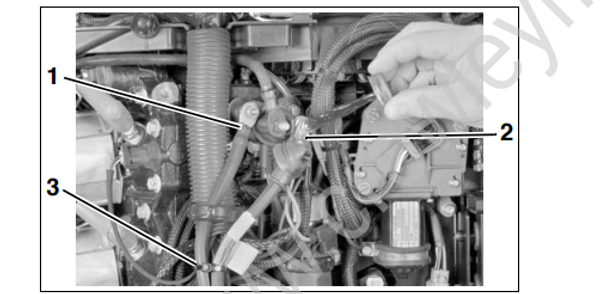
- Battery cable negative (–)
- Battery cable positive (+)
- Tie strap
Route battery cable and ESM to boat network cable out through the rigging grommet.
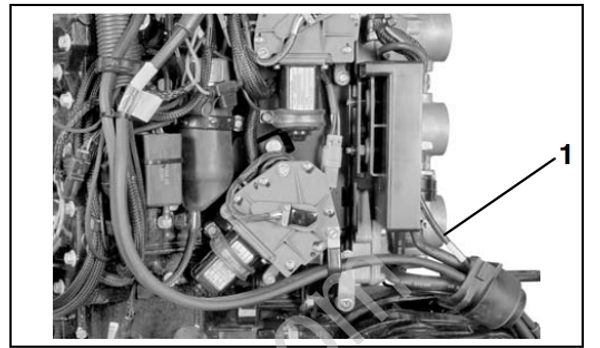
- Network cable
Install the flywheel cover. Connect the battery cables at the battery.
IMPORTANT: Calibrate shift and throttle actuators. Refer to Calibrate Actuator Stroke on p. 208.
Shift Actuator
Removal
Disconnect the battery cables at the battery. Remove the starboard lower engine cover.
Observe and note all wire routings before disassembling.
Remove clips and washers from the shift link.
Remove the shift link.
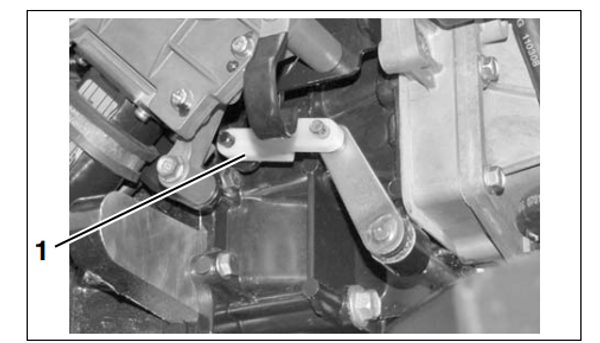
- Shift link
Remove the shift actuator connector from the clip on the mounting plate. Disconnect the shift actuator harness.
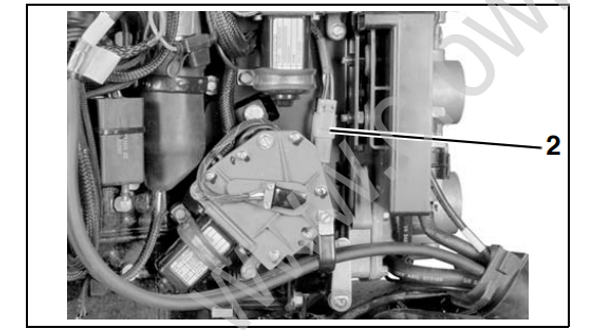
- Shift actuator connector
Remove the clamp retaining screw.
Remove the four shift actuator retaining screws.
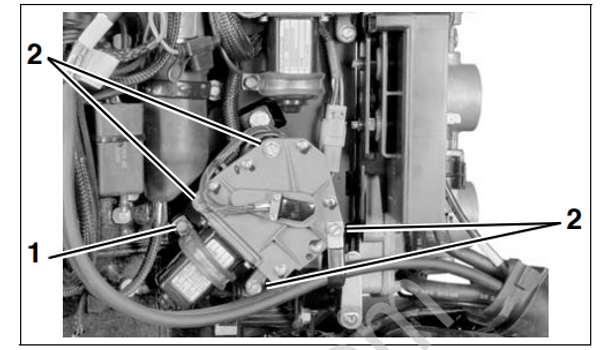
- Clamp retaining screw
- Shift actuator retaining screws
Installation
Remove old adhesive from clamp retaining screw and shift actuator retaining screws.
Apply Nut Lock to the threads of the screws.
Install shift actuator on mounting plate with three long screws and one short screw. Tighten screws to a torque of 60 to 84 in. lbs. (7 to 9.5 N·m).
Place clamp over actuator motor. Install and tighten screw to a torque of 60 to 84 in. lbs. (7 to 9.5 N·m).
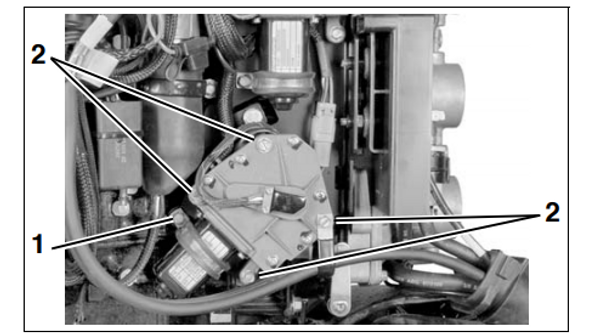
- Shift actuator retaining screws
- Clamp retaining screw
Connect the shift actuator harness. Attach to clip on mounting plate.
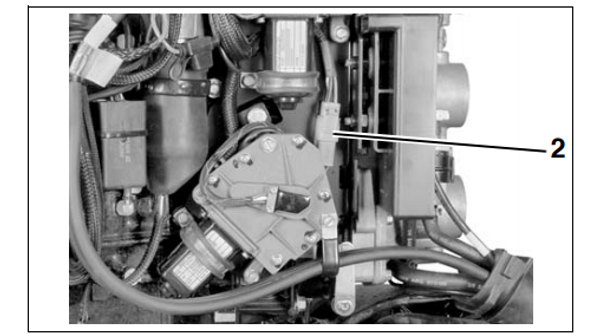
- Shift actuator connector
Route all harnesses as shown and secure with tie straps.
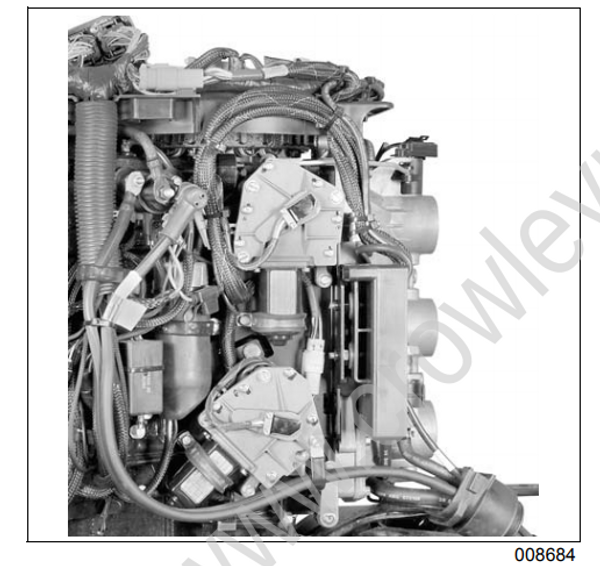
Install the starboard lower engine cover. Connect the battery cables at the battery.
IMPORTANT: Do not install shift link until the calibration procedure has been completed. Refer to Calibrate Actuator Stroke on p. 208.
Throttle Actuator
Removal
Disconnect the battery cables at the battery. Remove the flywheel cover and air silencer.
Observe and note all wire routings before disassembling.
Remove the throttle actuator connector from the clip on the mounting plate. Disconnect the throttle actuator harness.
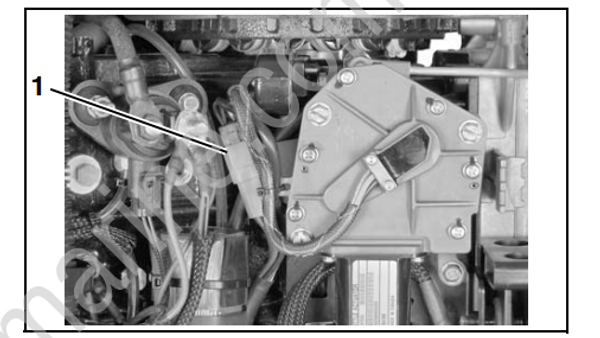
- Throttle actuator connector
Remove the clamp retaining screw.
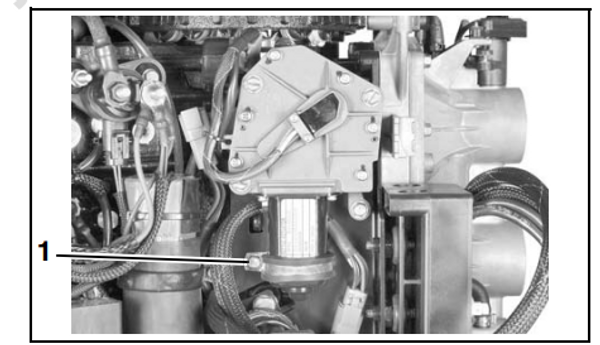
- Clamp retaining screw
Use Ball Socket Remover tool, P/N 342226, to remove throttle link from actuator arm.
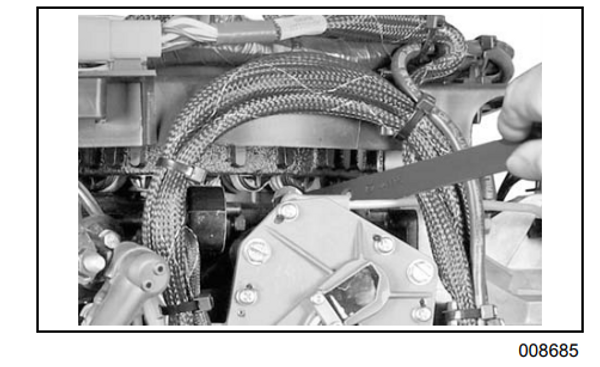
Remove the four throttle actuator retaining screws.
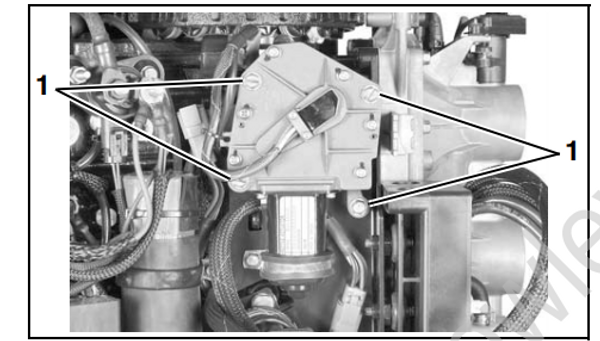
- Throttle actuator retaining screws
Installation
Remove old adhesive from clamp retaining screw and shift actuator retaining screws.
Apply Nut Lock on the threads of the screws.
Install throttle actuator on mounting plate with three long screws and one short screw. Tighten screws to a torque of 60 to 84 in. lbs. (7 to 9.5 N·m).
Place clamp over actuator motor. Install and tighten screw to a torque of 60 to 84 in. lbs. (7 to 9.5 N·m).
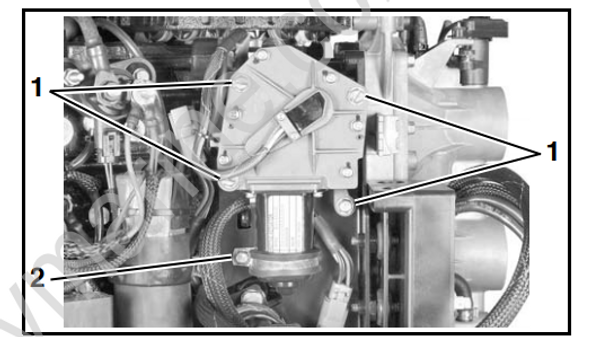
- Throttle actuator retaining screws
- Clamp retaining screw
Use Ball Socket Installer tool, P/N 342225, to snap throttle link onto actuator arm.