

DEUTSCH Connectors
IMPORTANT: Electrical Grease is recommended. Incorrect grease application can cause electrical or warning system problems.
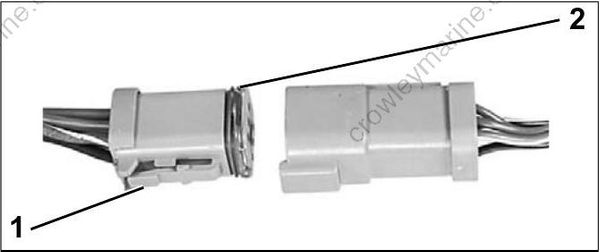
To disconnect the connector, press the latch and pull the connectors apart.
To connect the connector, confirm that the seal is in place . Cle an off any old grease and dirt from connectors. Apply a light coat of Electrical Grease to seal only. Push connectors together until latched.
42079A
- Latch
- Seal
Terminal Removal
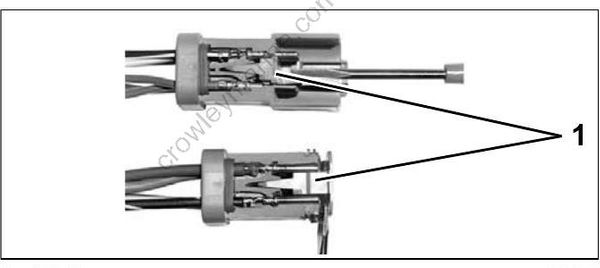
Use hook-end of Connector Service Tool, P/N 342667, to pull out wedge from receptacle, or use other end of tool to pry out wedge from plug. Use need le-nose pliers to remove wedge from 3-pin receptacle.
42327
- Wedge
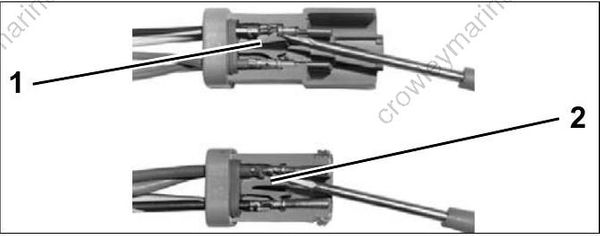
Release terminal latch and gently pull on wire.
423293
- Terminal latch (receptacle)
- Terminal latch (plug)
Terminal Installation
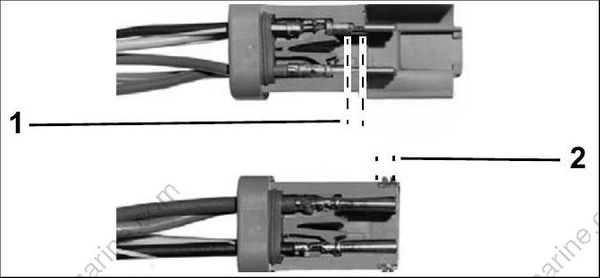
Push terminal through seal until it locks into place. Fill connector with Electrical Grease to 1/32 in. (0.8 mm) below ledge or end of plug.
42330
- Ledge of plug
- End of plug
Push wedge in until latched. W edge in 2-pin receptacle is not symmetrical; position latch shoulders next to terminals.
Crimping Terminals
Strip insulation back 3/16 in. (5 mm). Place terminal in 18-gauge notch of Crimping Pliers, P/N 322696. Position end of wire strands in terminal past wire crimp area, and position end of insulation past insulation crimp area. Capture all wire strands in crimp; leave no loose strands. Crimp wire securely. Do not s older. Crimp insulation in 14/16-gauge notch of crimping pliers.
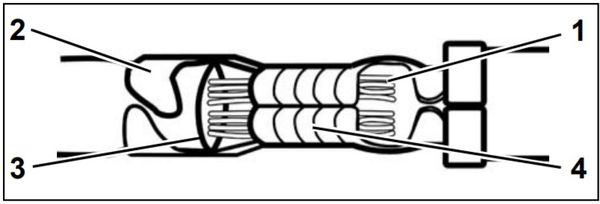
End of wire strands
Insulation crimp area
End of insulation
Wire crimp area
AMP Connectors
IMPORTANT: Always use the appropriate meter test probe s and adapters when testing components fitted with these terminals. Electrical grease is NOT used on AMP connectors.
SUPERSEAL 1.5
Disconnect
Lift latch. Pull connectors apart.
Connect
Confirm the seal is in place. Push connectors together until latched.
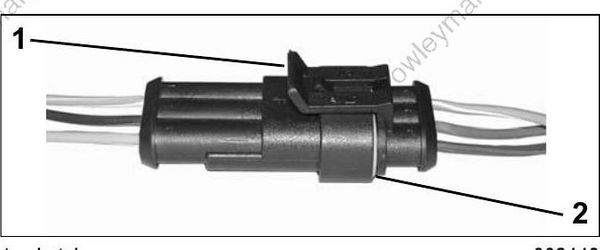
002448
- Latch
- Seal
Terminal Removal
Use Secondary Lock Tool, P/N 777078, to release anti-backout device of connector housing. Next, use Primary Lock Tool, P/N 77 7077, to release locking tab of connector housing. Release locking tab a nd pull on wire to remove from connector housing.
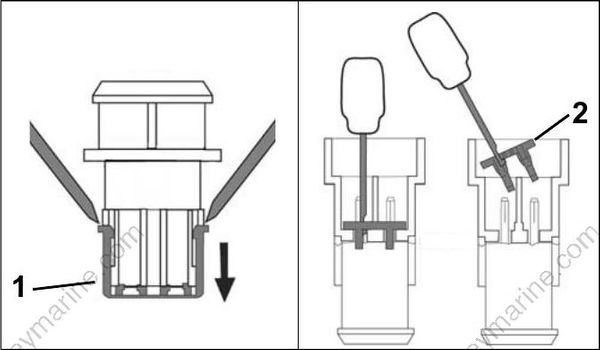
002449
002450
- Anti backout device, plug
- Anti backout device, receptacle
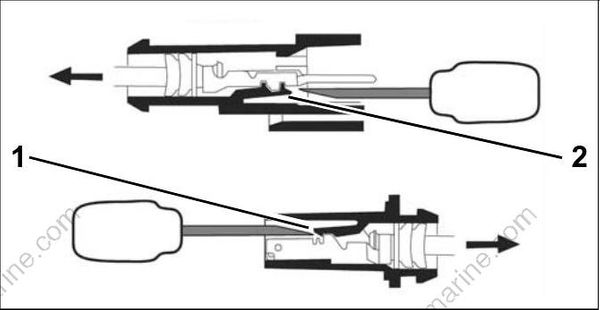
002447
- Locking tab, plug
- Locking tab, receptacle
Terminal Installation
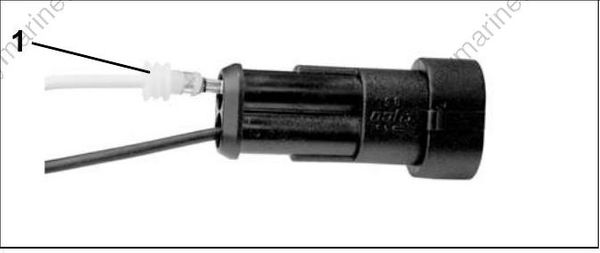
Align terminal with connector housing. Push connector and seal into housing until seated.
002451
- Terminal and seal
Align anti-backout device with connector housing and terminals. Use Secondary Lock In staller, P/N 777079, to seat device in connector.
Crimping Terminals
Crimping Superseal 1.5 terminals requires AMP Crimp Tool with dies, P/N 777281.
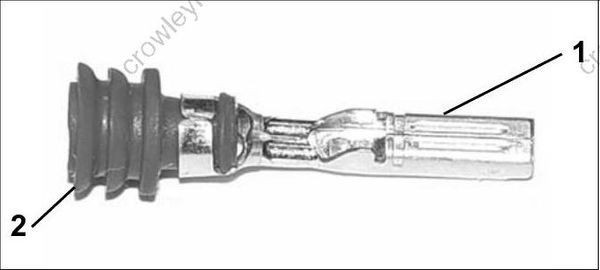
002452
- Terminal
- Seal
SUPER SEAL
The J1-A and J1-B connectors of the EMM are AMP Super Seal connectors.
Disconnect
Depress BOTH latches and pull connector from plug.
Connect
Push connector into plug until latches engage.
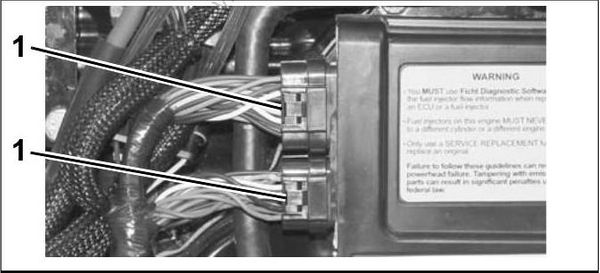
002118
- Latch
Terminal Removal
Open lock mechanism and remove terminal from connector housing.
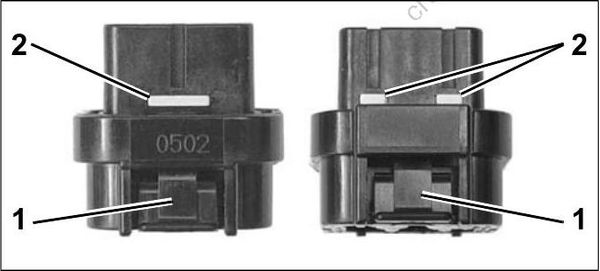
002453
- Latch
- Lock mechanism
Terminal Installation
Push terminal through seal until it is seated in connector housing. Close lock mechanism.
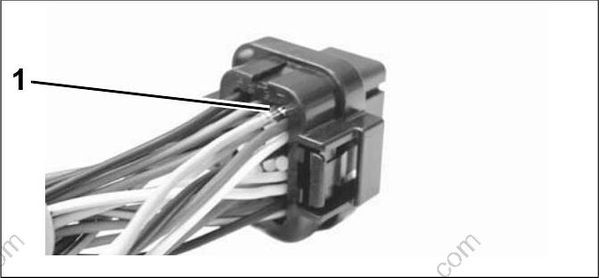
002454
- Terminal
POWER TIMER SERIES
The J2 connector of the EMM is a AMP Power Timer Series connector.
Disconnect
Use a screw driver to open latch. Pull connector from plug.
Connect
Push connector until seated in plug. Close latch completely.
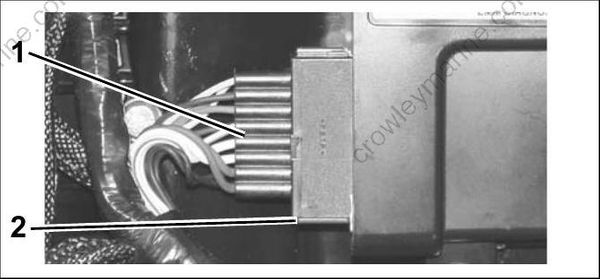
002448
- J2 connector
- Latch (closed)
Terminal Removal
Use Terminal Release Tool, P/N 351413, to release BOTH locking mechanisms of connector. Pull terminal from housing.
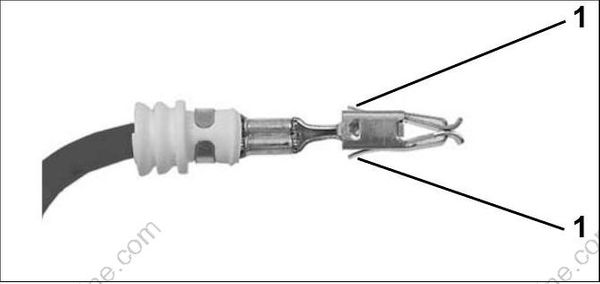
002455
- Locking mechanism(s)
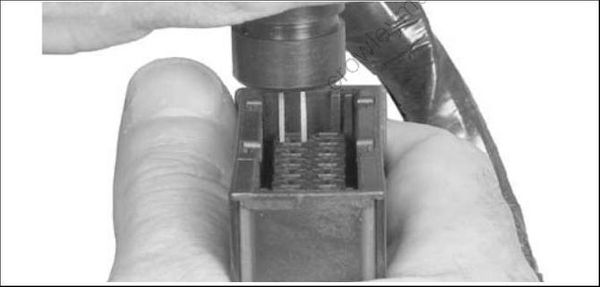
002313
- Terminal release tool
Terminal Installation
Align terminal with connector housing and push terminal with se al in to connector housing until seated.
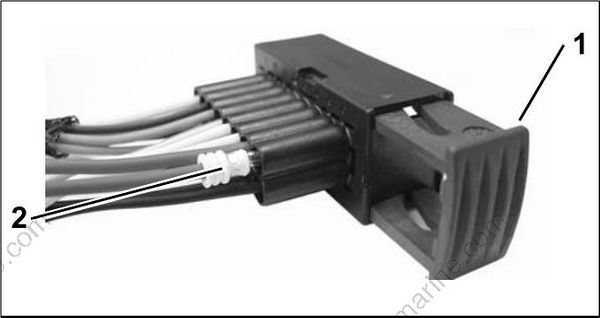
002456
- Latch
- Terminal with seal
Packard Connectors
IMPORTANT: Always use the appropriate meter test probes and adapters when testing components fitted with these terminals.
Disconnect
Lift latch(s). Remove connector.
Connect
Confirm the seal is in place. Push connector onto housing until latched.
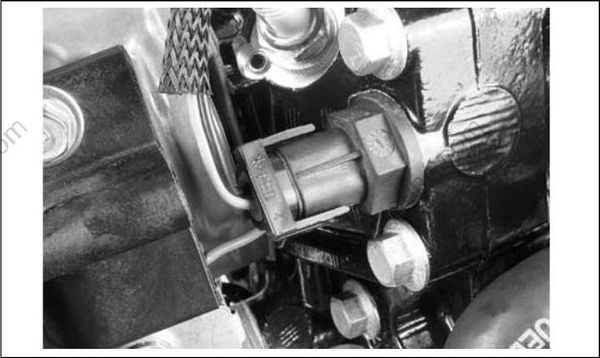
dsc02124
Terminal Removal
A tab on the back side of the terminal engages a shoulder in the connector housing to hold the terminal in place. The terminal is removed by releasing the tab and then pushing the terminal and wire through connector housing.
Insert a thin tool into the connector above the terminal to release tab.
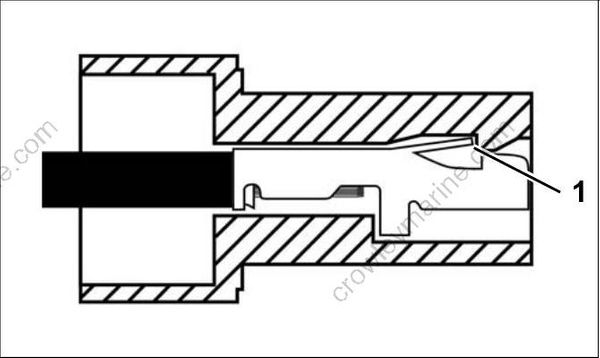
DRC5940a
- Tab
Terminal Installation
Install wire gasket on wires and feed wires through the correct terminal position of the connector housing. Terminal is crimped onto wire and then pulled back into connector housing until locking tab engages and terminal is seated.
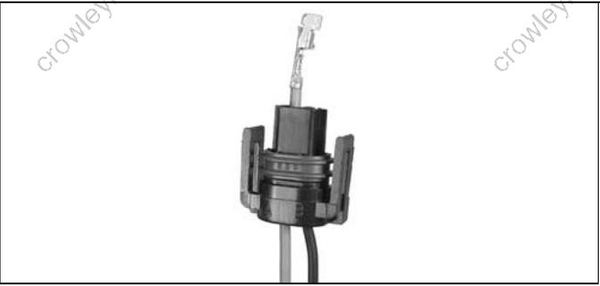
Crimping Terminals
Strip insulation back 3/16 in. (5 mm). Position end of wire strands in terminal past the wire crimp area and the end o f insulation in the insulation crimp area of the terminal.
Capture all wire strands in crimp ; leave no loose strands. Crimp wire and insulation securely using crimping pliers.
