

TACHOMETER CIRCUIT TESTS
Check voltage at the battery. Use this reading as a reference for battery voltage.
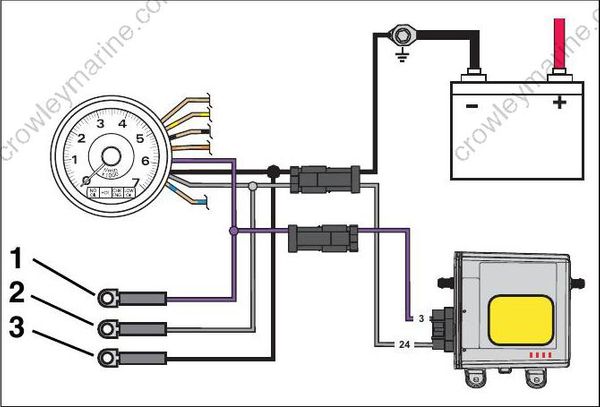
- Purple lead
- Gray lead
- Black lead
Connect the red meter lead to the tachometer purple wire and the black meter lead to the tachometer black wire (key ON, outboard NOT running).
- If meter shows battery voltage, go to next step.
- If meter shows less than battery voltage, check the purple, red/purple, and black wiring circuits; fuse, key switch, and battery connections.
Disconnect gray and black wires at tachometer. Set Fluke 29 Series II meter, or equivalent, to Hz scale. Connect meter between gray wire and black wire. With outboard running at 10 00 RPM, meter should indicate 90 to 105 Hz.
• If meter reads 90 to 105 Hz, replace tachometer.
• If meter reads low or no signal, confirm output on gray wire at pin 24 of EMM J1-A connector.
– Reading OK – Check condition of tachometer circuit (gray wire). Repair as needed.
– Reading not OK – Check connection at EMM; replace faulty EMM.
FLYWHEEL AND STATOR SERVICING
IMPORTANT: Weak flywheel magnets can cause low alternator output and affect outboard performance. Weak flywheel magnets can also cause low readings on ignition test equipment, such as a peak-reading voltmeter , which might cause unnecessary parts replacement.
An accurate test of alternator output can help determine the flywheel’s condition. Refer to CHARGING SYSTEM TESTS on p. 91.
Flywheel Removal
To prevent accidental starting while servicing, disconnect the battery cables at battery.
Remove the recoil starter assembly. Refer to RECOIL STARTER REMOVAL on p. 281.
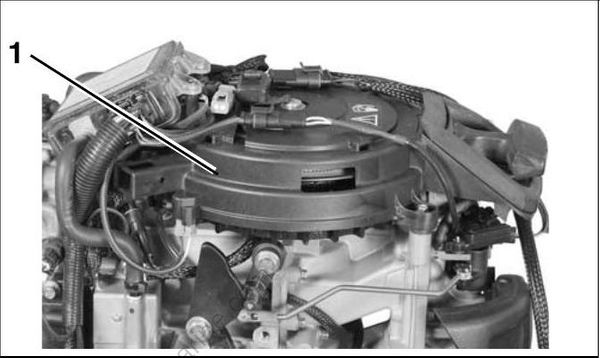
- Recoil Starter
Use Flywheel Holder, P/N 771311, or equivalent, and a 28 mm socket to remove flywheel nut.

Apply Moly Lube grease to the threads of the puller pressing screw, P/N 307637, and the center hole of the crankshaft.
Assemble the following components from Universal Puller Set, P/N 378103:
- Body, P/N 307636
- Screw, P/N 307637
- Handle, P/N 307638
- Three screws P/N 309492
- Three washers, P/N 307640
Put the puller on flywheel with body flat side up. Attach the puller body with the three shoulder screws and washers. Hold puller body with handle, and tighten pressing screw until flywheel releases. Turn the center screw and lift the flywheel off of the crankshaft.
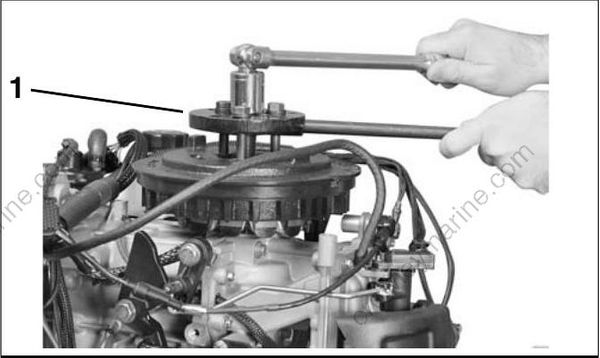
- Universal puller
Stator Service
Disconnect stator harness connector.
Remove three allen head screws to remove stator.
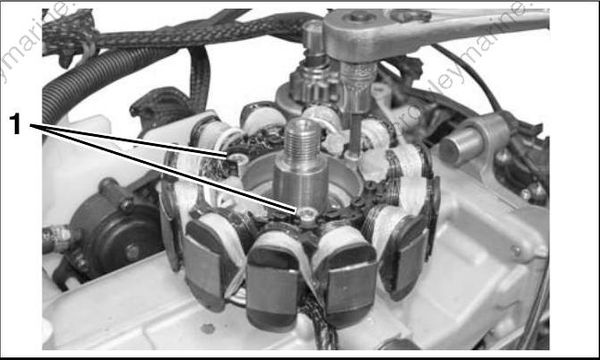
- Stator screws
To install stator, position stator on cylinder block. Apply Nut Lock to screw threads. Install screws and tighten in crossing pattern to a torque of 84 to 106 in. lbs. (9.5 to 12 N·m).
Flywheel Installation
To avoid injury, keep hands and fingers clear from underside of flywheel. Flywheel can snap toward stator with great magnetic force.
Install the outer edge of flywheel key parallel with centerline of crankshaft.
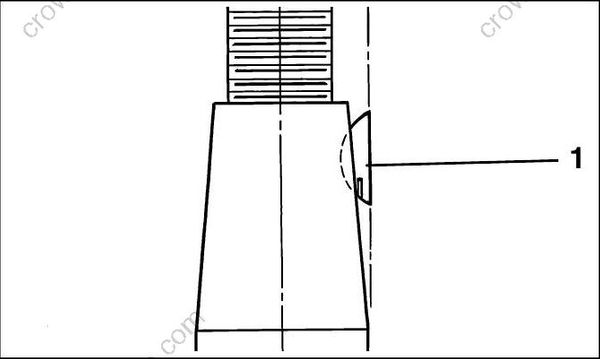
- Flywheel key
Thoroughly clean the crankshaft and flywheel tapers with Cleaning Solvent™ and let dry.
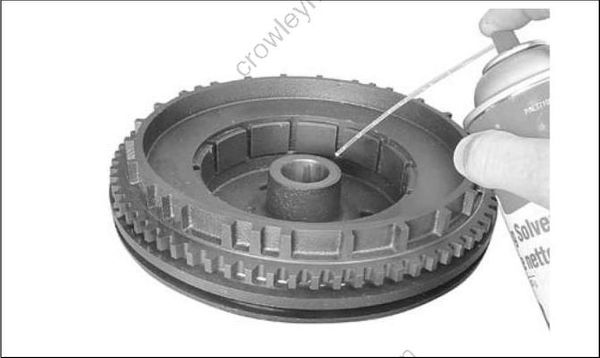
Align the flywheel keyway and install flywheel.
Coat the threads of the flywheel nut with Triple-Guard grease.
Install the washer and nut and tighten to a torque of 66 to 70 ft. lbs. (90 to 95 N·m).
To prevent damage to crankcase or cylinder block, DO NOT allow Flywheel Holder to rest against recoil starter mounting boss.
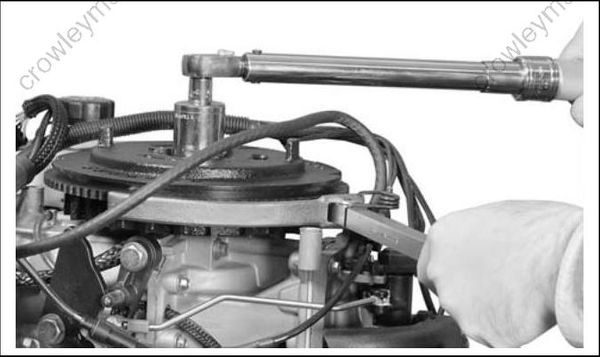
Replace recoil starter.
IMPORTANT: Check ignition timing after flywheel removal or replacement. Refer to TIMING ADJUSTMENTS on p. 106.
IGNITION COIL SERVICING
Ignition Coil Removal
Remove spark plug lead from ignition coil and dis connect ignition coil electrical connector.
Remove two ignition coil retaining screws.
Do not lose the rubber washers between coil and bracket.
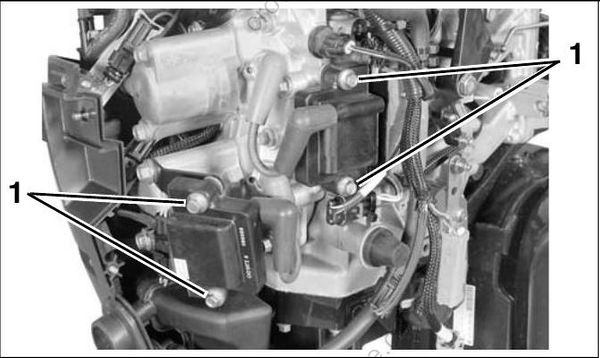
- Screws
Ignition Coil Installation
Install one rubber washer on each screw and install screw through ignition coil. I
nstall remaining rubber washers on screws between coil and bracket.
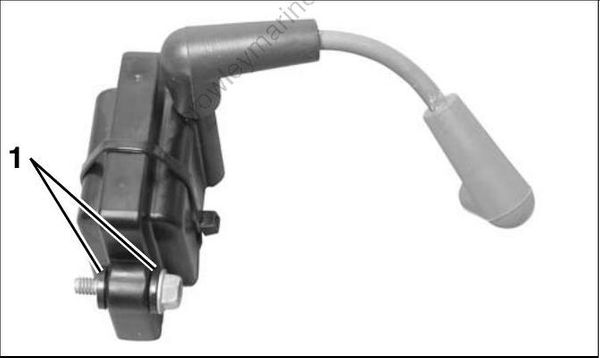
- Rubber washers
Install coil on bracket. Tighten screws to a torque of 31 to 49 in. lb. (3.5 to 5.5 N·m).
Install spark plug lead on ignition coil and connect ignition coil electrical connector.
