

Step 1: PRIMING
To prevent injury from contact with rotating propeller, always remove the propeller before running on a flushing device.
The oiling system of the outboard must be primed:
- After the initial installation of the outboard (pre delivery);
- Whenever the oil supply to the oil lift pump is disconnected or disrupted; and
- Whenever an oiling system component is removed or replaced.
Step 2: Oil Hose Connections
Always use caution while working around machinery with moving parts. The following set-up procedures require running tests that are performed with the outboard’s motor cover removed.
Insert the end of the oil supply hose (from the oil tank) into a suitable container.
Squeeze the oil primer bulb to flow oil from the oil tank.
Once oil flow is observed, connect the oil tank hose to the outboard’s oil supply hose and secure with 14.5 mm Oetiker clamp.
Observe oil flow through the oil distribution hoses.
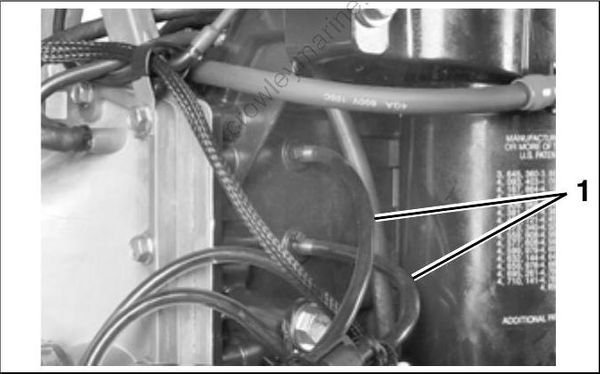
- Oil distribution hoses (7)
Step 3: Oil Distribution Manifold Priming
Follow these steps for initial outboard set-up:
- Squeeze the oil primer bulb to flow oil from the hose connection, through the filter, to the oil pump.
- Visually inspect filter to ensure that all air has been purged.
- Continue squeezing the primer until oil flows through the distribution manifold into the oil distribution hoses and to the crankcase fittings. All air must be eliminated from oil lines.
- Use the Evinrude Diagnostics Software program to confirm that the EMM is programmed for the type of oil being used.
- Start the outboard and use the oil priming function in the software for a minimum of 90 seconds to make sure the system is completely primed.
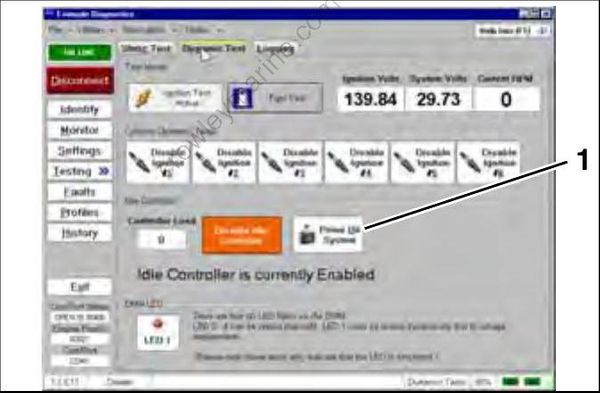
Dynamic Tests Screen
- Prime Oil button
Small bubbles are acceptable. Large bubbles must be eliminated through a continued priming process.
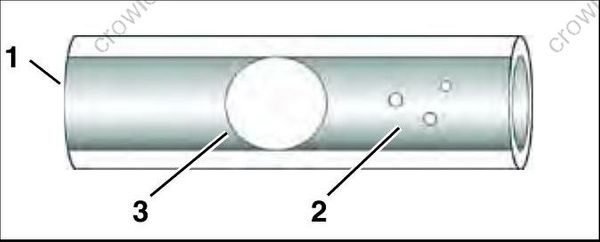
- Oil distribution hose
- Small bubbles
- Large bubbles
