ELECTRICAL AND IGNITION
If the pointer alignment is NOT correct, rotate the flywheel clockwise to align the mark “C” with the pointer. Hold the flywheel in this position. Loosen the pointer retaining screw and adjust the pointer location to align with the cast-in TDC boss on the flywheel. Tighten retaining screw.
Install spark plugs. Refer to Spark Plug Indexing on p. 155.
Timing Verification
Use the Evinrude Diagnostics Software program to synchronize the mechanical timing of the out board with the electronic timing control function of the EMM.
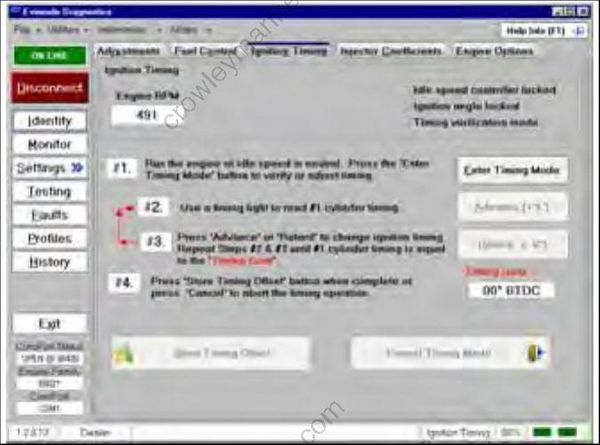
Timing Adjustment Screen
Perform timing verification after any of the following procedures:
- Powerhead replacement
- Crankshaft replacement
- Flywheel removal or replacement
- CPS replacement
- EMM replacement
- EMM software replacement (reprogramming)
Make sure the timing pointer is set and the outboard reaches operating temperature before timing verification is performed.
SPARK PLUGS
Inspection
Spark plugs should be removed and examined periodically. Replace worn, fouled or damaged spark plugs.
Use only recommended spark plugs with the cor rect gap setting.
| Spark Plug, Champion |
|---|
| QC10WEP @ 0.028 ± 0.003 in. (0.76 mm) |
- Remove spark plugs and inspect condition.
- Set spark plug gap on new, replacement spark plugs.
- Mark spark plugs for ground electrode orientation.
- Apply Electrical Grease to the ribbed portion of the spark plug ceramic and to the opening of the spark plug cover to prevent corrosion.
- Install spark plugs using “indexing” procedure.
Indexing
Spark plug indexing positions the ground electrode of the spark plug opposite the fuel injector nozzle.
Put an ink mark on the ceramic of the spark plug that is in line with the OPEN side of the ground electrode. This mark will be used to orient the spark plug with the OPEN side of the ground electrode facing the fuel injector.
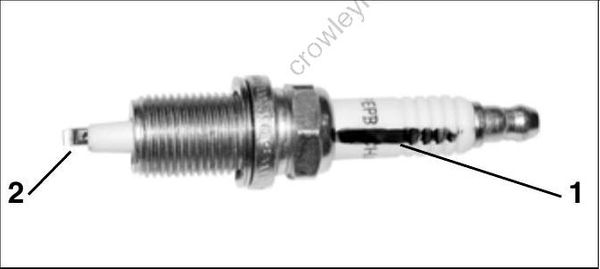
- Ink mark
- Open side
Apply Triple-Guard grease to the gasket surface of the spark plugs. Install all spark plugs and tighten them to a torque of 15 ft. lbs. (20 N-m).
If the mark is in unshaded area do not tighten any more.
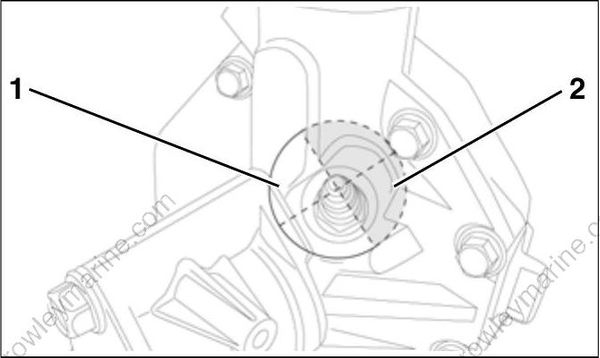
Spark Plug Indexing Diagram
- Unshaded area
- Shaded area
If the mark is in the shaded area, reset torque wrench to 30 ft. lbs. (41 N-m) and continue to turn until the mark is in the unshaded area.
If the mark does not reach the unshaded area before the torque of 30 ft. lbs. (41 N-m) is reached, the spark plug cannot be indexed for that cylinder. Try another spark plug and repeat the steps above.
ELECTRIC STARTER SERVICING
Removal
Do not clean the starter drive while the starter motor and drive are installed on the powerhead. The cleaning agent could drain into the starter motor, washing dirt from the drive into the starter bearings and commutator.
Disconnect the battery cables at the battery. Remove the starter positive (+) cable.
Remove the four frame and bracket mounting screws. Lift and remove the starter.
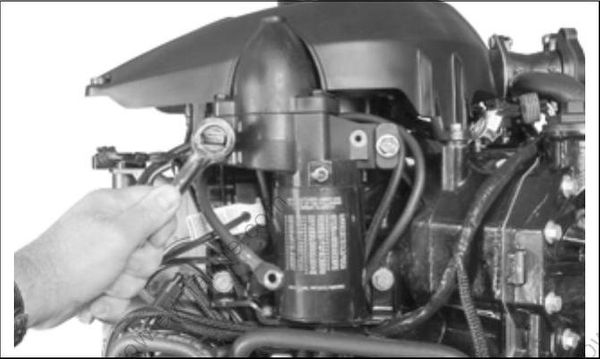
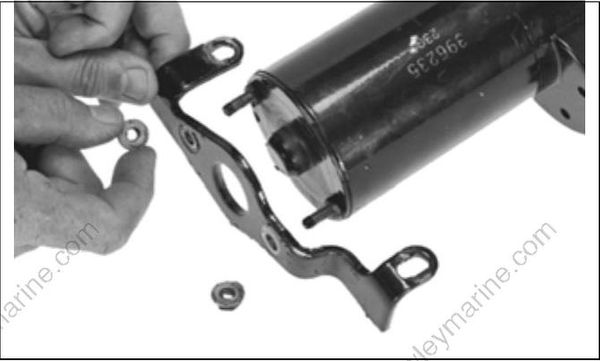
Loosen the two nuts used to fasten the starter bracket. Remove the nuts and bracket.