

LEAK TEST
Drain lubricant before testing.
STEP 1
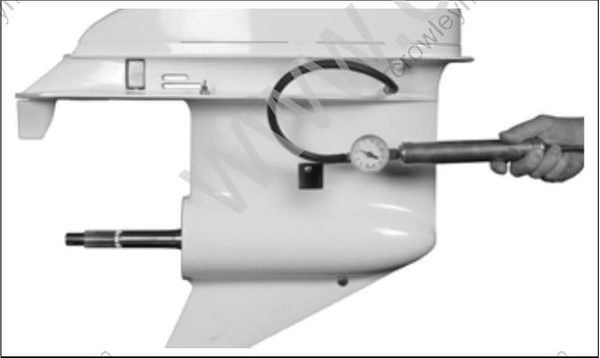
Install lubricant drain/fill plug and seal, thread pressure test gauge fitting and seal in lubricant level hole.
Pressurize 3 to 6 psi (21 to 42 kPa).
If pressure gauge indicates leakage, submerge the gearcase in water to determine source of leak. If the gearcase pressure gauge does not indicate leakage, increase pressure to 16 to 18 psi (110 to 124 kPa). Check for leakage.
Make necessary repairs and repeat test.
STEP 2
Complete successful STEP 1 before proceeding. Install vacuum test gauge. Apply 3 to 5 in. of vacuum (76 to 127 mm) Hg. with pump. Check for leakage.
If leakage occurs, apply oil around suspected seal. If leak then stops or oil is drawn in, that seal is defective.
Repeat test. Gearcase must hold minimum of 15 in. (381 mm) Hg.
REMOVAL AND INSTALLATION
Removal
To prevent accidental starting while servicing, twist and remove all spark plug leads.
During service, the outboard may drop unexpectedly. Avoid personal injury; always support the outboard’s weight with a suitable hoist or the tilt support bracket during service.
Remove screw from shift lever to release the lower shift rod.
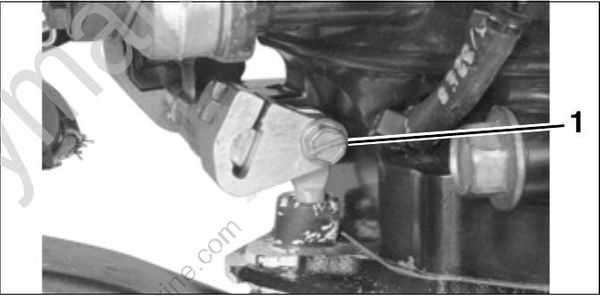
- Shift rod screw
Note where the index mark on the gearcase aligns with the index number of the adjustable trim tab so the trim tab can be installed in the same position. Remove the trim tab retaining screw, gasket and trim tab from the gearcase.
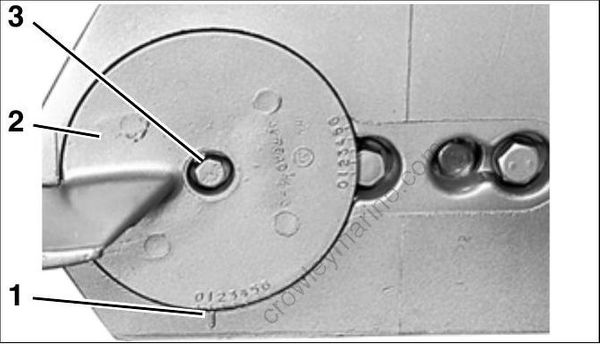
- Index mark
- Trim tab
- Trim tab retaining screw
Remove the forward screw with the washer, and remove middle screw.
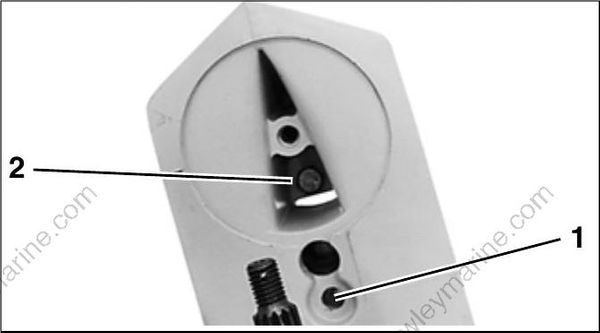
- Forward screw
- Middle screw
Remove the four gearcase retaining screws.
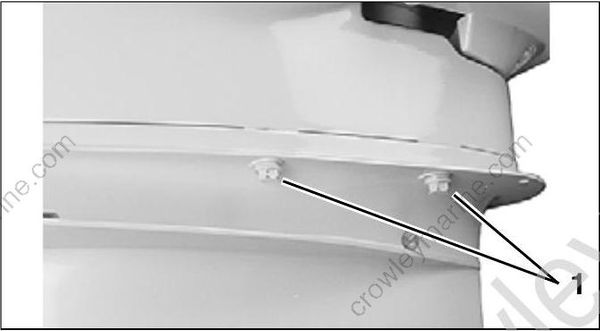
- Gearcase retaining screws
Remove the gearcase assembly from the exhaust housing, being careful not to bend the shift rod or damage the water tube. The lower inner exhaust housing may come out with the gearcase.
Installation
During service, the outboard may drop unexpectedly. Avoid personal injury; always support the outboard’s weight with a suitable hoist or the tilt support bracket during service.
IMPORTANT: Before installation of gearcase on motor, shift rod adjustment MUST be checked. Refer to SHIFT ROD ADJUSTMENT on p. 314.
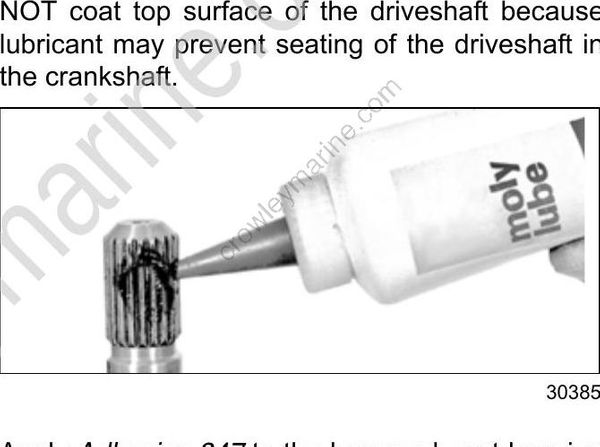
Coat the driveshaft splines with Moly Lube. DO NOT coat top surface of the driveshaft because lubricant may prevent seating of the driveshaft in the crankshaft.
Apply Adhesive 847 to the lower exhaust housing seals’ inner surfaces. Position two new seals on the housing. Apply Triple-Guard grease to the seals’ outer surfaces and position the housing on the gearcase.
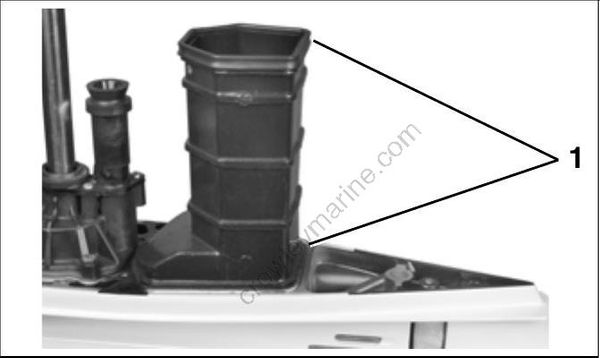
TYPICAL
- Lower exhaust seals
Apply Gel-Seal II to gearcase mating surface pads on exhaust housing. Slide the gearcase into place, making sure:
- Driveshaft engages the crankshaft.
- Water tube enters the water pump.
- Lower inner exhaust housing installs correctly.
- Shift rod does not turn and is positioned properly in shift shaft connection area.
Use Gearcase Alignment Kit, P/N 5007231, to accurately align gearcase housing to exhaust housing. Position alignment bolts (2) as indicated.

Alignment Bolt(s)
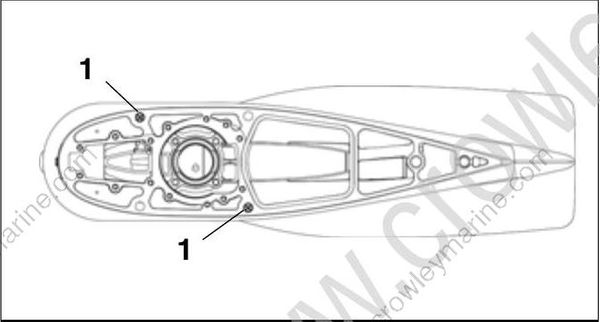
- Position of alignment bolts (2)
IMPORTANT: Remove and replace alignment screws with appropriate 3/8 in. mounting screws after all other gearcase mounting screws are installed and tightened.
Apply Gasket Sealing Compound to threads of the gearcase retaining screws. Torque the screws:
- 3/8 in. screws – 26 to 28 ft. lbs. (35 to 38 N•m)
- 7/16 in. screws – 40 to 50 ft. lbs. (54 to 68 N•m)
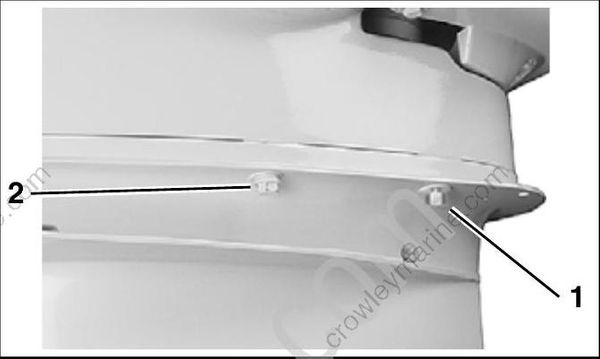
- Alignment screw
- 3/8 in. screw
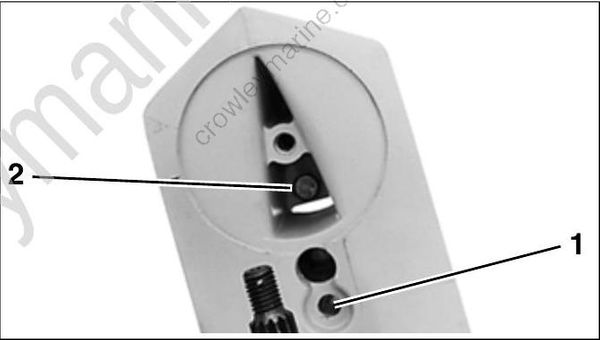
- 7/16 in. screw
- 3/8 in screw
Apply Gasket Sealing Compound to threads of the trim tab screw. Install gasket on “M”-type gear cases. Install and align the trim tab (cover on “L” type) with the index marks noted prior to disassembly. Torque the trim tab screw to 35 to 40 ft. lbs. (47 to 54 N•m). For adjustment, refer to Trim Tab Adjustment on p. 77.
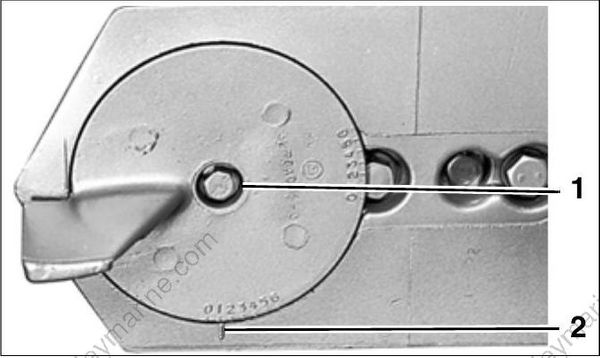
- Trim tab screw
- Index mark
IMPORTANT: Standard rotation and counter rotation trim tabs must not be interchanged. This would result in inadequate cooling water supply to the propeller hub.
Position the shift rod in the connector. Install and torque shift rod screw to 60 to 84 in. lbs. (7 to 9.5 N•m).
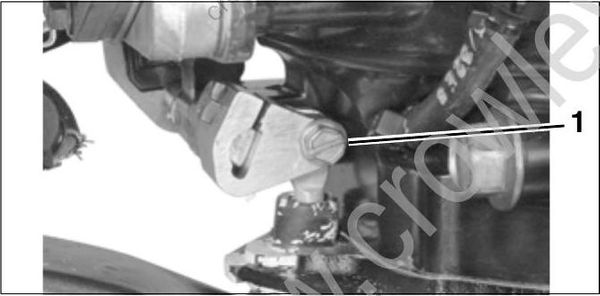
- Shift rod screw
To prevent loss of operator control, check for proper shifting operation and adjust, if necessary.
IMPORTANT: During break-in period of a reassembled gearcase, change the gearcase lubricant between 10 to 20 hours of operation.
WATER PUMP
Disassembly
Rotate the driveshaft counterclockwise to unlock the impeller cam. Remove the four impeller housing screws.
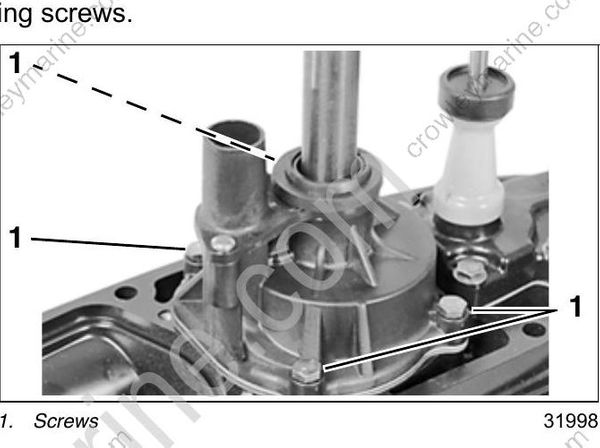
- Screws
Slide the water pump off the driveshaft. Remove the impeller drive cam, O-ring, impeller plate, and gasket. Discard the gasket.
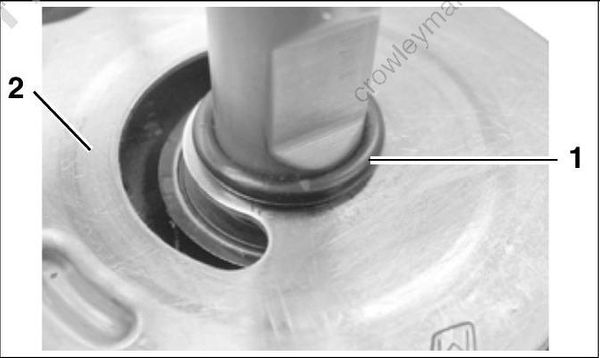
- O-ring
- Impeller plate
Remove all the parts from the housing.
Inspection
Check impeller for overheating, hub separation, and other wear or damage.
Check liner and wear plate for scoring, distortion, and impeller material transfer.
Inspect the housing for cracks or melting.
