

Sensor Resistance Tests
All sensor circuits are dependent on wiring and connections, EMM supplied current (5 V), and sensor resistance. The supplied current flows
through the wiring circuit and sensor before returning to the appropriate circuit in the EMM.
IMPORTANT: Use the Evinrude Diagnostics Software program to monitor sensor circuit voltages or values.
Crankshaft Position Sensor (CPS) Test
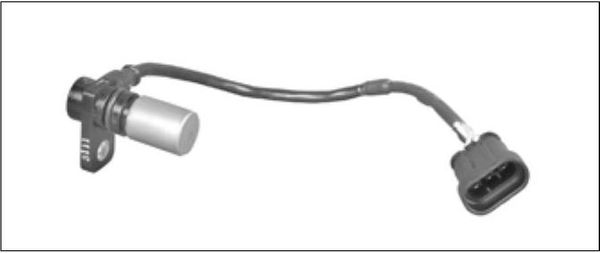
Disconnect the battery cables at the battery. Use an ohmmeter to measure sensor resistance.
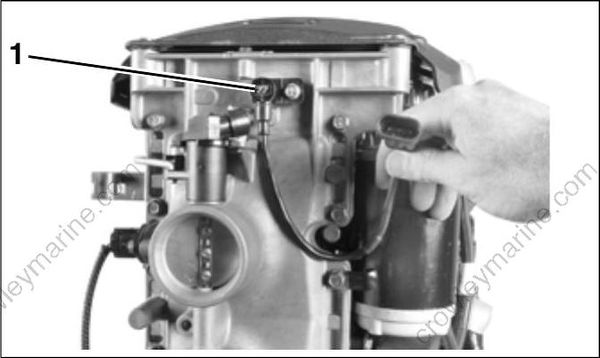
- CPS
| Sensor Resistance |
|---|
| 560 Ω ± 10% @ 77°F (25°C) |
The CPS is mounted to throttle body housing and requires no adjustment. Air gap or clearance to flywheel is fixed at approximately 0.073 in. (1.85 mm). The acceptable clearance is 0.036 to 0.110 in. (1 to 2.8 mm).
Throttle Position Sensor (TPS) Test
Disconnect the battery cables at the battery.
Remove the electrical connector from the TPS.
IMPORTANT: DO NOT lubricate TPS to throttle shaft surface.
STEP 1
Connect red meter lead to terminal “A” and black meter lead to terminal “B.”
| Sensor Resistance (between “A” and “B”) |
|---|
| > 3000 Ω @ 77°F (25°C) |
| Sensor Resistance (between “A” and “B”) |
|---|
| > 3000 Ω @ 77°F (25°C) |
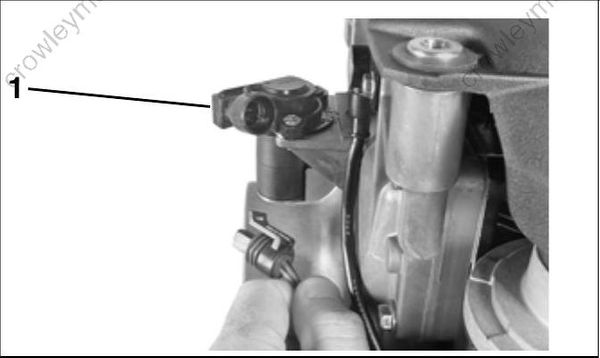
- TPS
STEP 2
Connect red meter lead to terminal “A” and black meter lead to terminal “C.” Rotate the sensor lever through its range of travel. Resistance reading
must change evenly as the sensor lever is moved.
STEP 3
Connect red meter lead on terminal “B” and black meter lead to terminal “C.” Rotate the sensor lever. Resistance reading must change evenly as the sensor lever is moved.
TPS voltage can be monitored using the diagnostic program. Use the engine Monitor screen to observe voltage while outboard is running. Voltage should change evenly as sensor lever is moved.
Engine Temperature Sensor Test
Use an ohmmeter to measure resistance.
| Engine Temperature Sensor Resistance |
|---|
| 9000 to 11000 Ω @ 77°F (25°C) |
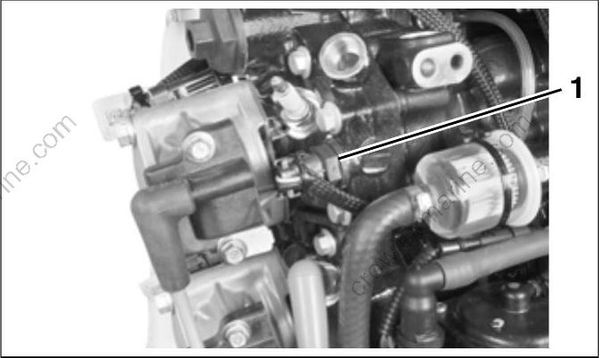
- Engine temperature sensor
Air Temperature Sensor (AT) Test
Use an ohmmeter to measure resistance.
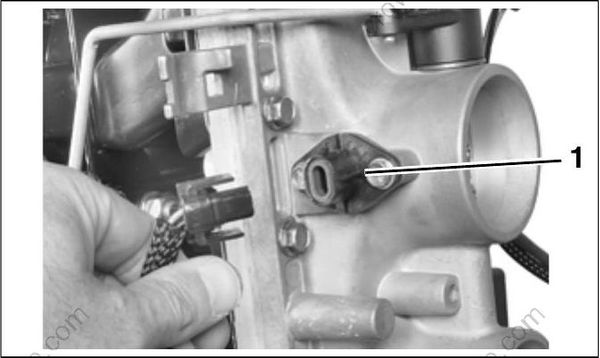
- AT sensor
Ignition Coil Tests
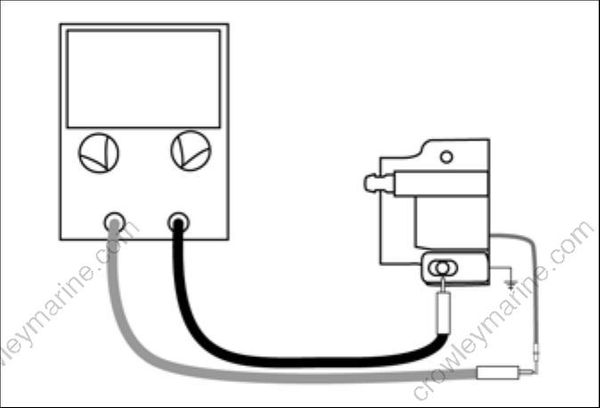
Primary Winding Resistance Test
Connect ohmmeter between coil primary terminal and clean engine ground.
| Ignition Coil Primary Resistance |
|---|
| 0.090 ± .005 Ω @ 77°F (25°C) |
IMPORTANT: A reading of less than 2 ohms is acceptable. Make sure meter is calibrated to read 1 ohm or less.
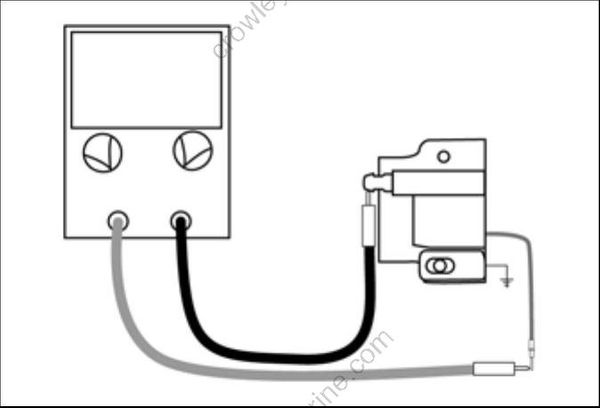
Secondary Winding Resistance Test
Connect ohmmeter between coil secondary terminal and coil primary terminal.
| Ignition Coil Secondary Resistance |
|---|
| 301 ± 14 Ω @ 77°F (25°C) |
Stator Tests
Stator Tests
The stator consists of 3 windings (4 poles each) on a 5 inch diameter core and generates an output voltage of 55 VAC (1100 watts maximum). This voltage is converted by the EMM and used to provide 12 VDC for battery charging (3 to 5 A at 500 RPM and 25 A at WOT) and 55 VDC for fuel injector, fuel and oil pump operation. The ignition module of EMM is also powered by the 55 VDC output.
Stator Resistance Tests
Disconnect the battery cables at the battery. Use an ohmmeter to check resistance of stator windings.
STEP 1
Disconnect EMM J2 connector from EMM.
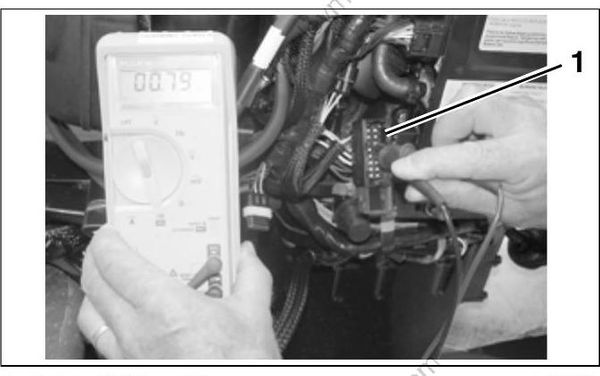
- EMM J2 Connector
Calibrate ohmmeter to appropriate scale and connect meter leads to the following pins:
- Yellow/white and yellow (pins 9 and 1)
- Brown/white and brown (pins 10 and 2)
- Orange/white and orange (pins 11 and 3)
IMPORTANT: A reading of less than 2 ohms is acceptable. Make sure meter is calibrated to read 1 ohm or less.
| Stator Winding Resistance Specification |
|---|
| Yellow & Yellow / white .670 ± .020 Ω @ 73°F (23°C) |
| Brown & Brown / white .670 ± .020 Ω @ 73°F (23°C) |
| Orange & Orange / white .670 ± .020 Ω @ 73°F (23°C) |
STEP 2
To check for a grounded condition, connect one meter lead to ground wire and alternately connect the other meter lead to each stator wire. Meter should read no continuity. If meter reads continuity, replace stator due to grounded winding.
Stator Voltage Output Test
Use a voltmeter to check the stator output voltage.
Set meter to read 55 VAC output.
To prevent accidental starting of outboard, disconnect crankshaft position sensor (CPS).
Disconnect CPS.
Disconnect stator (6-pin) connector from the engine harness (6-pin) connector.
Connect Stator Test Adaptor tool, P/N 5005799, to stator connector.
Connect meter leads to connector leads 1 and 6.
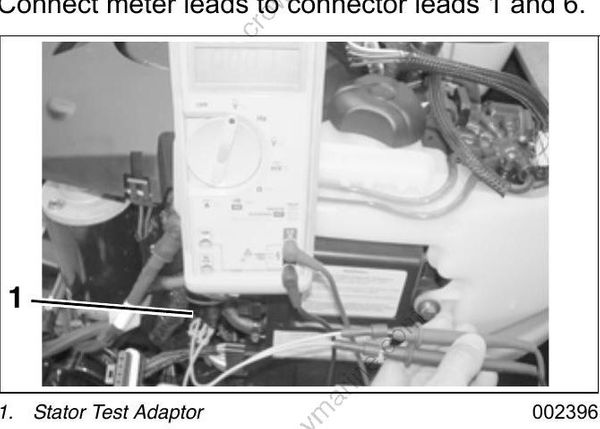
- Stator Test Adaptor
With a fully charged battery, crank outboard (300 RPM minimum) and observe meter reading.
| Stator Voltage Output (Measured between terminals 1 and 6) |
|---|
| 30 VAC at 300 RPM 40 VAC at 400 RPM 55 VAC above 500 RPM |
Capacitor Test
The capacitor should charge when you use an ohmmeter on the high ohms scale with the proper polarity. The resistance will increase until it goes to (nearly) infinity. If the capacitor is shorted, then it will never charge. If it is open, the resistance will be infinite immediately and won't change. If the polarity of the probes is reversed, it will not charge properly either. Determine the polarity of your meter and mark it. Black is usually negative with VOMs, for example. Confirm with a marked diode. A low reading across a good diode indicates that the positive lead is on the anode (triangle) and negative lead is on the cathode (bar).
CHARGING SYSTEM TESTS
12 V Charging Circuit
To test the operation of the regulator in the EMM, you must be able to run the outboard continuously at approximately 5000 RPM, such as in a test tank or on a marine dynamometer.
The test consists of monitoring the system’s response to a partially discharged battery. Use a variable load tester to discharge the battery.
IMPORTANT: The regulator requires battery voltage on the red wire to operate. Before proceeding, make sure battery voltage is at the connector red wire when key is ON.
Test Procedure
Disconnect the battery cables at the battery.
Use an inductive amp meter or connect a 0 to 40 A ammeter in series between the red wire of engine wire harness (alternator output from EMM) and the positive (B+) battery cable terminal of starter solenoid.
Fluke† model 334 or 336, Snap-On† model MT110 or EETA501, and various other amp meters should be available through local tool suppliers.
Reconnect the outboard’s battery cables.
