

Removal
To avoid accidental starting of engine while servicing, twist and remove all spark
plug leads.
Use Ball Socket Remover tool, P/N 342226, to unsnap the throttle cable clip from the throttle lever.
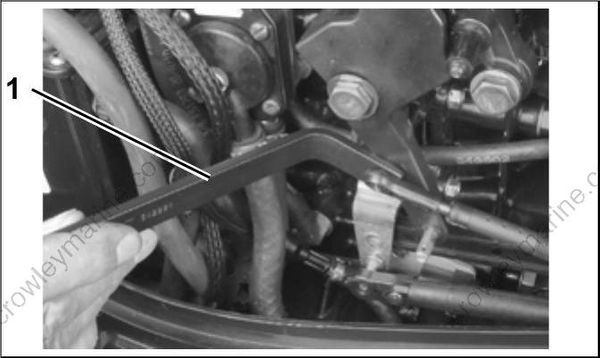
- Remover tool
Remove the throttle cable anchor screw and washer. Loosen throttle cable retainer screw. And, remove the tie strap holding the tiller handle electrical harness.
Remove retainer clip from shift cable.
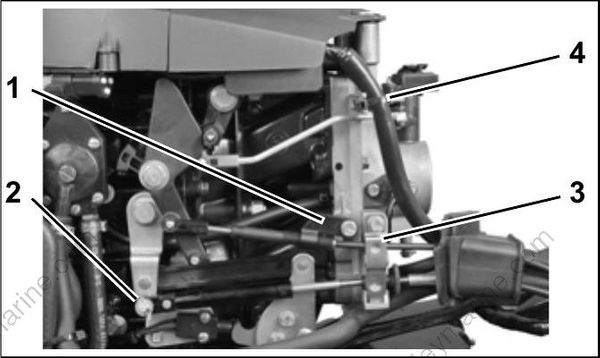
Throttle cable anchor
Shift cable retainer clip
Cable retainer
Tie strap
Remove the electrical cover.
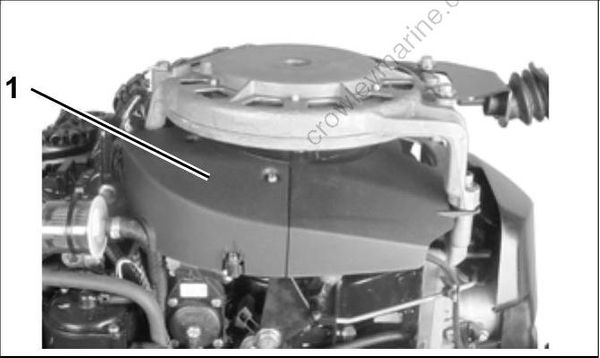
- Electrical cover
Disconnect the electrical harness coming from the tiller handle.
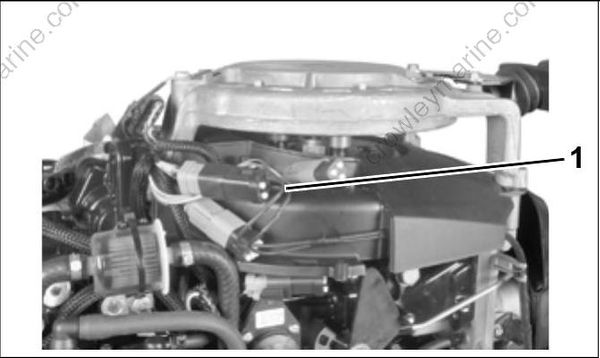
Rope Start models
- Electrical harness connector
Remove shift and throttle cables and wire harness from grommet in lower engine cover.
Remove locknuts from screws on top of steering arm.
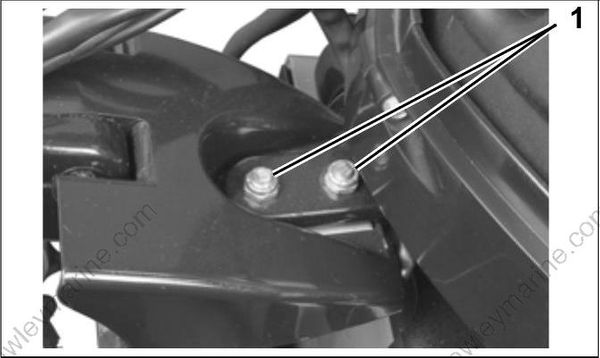
- Screw
Remove the screws attaching tiller bracket to steering arm. Remove tiller bracket and handle.
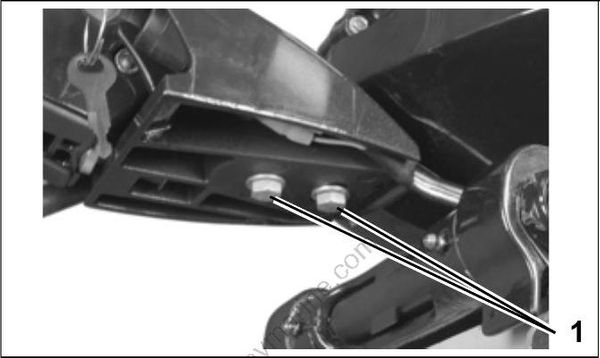
- Screw
Disassembly
Loosen throttle friction control so there is no restriction on grip.
IMPORTANT: Do not back screw out completely. Nut is under spring tension.
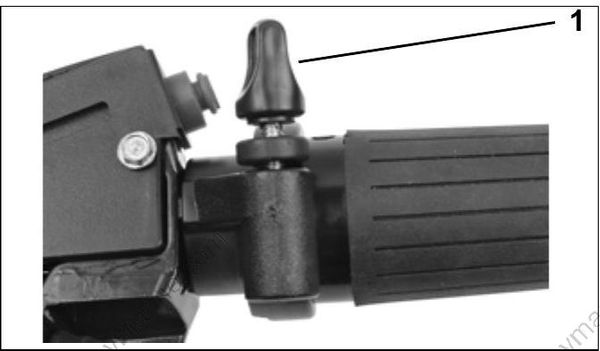
- Throttle friction control
Remove seven screws and bottom cover of tiller handle.
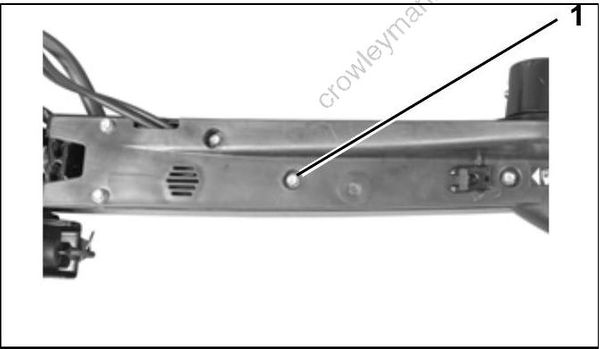
- Cover screw
Remove stop switch cover screws, unplug stop switch electrical connector and remove stop switch assembly.
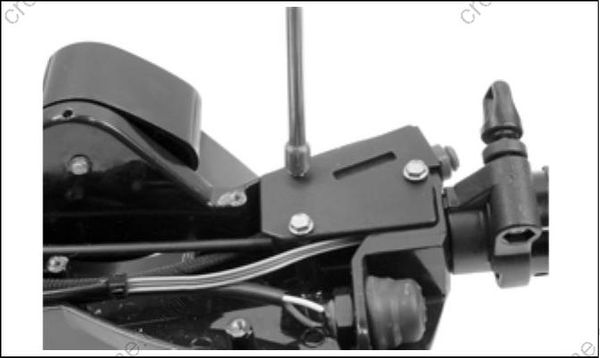
Disconnect trim switch connector. Remove connector from trim switch wires. Refer to CONNECTOR SERVICING on p. 160.
Use Twist-Grip Remover, P/N 390767, to depress the grip detents. Tighten screw and remove the grip by pulling grip.
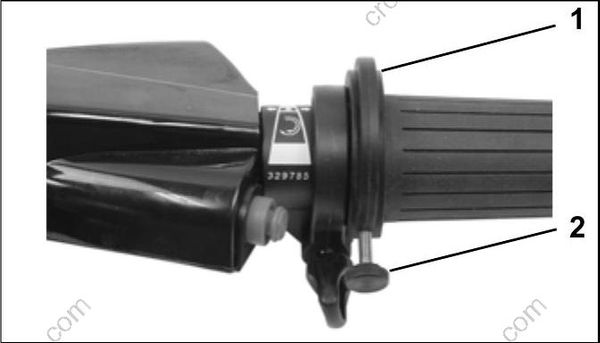
Twist-Grip Remover
Screw
Remove the helix halves, rollers, and guides.
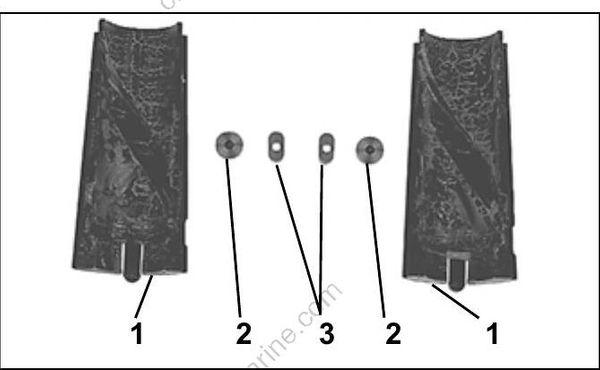
Helix halves
Rollers
Guides
Pull the throttle pin out of the cable.
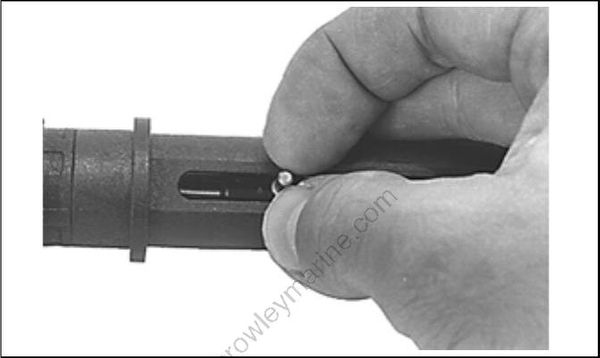
Remove the throttle friction control.
- Throttle friction control
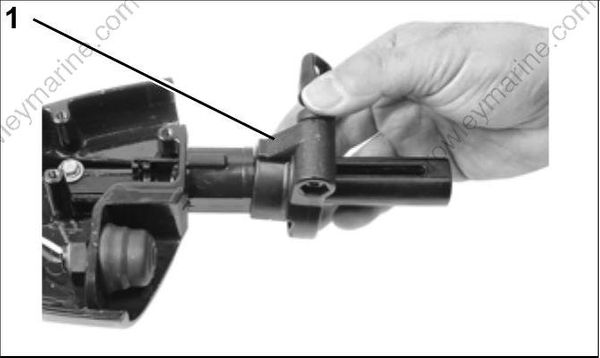
Remove the throttle cable retaining clip. Pry the cable trunnion out of the steering handle and remove cable.
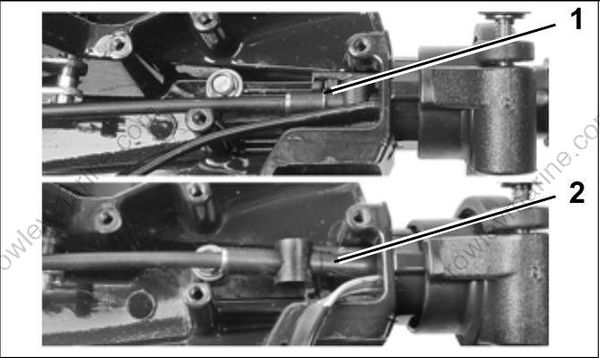
Retainer
Throttle cable trunnion
The trim switch wiring can now be removed from the inner handle.
Remove the screw and washer retaining the inner handle tab.
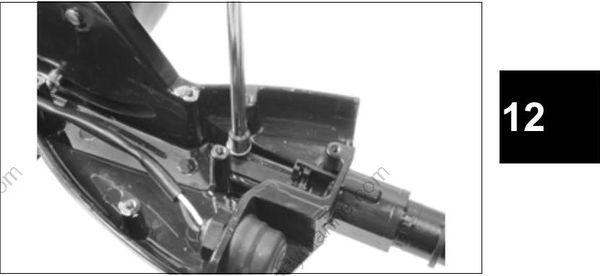
Use an appropriate tool to carefully pry up on the inner handle retaining tab.
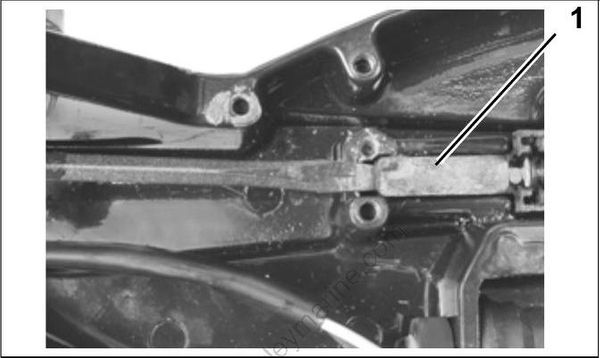
- Inner handle retainer tab
Use a wooden dowel and a soft mallet to remove the inner handle.
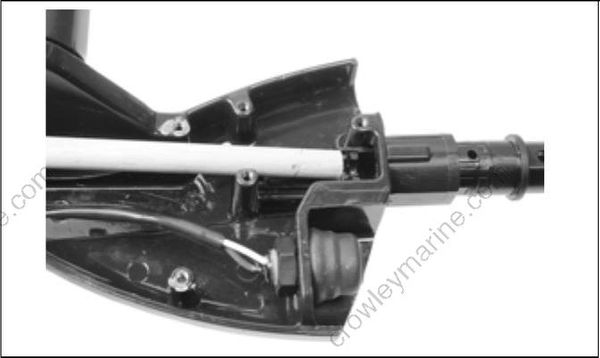
Remove shift cable retainer from shift cable trunnion.
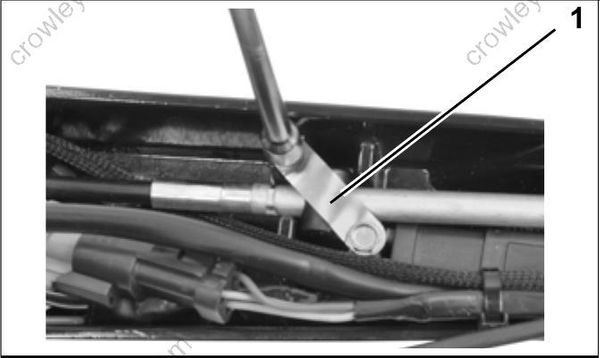
- Shift cable retainer
Remove cotter pin from shift handle pin. Remove shift cable.
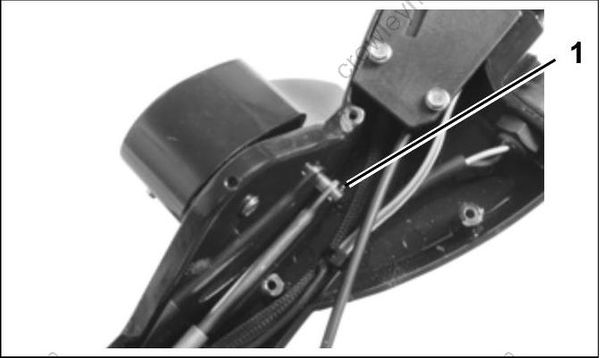
- Cotter pin
006708 Remove shift handle screw and washer. Remove shift handle, bushing and washer.
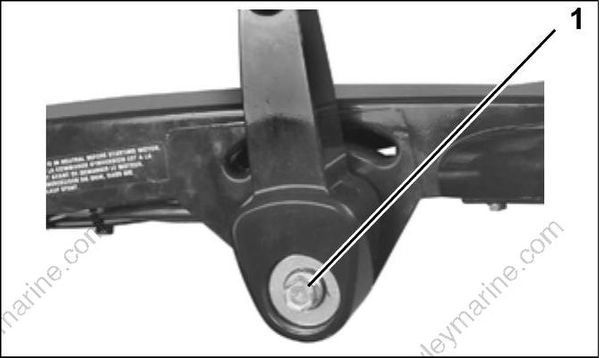
- Shift handle screw
006714 Remove shift handle detent ball, spring and guide.
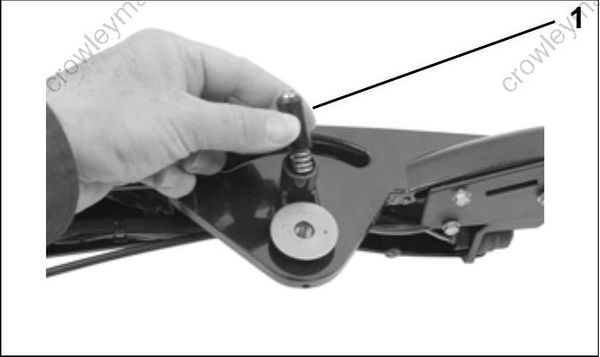
- Detent ball, spring and guide
Remove the shift pin if necessary.
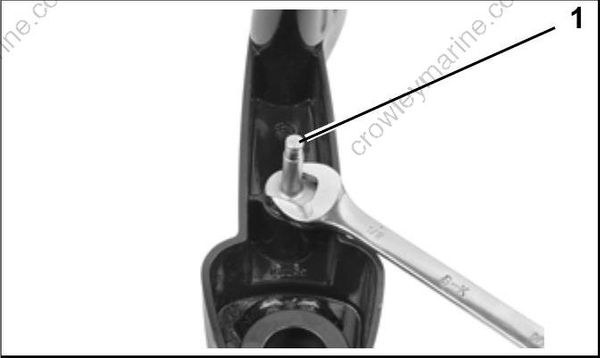
- Shift pin
Inspection
Inspect the throttle cable for kinks and wear. Replace if necessary.
Inspect the shift cable for kinks and wear. Replace if necessary.
Inspect the steering handle components for wear, cracks, or damage. Replace parts if necessary.
Assembly
Apply Nut Lock to threads of shift pin and install shift pin into shift handle. Tighten to a torque of 18 to 22 ft. lbs. (24.5 to 29 N·m).
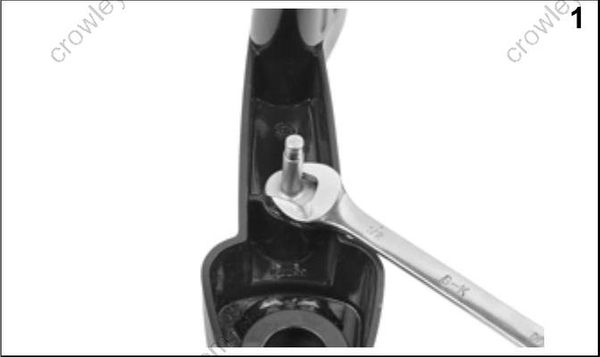
- Detent ball, spring and guide
Coat detent ball, spring and guide with Triple-Guard grease and install into shift handle. Place one washer on shift handle mounting boss.
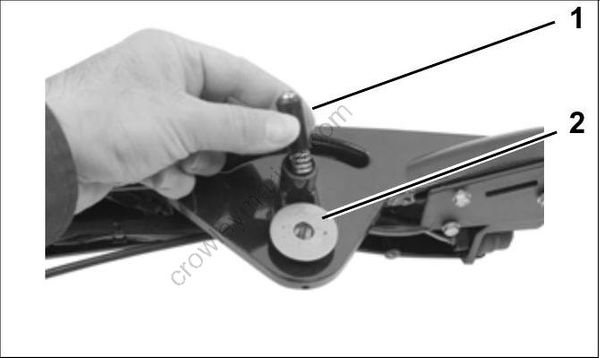
Detent ball, spring and guide
Washer
Coat bushing and washer with Triple-Guard grease. Apply Nut Lock to threads of screw.
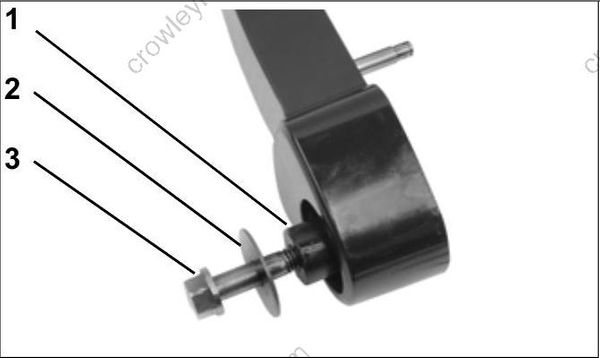
Bushing
Washer
Screw
Install shift handle on tiller handle and tighten screw to a torque of 18 to 20 ft. lbs. (24.5 to 27 N·m).
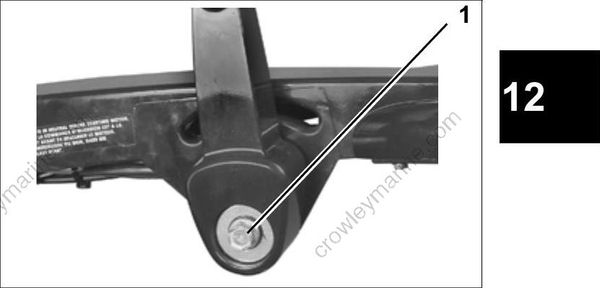
- Shift handle screw
Install shift cable on shift pin with a new cotter pin.
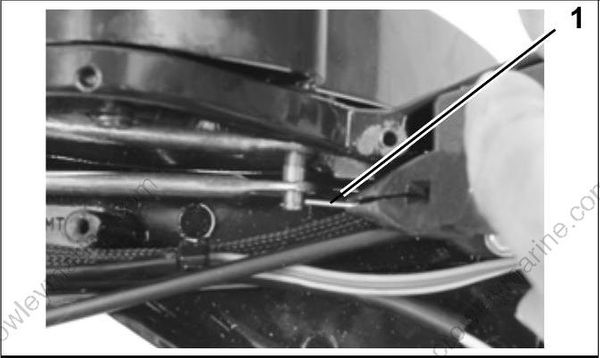
- Cotter pin
Install shift cable retainer on shift cable trunnion.
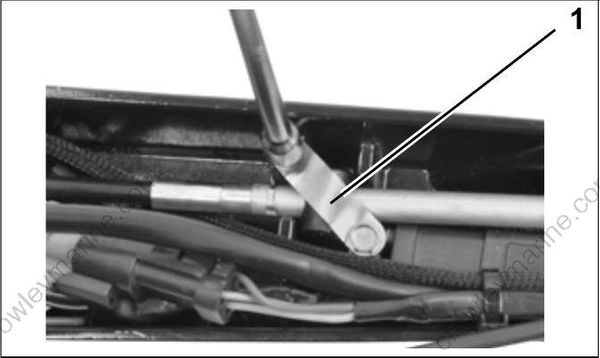
- Shift cable retainer
Use a soft-faced mallet to install the inner handle.
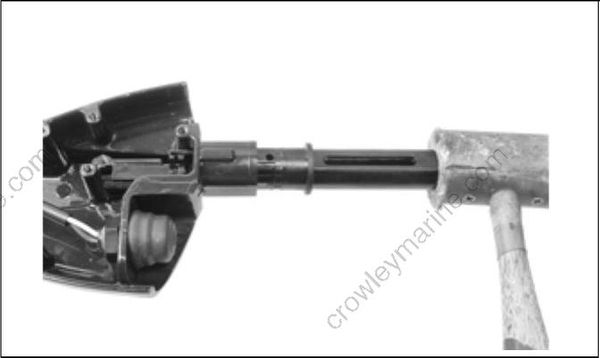
Secure tab of the inner handle into the outer handle. Tab must be flush with the back of the flange and top of tab must be flush with top of flange.
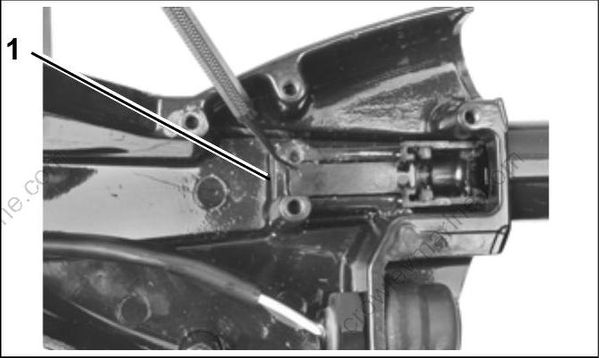
- Back of flange
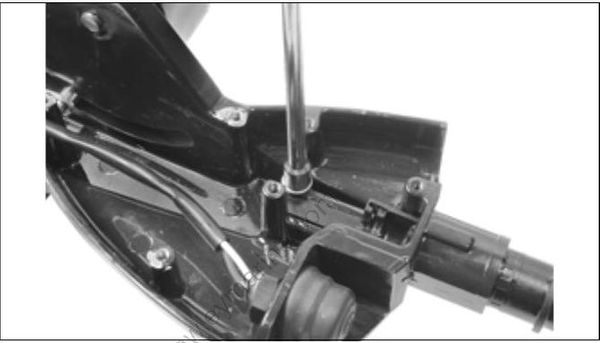
Apply Nut Lock on the screw threads, install the washer and screw.
IMPORTANT: Turn self-tapping screw counter clock-wise until threads of screw engage threads of screw boss. Failure to follow this procedure will damage the screw boss threads. Once threads are engaged, tighten screw so that there is no space between tab, washer and screw. Top of tab MUST be flush with top of flange.
Install the throttle control plate on outer handle.
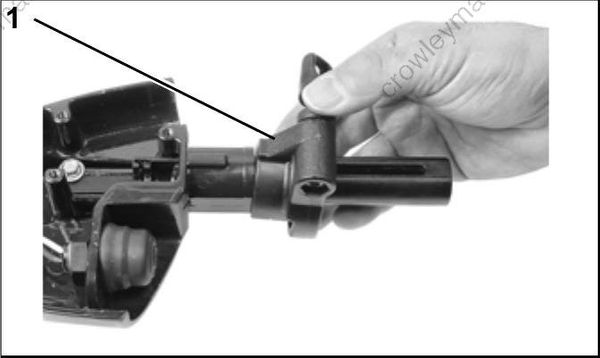
- Throttle friction control
Install trim switch wiring through inner steering handle.
IMPORTANT: Trim switch wiring must NOT be twisted through the throttle twist grip or inner tiller handle / wire guide.
Insert wire guide into inner steering handle.
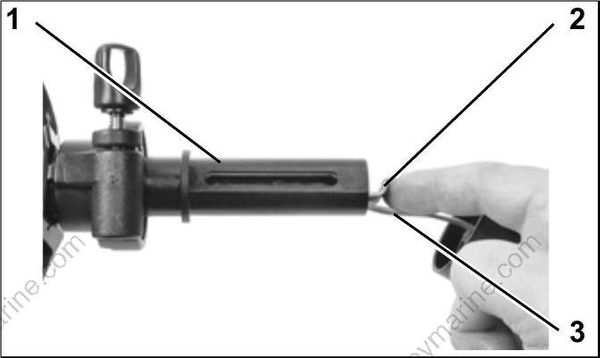
Inner tiller handle
Wire guide
Trim switch wires
Wire guide should slide easily into place. If any binding is felt, inspect trim switch wiring for twisting. If wire guide is forced into place, it WILL damage trim switch wiring.
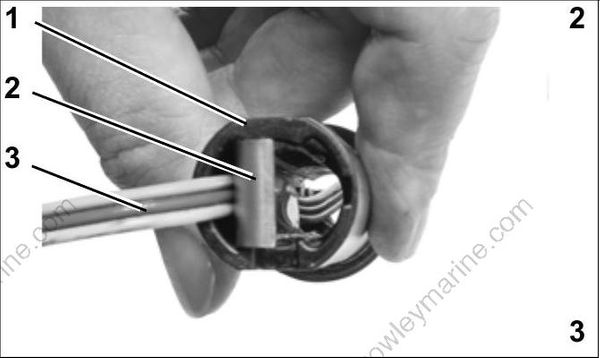
Inner tiller handle
Wire guide
Trim switch wires
Make sure trim switch wiring is NOT twisted before proceeding.
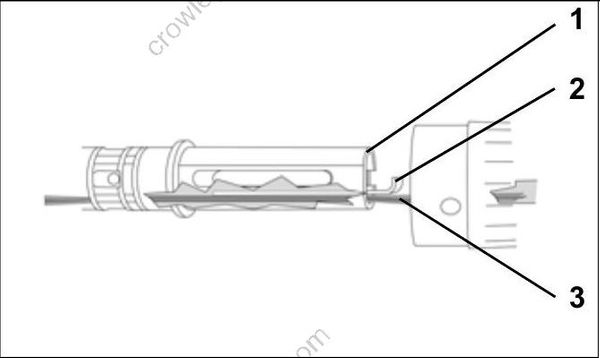
Inner tiller handle
Wire guide
Trim switch wires
Install the handle end of the throttle cable. Snap the throttle cable trunnion into the recess in the handle. Install the retainer clip.
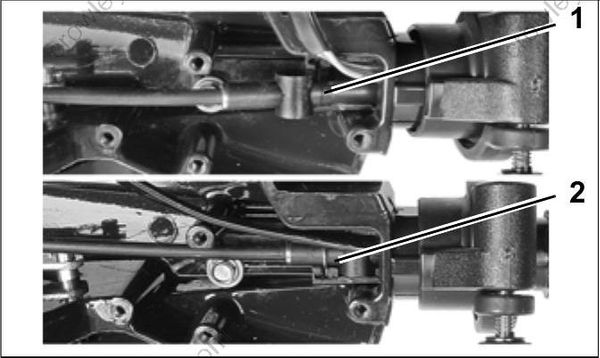
Throttle cable trunnion
Retainer
Push the throttle cable pin through the end of the throttle cable.
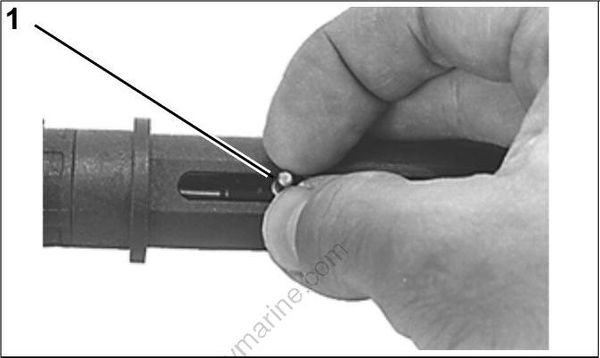
- Pin
Lubricate end of the pin, guides, rollers, helix halves, and inner handle guide slot with Moly Lube.
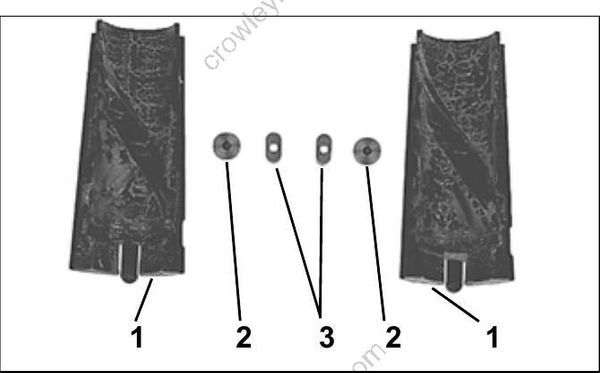
Helix halves
Rollers
Guides
Place the guides over the roller pin and into the slots of the inner handle. Place the rollers on the ends of the roller pin.
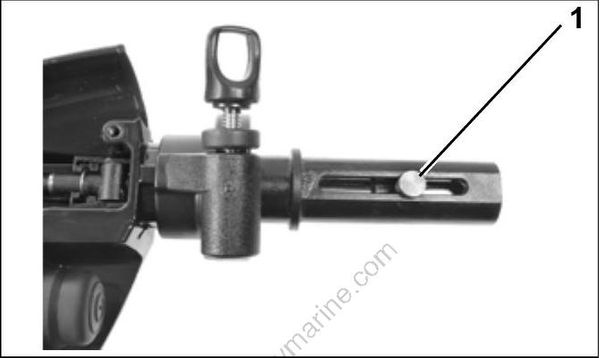
- Roller
Assemble the helix halves on the handle and slide the grip over the helix.
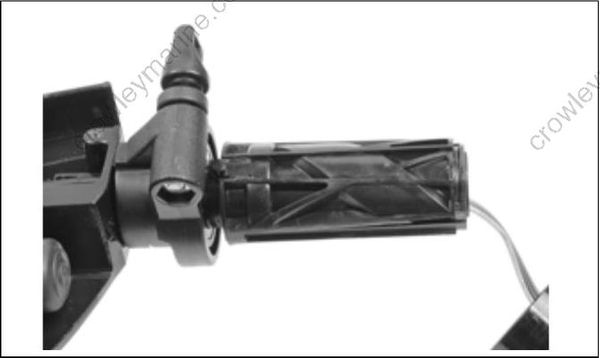
Carefully pull trim switch wires through inner tiller handle as twist grip assembly is installed.
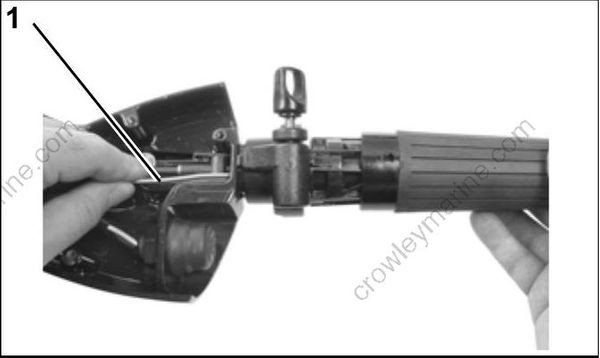
- Trim switch wiring
Install trim switch connector. Refer to CONNECTOR SERVICING on p. 160.
Be sure the twist-grip's speed indicator line is positioned with the speed range symbol on the handle. Snap the grip into place.
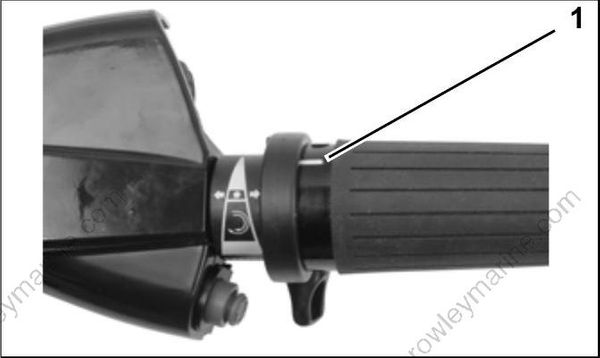
- Indicator line
Install stop switch assembly and connect to harness.
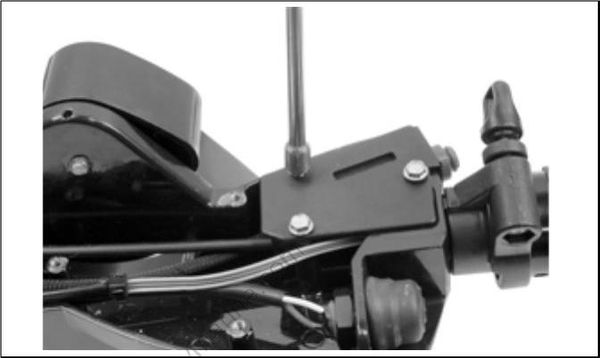
Install bottom cover of tiller handle with seven screws.
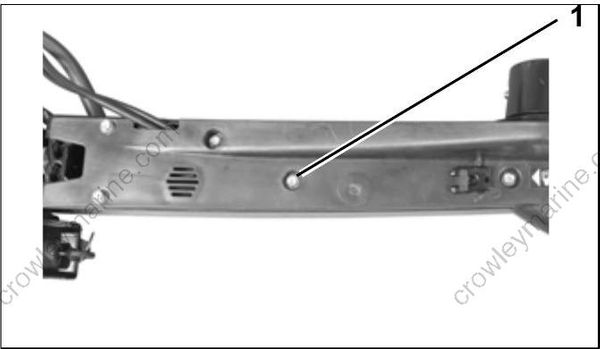
- Cover screw
Installation
The steering arm can be positioned straight, or angled 15° port or starboard by moving the adjustment plate.
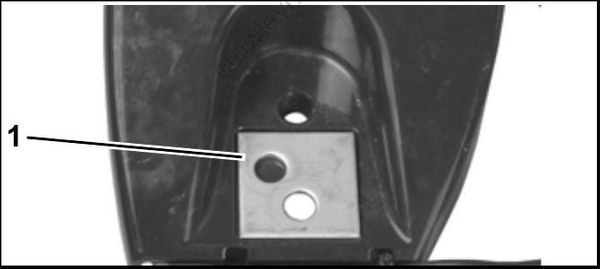
- Plate adjustment for tiller in CENTER position.
Place tiller bracket on steering arm from the bottom. Thread steering arm screws, with washers, into steering arm and tighten to a torque of 18 to 20 ft.lbs. (24.5 to 27 N·m).
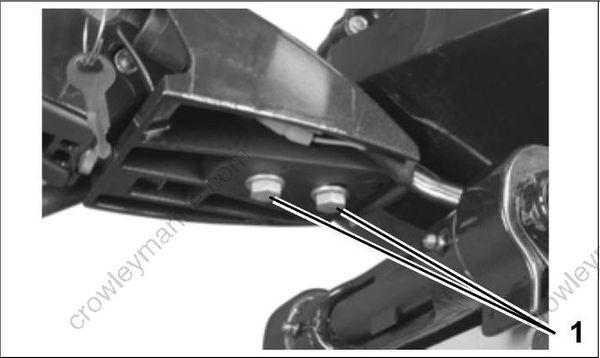
- Screw
Install locknuts on screws on top of steering arm. Hold screws with wrench and tighten locknuts to a torque of 18 to 20 ft.lbs. (24.5 to 27 N·m).
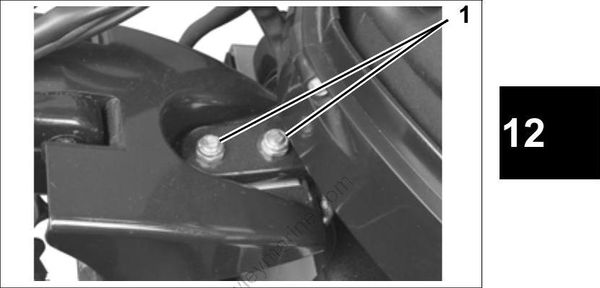
- Screw
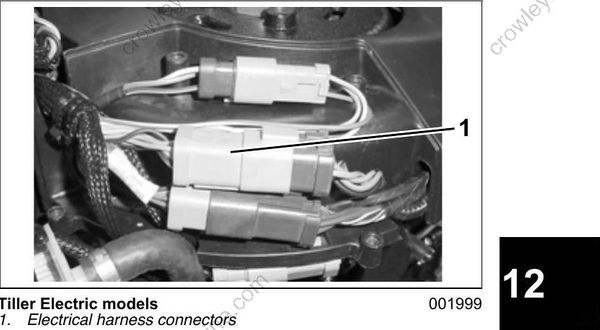
Route shift and throttle cables and electrical harness through grommet in lower motor cover. Connect harness to engine wiring harness.
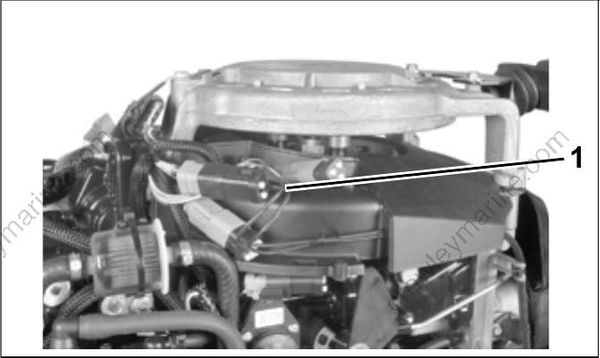
Rope Start models
- Electrical harness connector
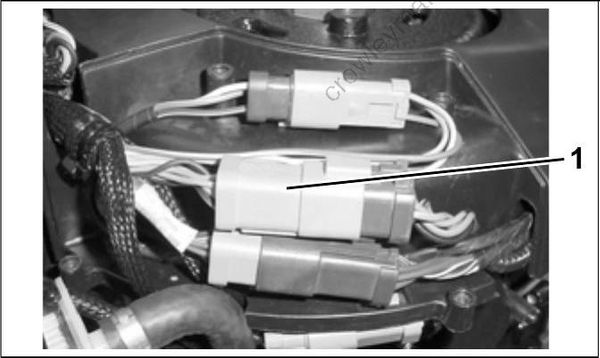
Tiller Electric models
- Electrical harness connectors
Use tie strap to secure harness to throttle body bracket.
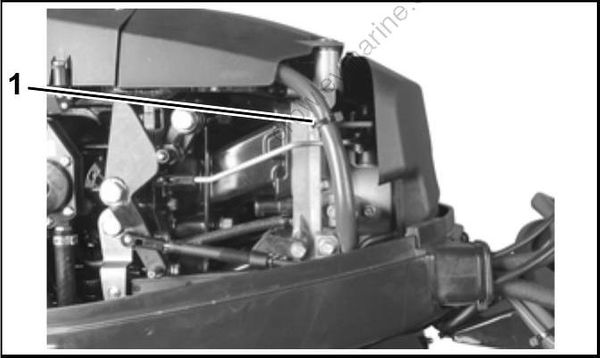
- Bracket
Control Cable Installation
IMPORTANT: DO NOT complete final attachment of cables to shift and throttle levers until all cables, wires, and hoses have been routed and grommet has been placed into the lower engine cover.
Shift Cable Adjustment
Pull firmly on shift cable casing to remove back lash. With outboard and tiller handle shift lever in NEUTRAL, place the cable trunnion into the lower anchor pocket. Adjust the trunnion nut so the casing fits onto the shift lever pin.
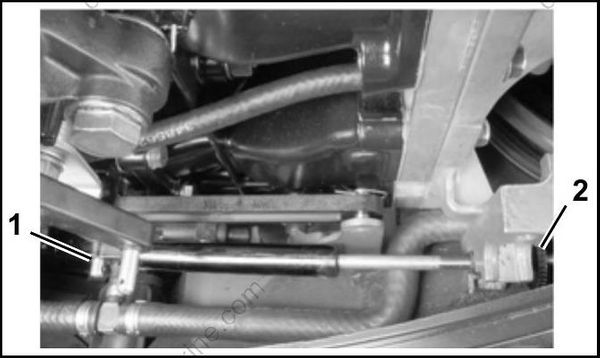
Shift lever pin
Trunnion nut
Secure shift cable to the shift lever pin. For proper installation, review the following steps:
Place washer on pin.
Position retainer clip with straight section on the bottom and angled section on the top.
Use long nose pliers to insert straight section of clip into linkage pin hole.
Push the clip towards the hole while lifting on the curved end with the pliers.
Be sure retainer clip fully engages the pin.
Lock the retainer by moving the angled section behind the straight section.
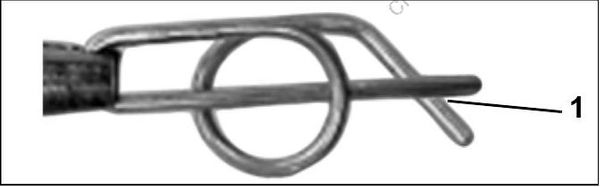
Locked Retainer Clip
- Angled section behind straight section
Throttle Cable Adjustment
Place throttle cable in position. Use Ball Socket Installer tool, P/N 342225, to snap throttle cable connector onto throttle lever.
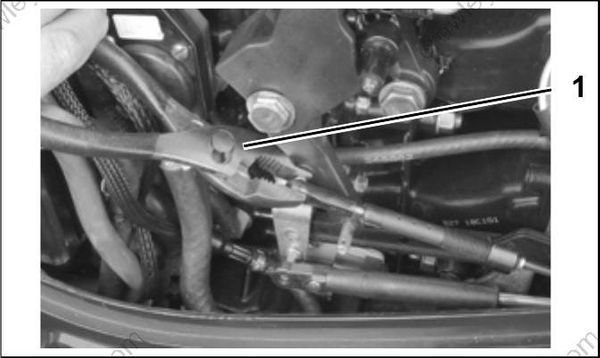
- Installer tool
Place throttle cable in upper anchor pocket. Install cable retainer on anchor block.
Hold twist grip in full SLOW position. Pull firmly on cable to remove backlash.
Adjust cable anchor so throttle cam is against idle stop when anchor screw aligns with throttle body boss. Then, rotate anchor four turns toward the end of the cable.
Install washer, cable anchor, and cable anchor screw on throttle body boss. Tighten screw securely.
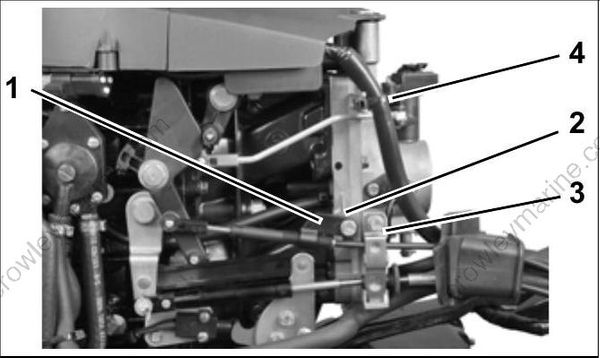
Cable anchor
Boss
Cable retainer
Tie strap
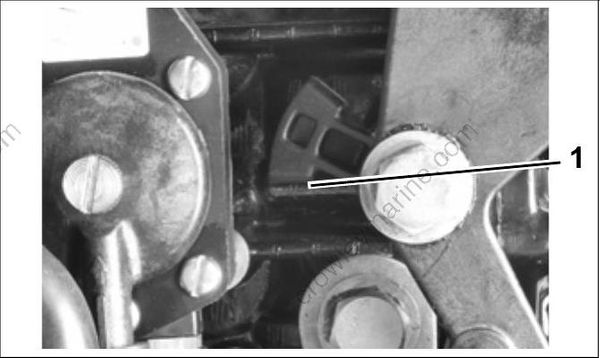
- Throttle lever stop

- Turn anchor four turns toward cable end.
IMPORTANT: Rotate twist grip. Make sure throttle cam goes to full throttle without bending cable, and still returns to IDLE stop.
