

RECOIL STARTER CLEANING AND INSPECTION
Wash metal components in solvent and dry with compressed air.
Inspect the rewind spring for broken end loops and weak tension.
Examine the starter pawl for wear.
Inspect the starter components for wear. Replace as necessary.
Inspect starter rope. Replace rope if frayed. Cut new rope 96.5 in. (245 cm) in length. Fuse ends of rope to a length of 1/2 in. (12 mm).
Examine the pulley and the starter housing. Look for sharp edges and rough surfaces that could fray the starter rope. File and polish to remove.
Examine the starter and starter lockout parts. Replace any worn or damaged parts.
RECOIL STARTER ASSEMBLY
Wear safety glasses while disassembling and assembling manual starters because of rewind spring tension.
Place starter spring shield and pulley bushing into the starter housing
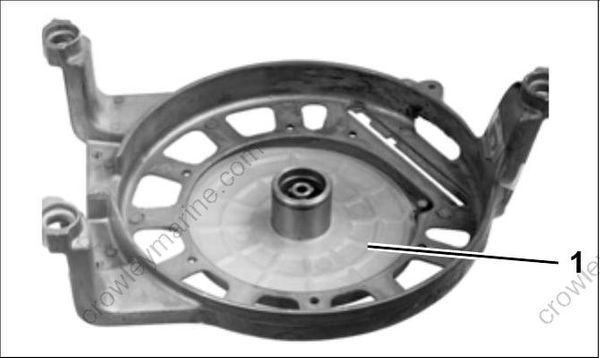
- Shield
Clamp base of Starter Spring Winder and Installer, P/N 392093, in a vise. Insert release plate into spring winder base.
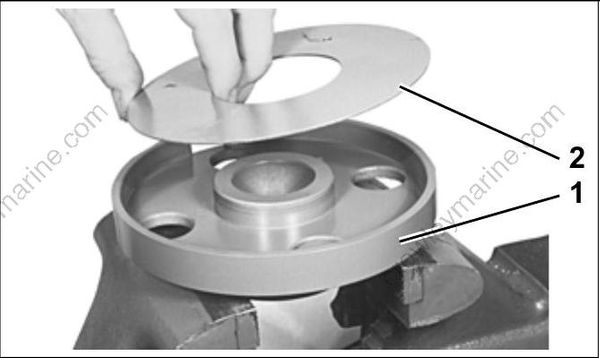
Base
Plate
Apply Triple-Guard grease or Lubriplate 777 to the rewind spring. Install the rewind spring into the spring winder base with open loop of spring facing inward. Insert the pin of the crank and pin assembly into the loop of the rewind spring. Secure the crank and pin assembly to the starter winder base with the crank retainer screw.
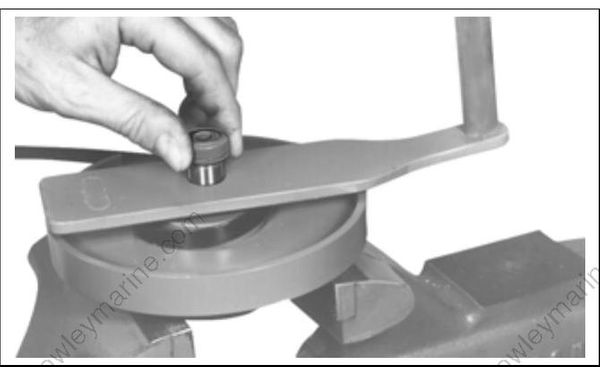
Rotate the crank and pin assembly in the direction shown on the tool. Wind the spring into the starter winder base until end of spring contacts the starter winder base.
Remove the crank retainer screw and the crank and pin assembly from the starter winder base. Remove the starter winder base from the vise.
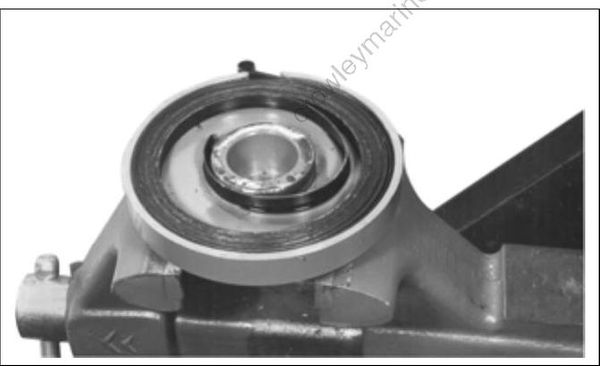
Install the rewind spring into the starter housing. Locate the outer loop of the rewind spring on the pin in the starter housing. Press down through the holes in the spring winder base to transfer the rewind spring into the starter housing.
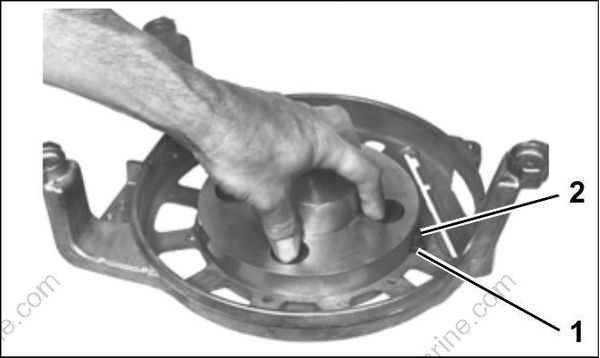
Outer loop
Pin
Apply Triple-Guard grease or Lubriplate 777 to the pulley bushing. Install the pulley bushing in the pulley. Place the pulley shim on the pulley.
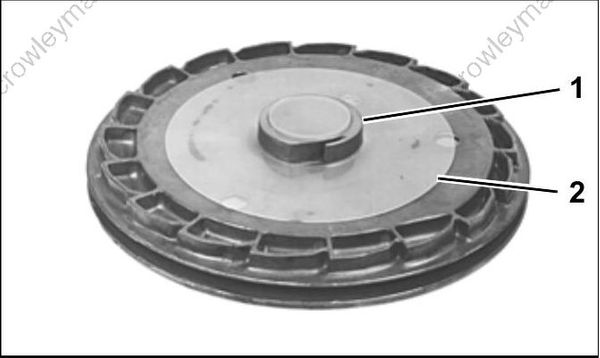
Bushing
Shim
Bend the inside loop of the rewind spring in toward the center of the starter housing. Place the inner loop of the spring in the slot of the pulley, and install the pulley in the starter housing.
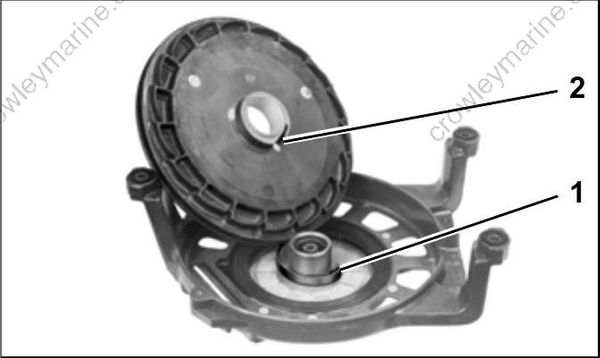
Inside loop
Slot
Place the friction plate spring washer between the two friction plates on the pulley hub. Secure the friction plate and friction plate spring washer with the pulley lock ring.
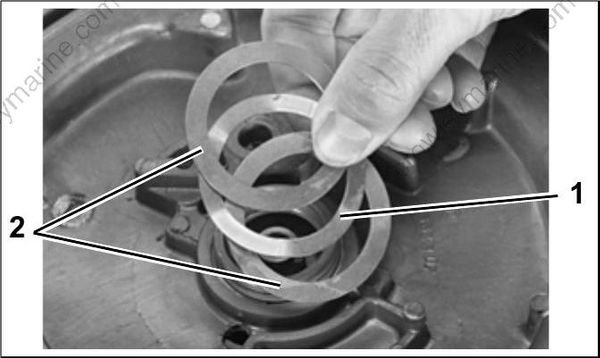
Friction plate spring washer
Friction plates
Make sure the starter pawl bushing is installed in the pulley. Apply Triple-Guard grease or Lubriplate 777 to boss of the starter pawl. Place spring washer on the boss of the starter pawl. Place the starter pawl in the pulley.
Place the starter housing spring in the starter housing.
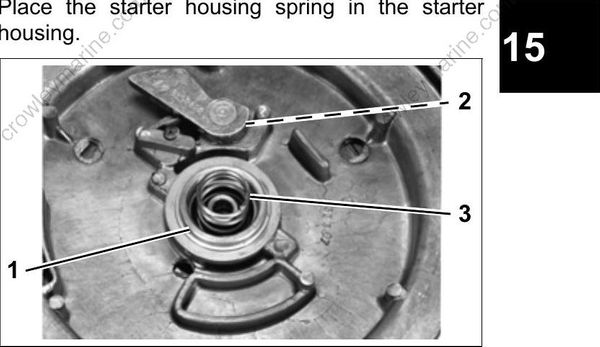
Lock ring
Spring washer (under starter pawl)
Spring
Install the starter pawl plate return spring on the starter pawl plate. Press the other end of spring on the boss of the pulley. Position the starter pawl plate on the pulley.
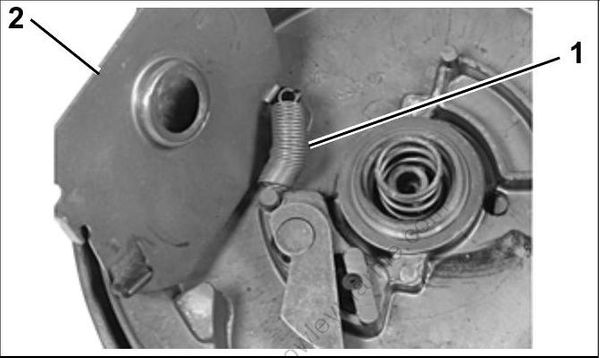
Spring
Plate
Clean threads of the starter pawl plate retaining screw and nut to remove adhesive.
Install the starter pawl plate retaining screw and washer into the starter housing. Tighten screw to a torque of 96 to 120 in. lbs. (11 to 13.5 N·m).
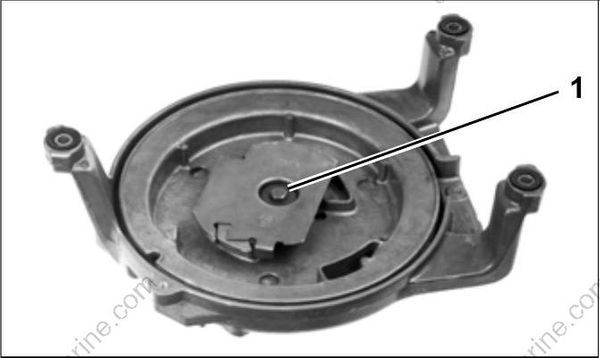
- Screw
Spray threads of starter pawl plate retaining screw and nut with Locquic Primer. Apply Nut Lock to the threads of the nut. Install and tighten the nut securely.
Install the rope guide and pulley support to the starter housing. Tighten the screws securely.
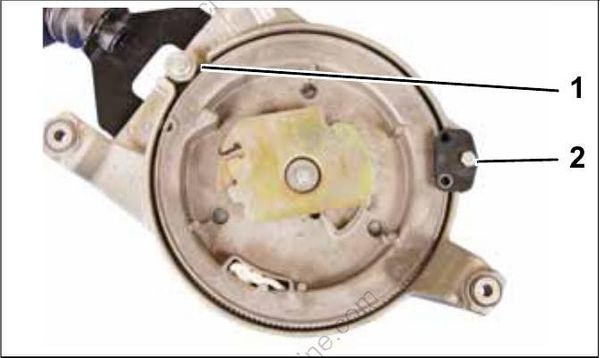
Rope guide
Pulley support
If removed, install the starter handle bracket to the starter housing. Tighten screws securely.
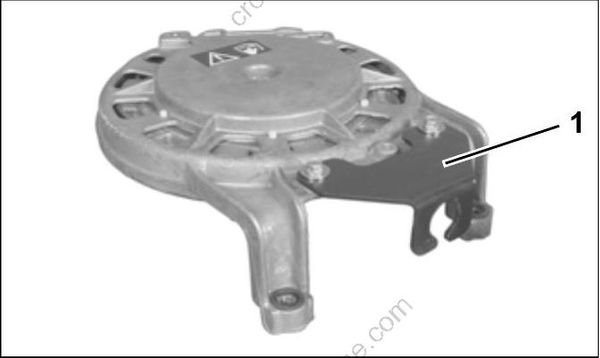
- Starter handle bracket
Tie a knot in one end of the starter rope. With the starter housing upside down on a bench, wind the pulley counterclockwise until the rewind spring is tight.
Back off the rewind spring until the rope cavity of the pulley is aligned with the rope guide. Thread the starter rope through the pulley, rope guide, and outlet in the starter handle bracket.
Seat the knotted end of the starter rope in the pulley. Tie a slip knot in the starter rope to hold rope in position.
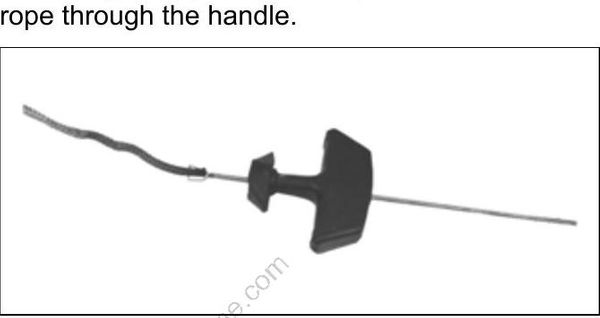
Apply Triple-Guard grease or Lubriplate 777 to the handle end of the starter rope. Using Starter Rope Threading Tool, P/N 378774, thread the starter rope through the handle.
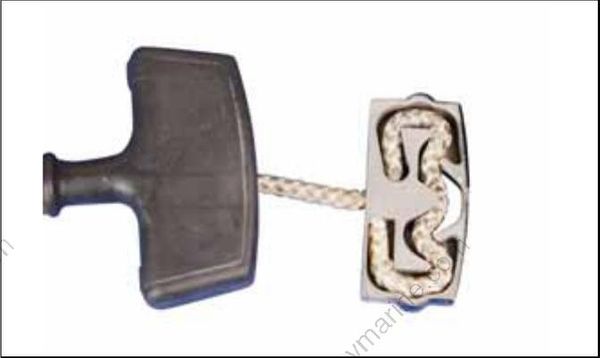
Press the starter rope into the channel of the rope anchor, with end of starter rope firmly against end of channel. Press the anchor into the handle.
Check operation of the starter pawl when the starter rope is pulled out. The starter pawl should extend when the starter rope is pulled and retract when the starter rope recoils.
RECOIL STARTER INSTALLATION
Apply Nut Lock to the threads of starter ratchet screws. Install washers and ratchet on flywheel. Tighten screws to a torque of 120 to 144 in. lbs. (13.5 to 16 N·m).
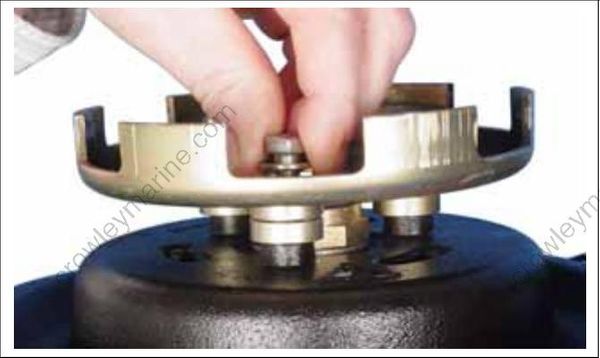
Place the starter assembly onto the outboard. Install the starter housing retaining screws, washers, and lock washers. Be sure to place washers between the starter housing and the flywheel cover. Apply Ultra Lock to threads and tighten the three starter housing screws to a torque of 120 to 144 in. lbs. (14 to 16 N·m).
Install clamp for oiling system wiring harness.
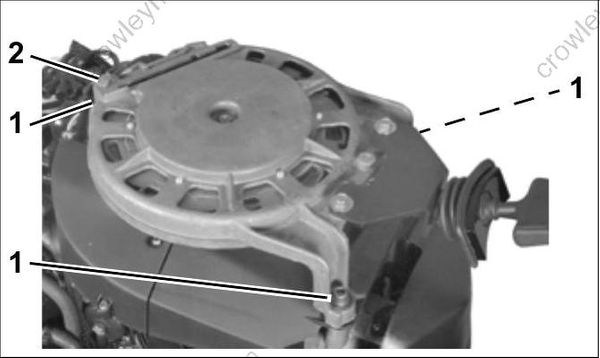
Starter housing screws (3)
Clamp
