

Water Intake Screens
Inspect condition of water intake screens. Clean or replace as needed.
Confirm function of overboard water pressure indicator.
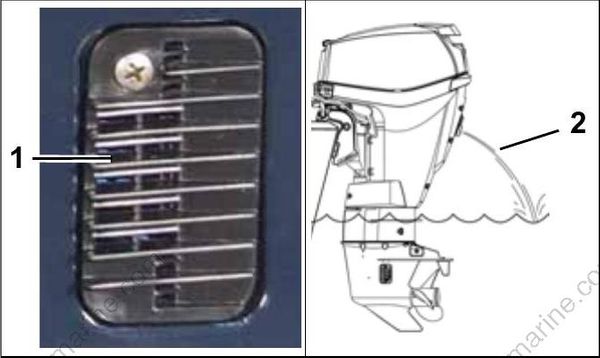
- Water intake screen
- Overboard indicator
Additional Maintenance
Check operation or visually inspect thermostats and pressure relief valve. Clean or replace as needed.
Check that all water passages, hoses, and fittings for both the EMM and the vapor separator flow water freely.
Replace water pump.
LUBRICATION
Steering System
Failure to regrease as recommended could result in steering system corrosion.
Corrosion can affect steering effort, making operator control difficult.
Grease the stainless steel output end of the steering cable with Triple-Guard grease.
Use an appropriate cleaning solvent to remove corrosion and dirt from output end of cable prior to coating it with grease. Make sure wiper nut is installed and not damaged.
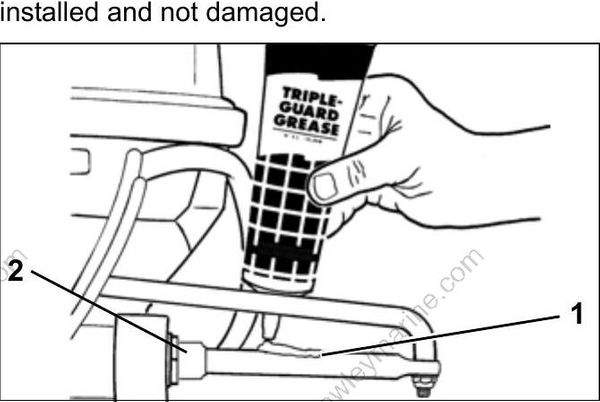
- Steering cable
- Wiper nut
Tiller Handle
Lubricate the tiller handle grease fittings with Triple-Guard grease.
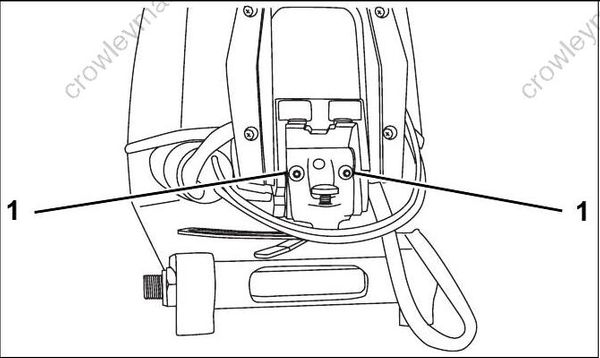
- Tiller handle fittings
Swivel Bracket and Trailering Bracket
Lubricate the swivel bracket with Triple-Guard grease.
Apply grease until the grease begins to flow from the upper or lower swivel bracket areas.
Coat the pivot points of the trailering bracket with Triple-Guard grease.
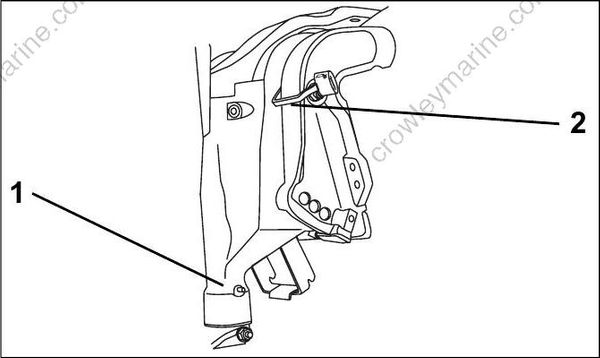
- Grease fitting
- Tilt support
Tilt Tube
Lubricate the tilt tube grease fittings with Triple-Guard grease.
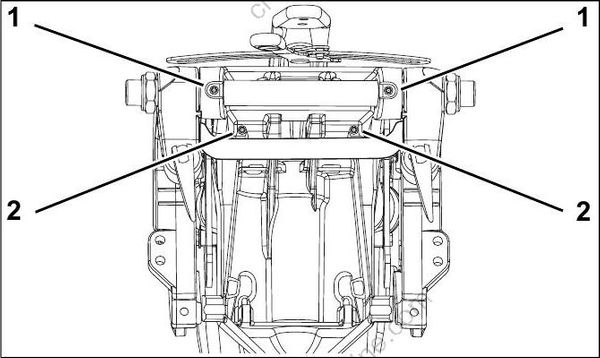
- Tilt tube fittings
- Swivel bracket fittings
Throttle and Shift Linkage
Disconnect the battery cables at the battery.
Remove clips and washers from throttle and shift lever pins. Carefully, remove casing guides from pins.
DO NOT disturb cable trunnion adjustments.
Shift remote control into FULL THROTTLE/REVERSE position to fully extend the plastic casing guides.
Apply Triple-Guard grease to:
- Cable attachment pins of both the throttle and shift levers
- Inner casings of both the throttle and shift cables.
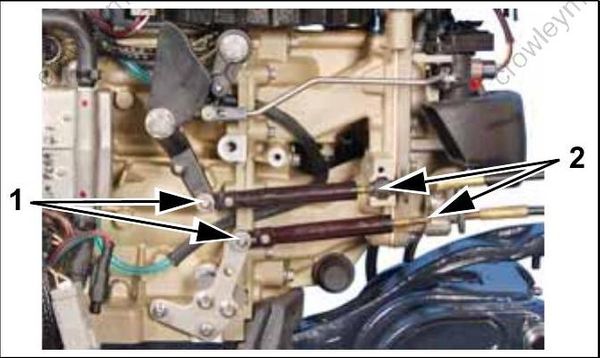
- Attachment pins, throttle and shift cables
- Brass inner casings, throttle and shift cables
Shift the remote control to the NEUTRAL/IDLE position.
Install control cables.
Check proper throttle and shift function.
Propeller Shaft
Debris from the water can become lodged around propeller shaft. Frequent inspection can minimize potential gearcase damage.
When servicing the propeller, always shift the outboard to NEUTRAL, turn the key switch OFF, and disconnect the battery cables at the battery.
Remove propeller. Refer to Propeller Hardware Installation on p. 56.
Inspect bushing and blade surfaces. Replace damaged or worn propellers.
Clean propeller shaft. Inspect propeller shaft seals. Replace damaged or worn seals.
Apply Triple-Guard grease to entire length of propeller shaft prior to installing propeller.
Reinstall propeller hardware and propeller
Gearcase Lubricant
Draining
Gearcase lubricant may be under pressure and/or hot. If plug is removed from a recently operated outboard, take precautions to avoid injury.
Always check the fill level of the gearcase lubricant at the upper plug before removing the lower, drain/fill plug. A tie strap can be used to check lubricant level.
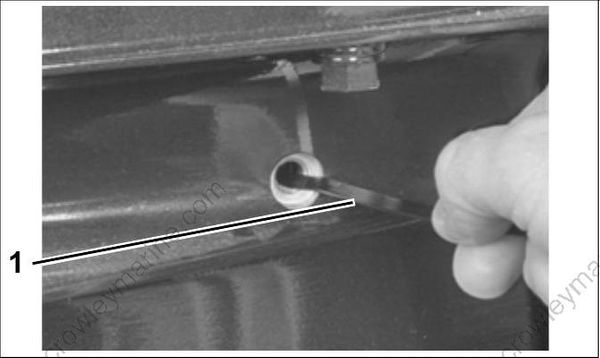
- Tie strap
Remove the lubricant level plug, then the lubricant drain/fill plug, and drain the lube from the gearcase into a container.
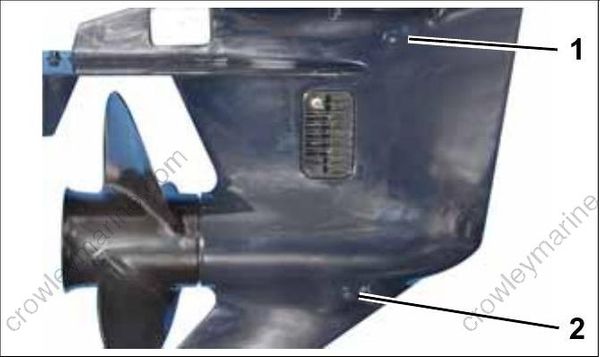
- Lubricant level plug
- Lubricant drain/fill plug
Inspection
Inspect the lube and the magnets on the plugs for metal chips. The presence of metal fuzz can indicate normal wear of the gears, bearings, or shafts within the gearcase. Metal chips can indicate extensive internal damage.
Inspect the lubricant for water contamination. Water can make the lubricant milky in appearance. However, normal aeration can also cause the same appearance.
To check for water contamination, put lubricant into a glass container. Allow the oil to settle for a minimum of one hour to determine if there is an abnormal amount of water in the oil. Some gear case lubricants are designed to mix with a small amount of water from normal water vapor condensation within the gearcase.
Refer to GEARCASE LEAK TEST on p. 271.
Overheated lubricant will have a black color and burned odor.
Internal gearcase inspection is recommended when lubricant is contaminated or shows signs of failure.
Filling
Refer to the INSPECTION AND MAINTENANCE SCHEDULE on p. 60 for service frequency and recommended lubricants.
Secure the gearcase in a vertical position.
Remove the lubricant level plug and the lubricant drain/fill plug.
Slowly fill the gearcase with gearcase lube through the drain/fill hole until it appears at the oil level hole. Filling the gearcase too quickly can cause air pockets and the gearcase may not fill completely. Clean plug seal area and install the lubricant level plug and new seal, then the lubricant drain/fill plug and new seal. Tighten them to a torque of 60 to 84 in. lbs. (7 to 9.5 N-m).
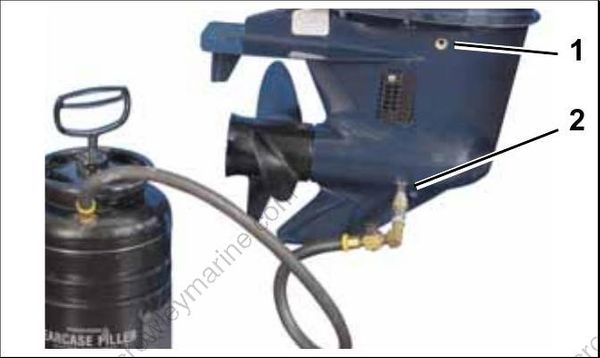
- Lubricant level plug
- Lubricant drain/fill plug
The recommended gear lubricants are formulated for marine applications. Do not use automotive gear lubricants, engine oils, or any other oil or grease.
Trim and Tilt
Check reservoir fluid level at least every three years or 300 operating hours.
- System capacity is approximately 15.2 fl. oz. (450 ml).
- Tilt the outboard and engage the tilt support.
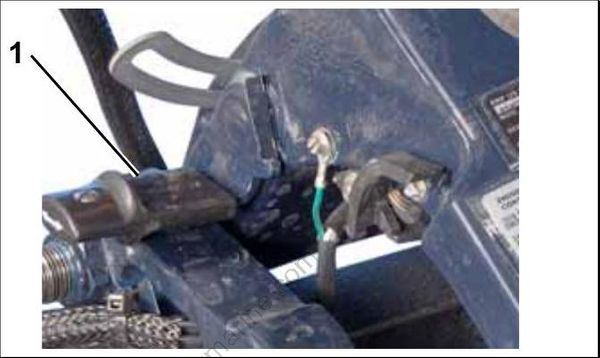
- Tilt support bracket
- Remove the fill plug.
- Single Ram System – Add Evinrude/Johnson Biodegradable TNT Fluid, as needed, to bring level to the bottom of the fill plug threads.
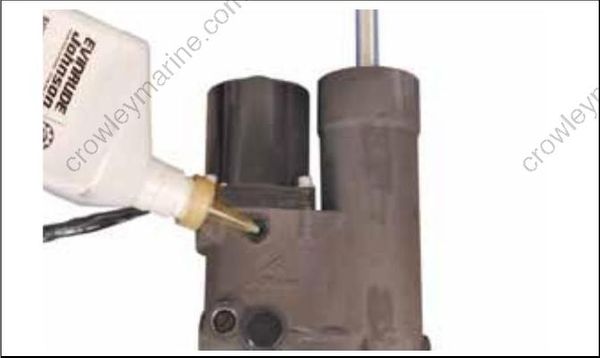
- Install the fill plug and tighten to a torque of 45 to 55 in. lbs. (5 to 6 N-m).
- Disengage tilt support.
- Cycle the unit at least five complete cycles to purge all air from the system. When cycling the unit, hold the trim switch ON an additional 5 to 10 seconds after the unit reaches the end of its travel before activating the switch in the opposite direction.
Correct fluid level must be maintained to ensure operation of the impact protection built into the unit.
BATTERY AND BATTERY CONNECTIONS
Check battery connections frequently. Periodically remove battery to clean and service connections.
Battery electrolyte is acidic—handle with care. If electrolyte contacts any part of the body, immediately flush with water and seek medical attention.
- Confirm that battery meets the minimum engine requirements.
- Connections must be clean and tight.
- Observe all wiring connections prior to disassembly.
Disconnect battery negative (–) cable first and the battery positive (+) cable last.
Clean all terminals, battery posts, and connectors with a solution of baking soda and water. Use a wire brush or battery terminal tool to remove corrosion buildup. Rinse and clean all surfaces.
Reinstall battery and tighten all connections securely. Refer to Battery Installation on p. 25.
DO NOT secure battery cables with wing nuts.
Coat all connections with Triple-Guard grease and insulate to prevent shorts or spark arcing.
Keep battery connections clean, tight, and insulated to prevent their shorting or arcing and causing an explosion. If the battery mounting system does not cover the connections, install covers.
