

Water Intake Screens
Install water intake screens. Tighten screws to a torque of 60 to 84 in. lbs. (7 to 9.5 N·m).
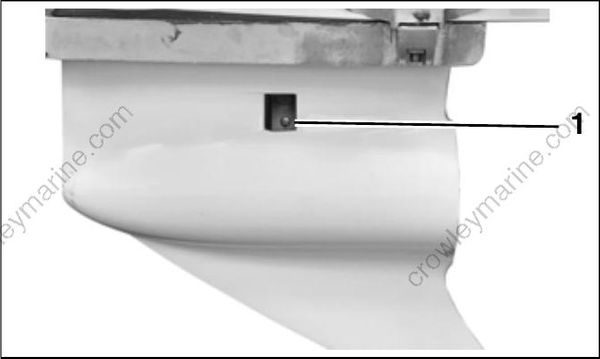
- Water intake screen
Shift Housing, Gear, and Propeller Shaft Installation
Push shifter detent into farthest downward position. Tip the rear of the gearcase slightly downward to assist in the installation of the shaft assembly.
Be sure the thrust bearing and the thrust washer are in the proper position. Insert the shaft assembly fully into the gearcase while aligning shift housing pin with hole in forward end of gearcase housing.
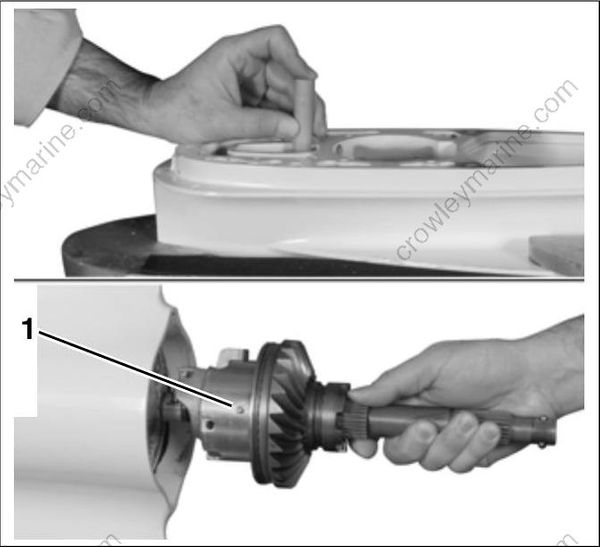
- Pin
Shift Rod Cover
Pinion Gear and Driveshaft Installation
Propeller Shaft Bearing Housing and Gear Installation – “M2” Type
IMPORTANT: The propeller shaft bearing housing on “M2” type gearcases is PRESSED into the gearcase housing.
Lightly apply Triple Guard Grease to new bearing housing O-rings. Install O-rings in grooves in the housing. Grease the machined side surfaces of bearing housing.
Place bearing housing in gearcase.
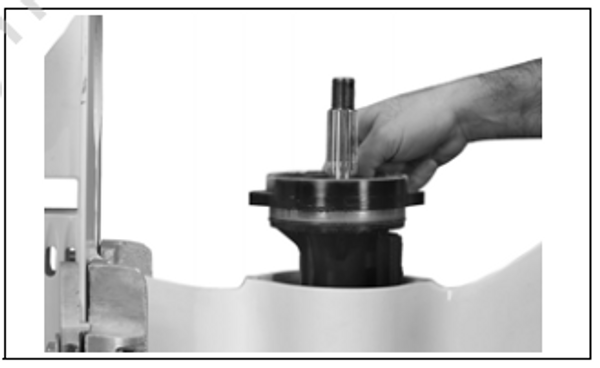
Align retaining holes in bearing housing with screw holes in gearcase. Thread Alignment Pins, P/N 354140, into gearcase.
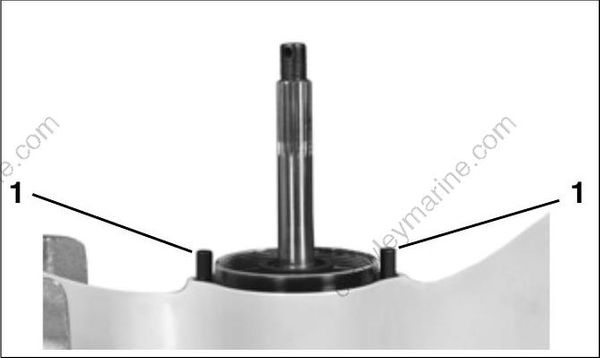
- Alignment pins
IMPORTANT: Pinion, clutch dog and forward gears must align properly for bearing housing to seat properly.
Use Installer Handle, P/N 345822, Propeller Shaft Bearing Housing Installer, P/N 354057, Gearcase Fixture, P/N 354059 and an appropriate floor press (10 ton or greater) to install housing into gearcase. Align and level gearcase assembly in fixture as shown. Secure fixture to floor press.
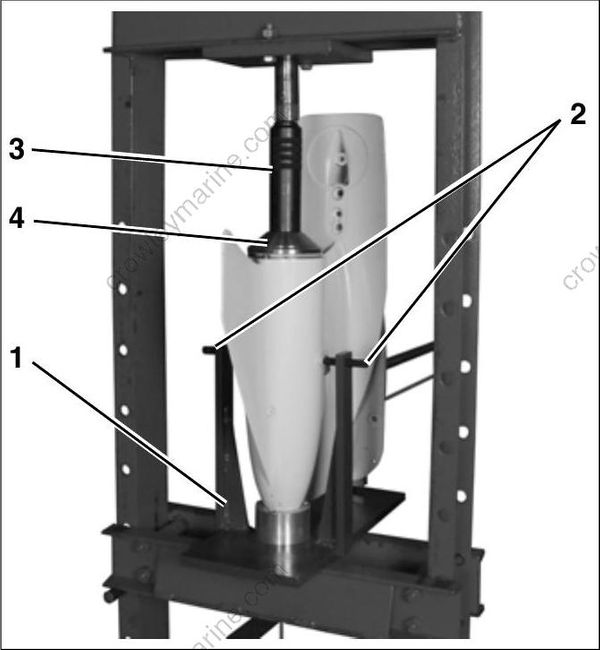
- Gearcase fixture, P/N 354059
- Vertical alignment screws
- Handle P/N 345822
- M2 Adapter P/N 353057
Housing must be completely seated in gearcase to install retainer screws. Bearing housing is approximately level with gearcase.
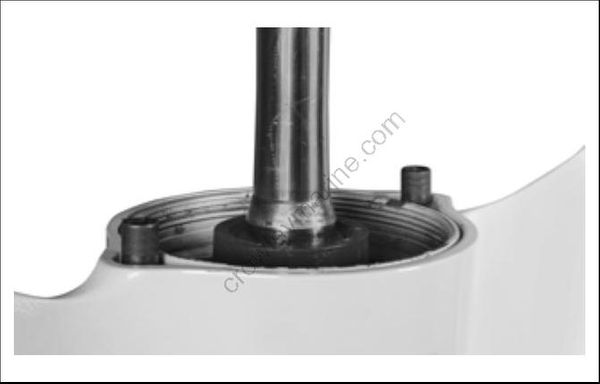
Apply Ultra Lock to threads and install two retaining screws. Tighten screws to a torque of 18 to 20 ft. lbs. (24 to 27 N·m).
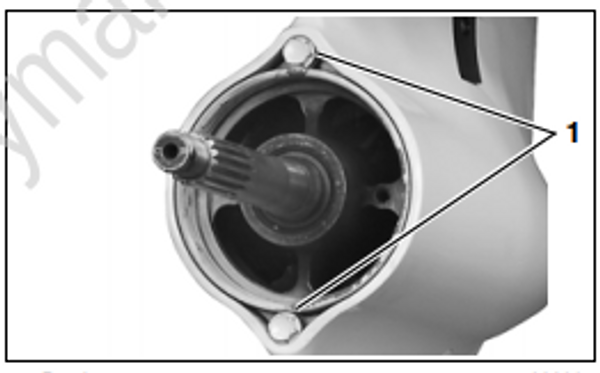
- Retainer screws
Final Assembly and Adjustment
To complete gearcase assembly, refer to:
- GEARCASE LEAK TEST on p. 286
- WATER PUMP SERVICE on p. 290
- SHIFT ROD ADJUSTMENT on p. 294
- GEARCASE REMOVAL AND INSTALLATION on p. 287
- Gearcase Lubricant on p. 79
- Propeller Hardware Installation on p. 67
- Trim Tab Adjustment on p. 70
During break-in period of a reassembled gearcase, change the gearcase lubricant between 10 to 20 hours of operation.
