

Installing the outboard motor
Proper mounting of the outboard motor provides better performance, maximum reliability, and the highest customer satisfaction. This chapter contains the specifications necessary to mount the outboard motor, and may vary slightly depending on the applications. When mounting the outboard motor, make sure that there is sufficient clearance for the outboard motor to fully tilt up, and to fully move to port and starboard. See “External dimensions” (3-5).
- Place the outboard motor on the vertical centerline of the boat transom.
TIP:
Make sure that distance “a” is equal to distance “b”, and distance “c” is equal to distance “d”.
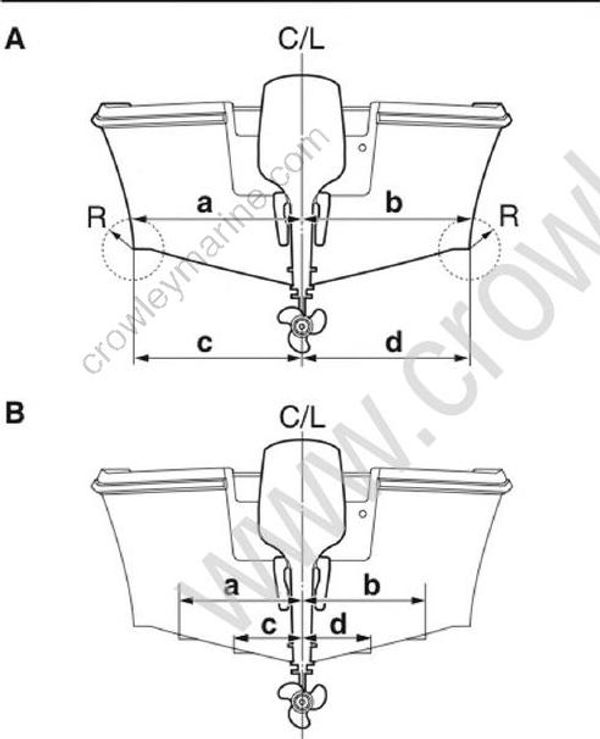
A. Hull without strakes
B. Hull with strakes
C/L: Centerline of the transom
R: Radius
- Adjust the position of the outboard motor so that the height of the anti-cavitation plate “1” is equal to or slightly above the bottom of the boat transom.
TIP:
This mounting height information is for reference only. It is impossible to provide complete instructions for every possible boat and outboard motor combination.
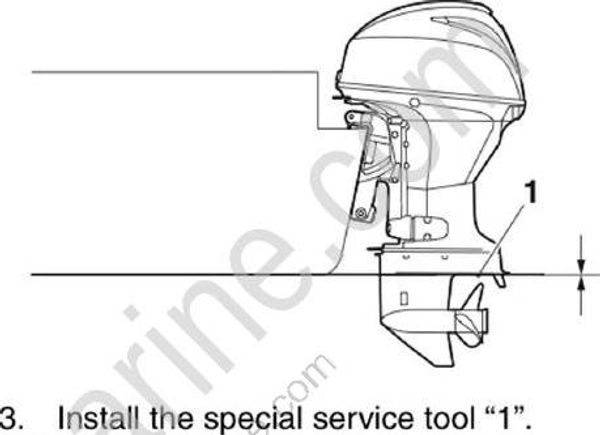
Install the special service tool "1".
Adjust the height of the scale “2” to the transom height (H), and place it on the special service tool “1”. Secure the special service tool “1” to the boat transom using screws or vises.
TIP:
For the transom height (H), see “External dimensions” (3-5).
- When the outboard motor mounting position has been determined, mark the best suited 4 symmetrical mounting holes on the boat transom “3”. Drill the mounting holes perpendicular to the surface of the boat transom using a 13.0 mm (0.5 in) “a” drill bit. 3-9
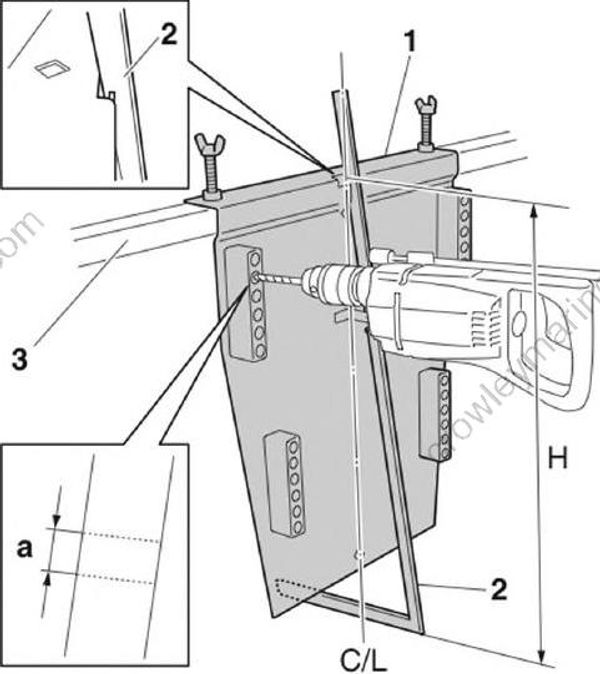
C/L: Centerline of the transom
Drilling plate “1”: YB-34465-A
- Apply sealant to the mounting holes, and then secure the outboard motor using the included mounting bolts “1”, small washers “2”, large washers “3”, and nuts “4”.
NOTICE
Make sure that there is no clearance between the surfaces of the boat transom and the clamp brackets. Otherwise, the clamp brackets or boat transom may be damaged.
TIP:
The second hole from the top of each clamp bracket is recommended for the upper mounting bolt.
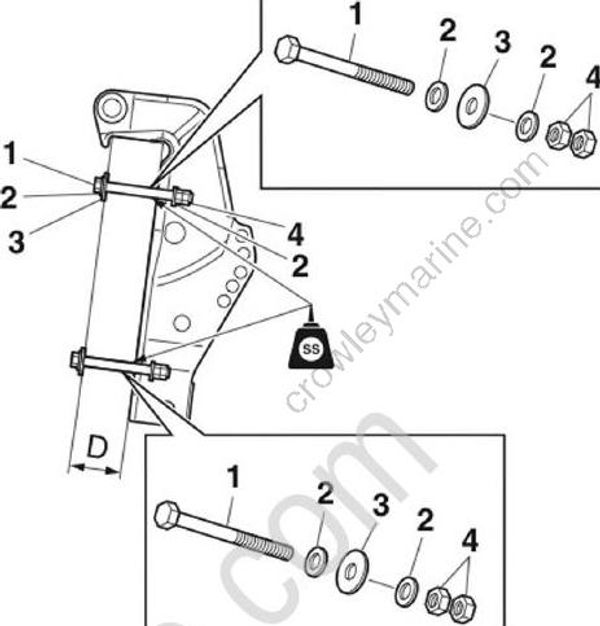
| Boat transom thickness (D) |
Mounting bolt |
|---|---|
| 65-75 mm (2.56-2.95 in) |
M12 x 105 mm (4.13 in) |
- Tighten the nuts firmly.
NOTICE:
Make sure that the clamp brackets do not bite into the boat transom.
- Tighten the locknuts firmly.
Outboard motor mounting height
Outboard motor mounting height
If the water line is too close to the power head, poor engine performance could result, and water could enter the cylinders and damage the engine.
When mounting a 4-stroke outboard motor to a boat, make sure that the mounting height between the water surface and the clamp bracket seating point is not less than the specified minimum mounting height “a”. Measure the mounting height when the boat is moored and carrying the maximum load.
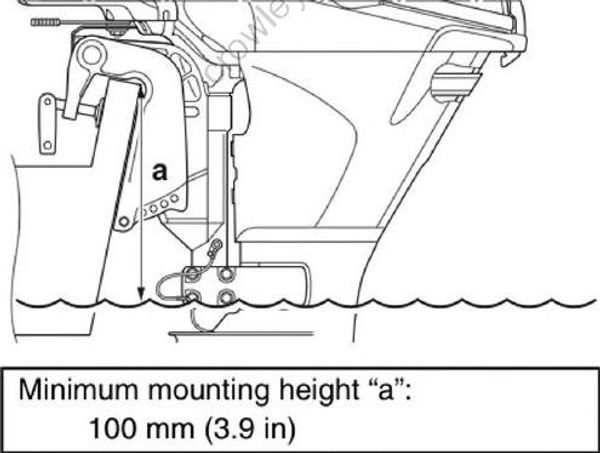
Minimum mounting height "a": 100 mm (3.9 in)
Rigging grommet mounting
Rigging grommet description
Pass all the control components through the proper holes in the rigging grommet.

1. Gauge harness
2. Trolling switch harness
3. Main wire harness
4. Speedometer hose
5. Battery cable
6. Command Link Multifunction Gauge harness
Installing the battery cable
- Route the battery cable “1” through the bottom cowling.
TIP:
Route the battery cable “1” to the outside of all wire harnesses.
The positive battery cable is marked with red tape.

Connect the negative battery cable “a”, and then install its cover “1”.
Fasten all wire harnesses to the negative battery cable “a” using the plastic tie “2”.
TIP:
Bind the wire harnesses so that they do not interfere with the oil filter.
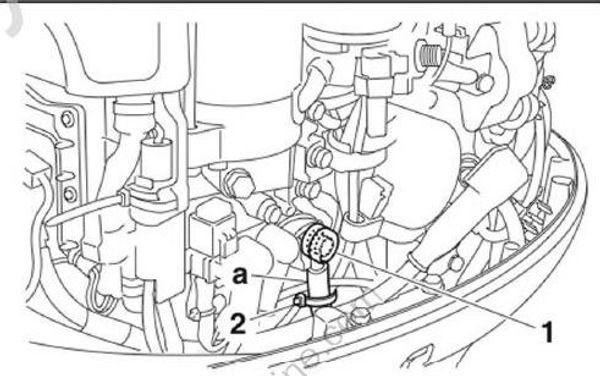
Connect the positive battery cable “a” and install the washer “1”, and then tighten the positive battery cable nut “2” to the specified torque.
Install the rubber cap “b”.
