

EXPLODED DIAGRAM
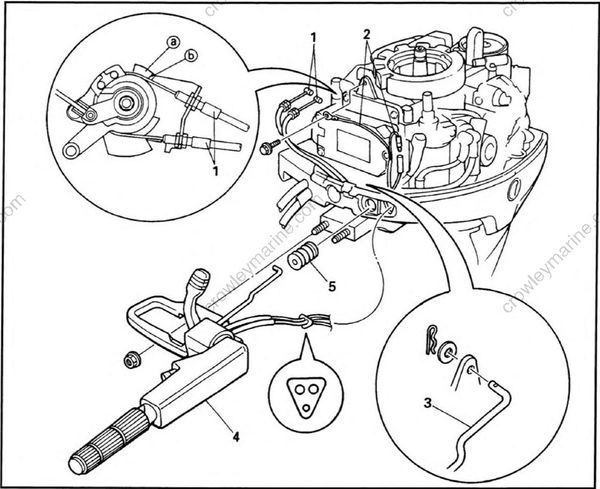
REMOVAL AND INSTALLATION CHART
| Step | Procedure/Part name | Q'ty | Service points |
|---|---|---|---|
| STEERING HANDLE REMOVAL | Follow the left "Step" for removal. | ||
| Flywheel magneto cover | |||
| 1 | Throttle cable | 2 | NOTE: When adjusting the throttle cables, make sure that the throttle control cam stopper (a) touches the bracket stopper (b) (throttle fully-opened) and then tighten the lock-nuts. |
| 2 | Engine stop switch lead | 2 | |
| 3 | Shift link rod | 1 | |
| 4 | Steering handle assy. | 1 | |
| 5 | Grommet | 1 | |
| Reverse the removal steps for installation. |
EXPLODED DIAGRAM
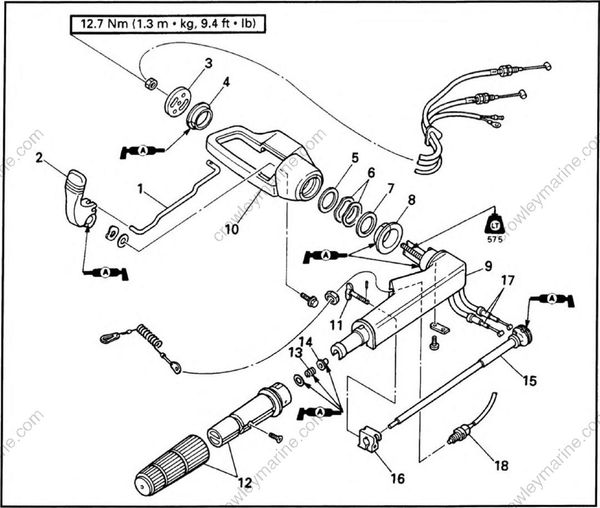
REMOVAL AND INSTALLATION CHART
| Step | Procedure/Part name | Q'ty | Service points |
|---|---|---|---|
| STEERING HANDLE DISASSEMBLY | Follow the left "Step" for removal. | ||
| 1 | Shift link rod | 1 | |
| 2 | Shift lever | 1 | |
| 3 | Plate | 1 | |
| 4 | Bushing | 1 | |
| 5 | Plastic washer | 1 | |
| 6 | Wave washer | 2 | |
| 7 | Metal washer | 1 |
EXPLODED DIAGRAM
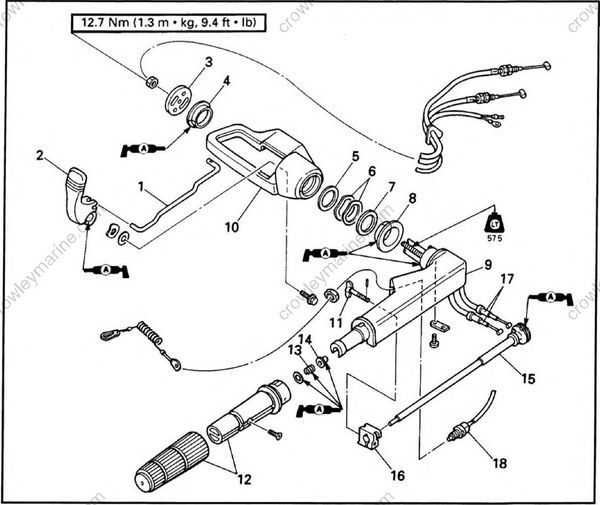
| Step | Procedure/Part name | Q'ty | Service points |
|---|---|---|---|
| 8 | Bushing | 1 | |
| 9 | Tiller handle bracket | 1 | |
| 10 | Steering bracket | 1 | |
| 11 | Friction piece | 1 | |
| 12 | Steering grip | 1 | |
| 13 | Spring | 1 | |
| 14 | Bushing | 1 | |
| 15 | Throttle shaft | 1 | |
| 16 | Friction piece | 1 | |
| 17 | Throttle cable | 2 | |
| 18 | Engine stop switch | 1 | |
| Reverse the disassembly steps for installation. |
